6.
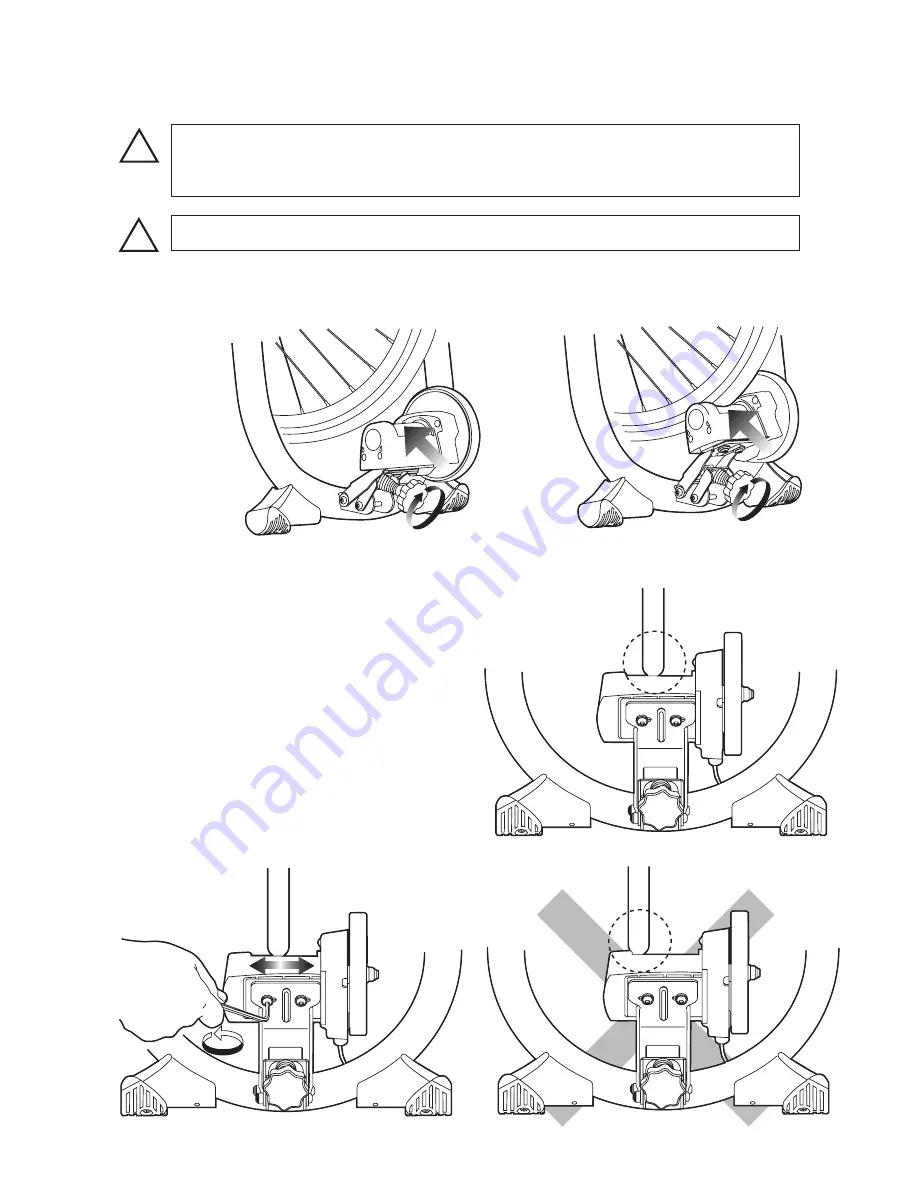
The rear tire should sit in the almost center part of
the Drive Roller without touching any other parts.
(see Fig. L)
If the tire has touched the plastic parts (Fig. M)
due to some reasons like the rear wheel is not
trued correctly or you have installed a too fat tire,
you must adjust the Mag unit position.
There are two sets of installation thread holes
on the bracket. Choose either one for better
positioning.
Also, you can micro-adjust the position. To do so,
loosen the backside screws with M4 hex wrench,
adjust the roller position side to side, then tighten
the screws again tightly. (see Fig. M)
5.
Contact the Drive Roller to the rear tire by turning the Roller Pressure Adjust Knob clockwise.
(see Fig. J)
The best position is that the roller compresses the tire in the depth of 3 – 4 mm. (see Fig. K)
- 6 -
(Fig. L)
(Fig. N)
(Fig. M)
(Fig. J)
(Fig. K)
Please note too much and too less roller pressure will bring premature tire wear.
Keep correct roller pressure and maintain the air pressure 10% higher than your
usual level before using LR240.
!
If it's hard to tighten the knob bolt, lift up the Mag unit by hand then tighten the knob.
TIPS
Do nut apply brake while riding on LR240 to avoid unnecessary tire wear out.
!


