background image

(ver.1.10 2018/4)

Warranty Period : 1 year

Minoura offers 1-year limited 

warranty to this product

from the date of your purchase.

Any natural wear and the 

problems caused by

misuse


or unapproved 

modification will not be

covered by this program.

For more details, read the enclosed 

Minoura Limited Warranty Policy 

card in the kit.

Also please regularly check our 

Minoura web site for the

latest information.

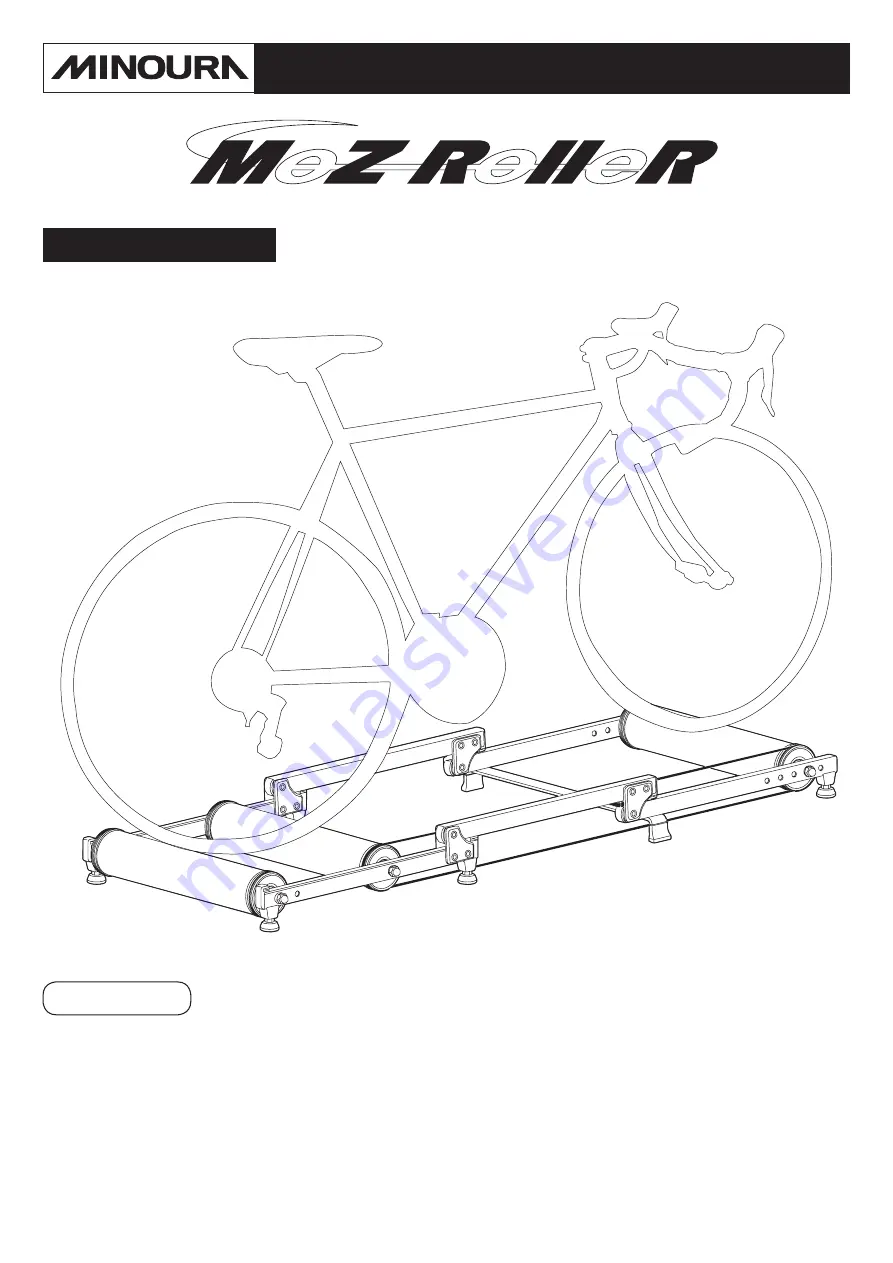
indoor bike trainer 

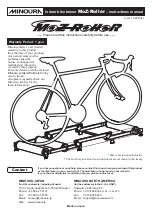
MoZ-Roller


– instructions manual

––– Please read this instructions carefully before use –––

* Bike is not included in this kit.

* The Foot Step and Front Guard (included) are not shown in this image.

Contact

If you have questions or need help, please contact the shop where you purchased this product 
or the distributor in your country first. The distributor can be found on our web site.
If your shop or distributor is unable to help you, please contact us at:

MINOURA 

JAPAN 

   MINOURA 

NORTH 

AMERICA

(for ALL customers, including Canada)   

(for the customers in the U.S.A. ONLY)

1197-1 Godo, Anpachi, Gifu 503-2305 Japan 

Hayward, California, USA

Phone: 

+81-584-27-3131   Phone: 


1-510-538-8599

  (9:00 – 17:00 PST)

Fax: +81-584-27-7505 


Fax: 1-510-538-5899

Email: minoura@minoura.jp   


Email: support@minourausa.com

Web: www.minoura.jp

Made in Japan

Summary of Contents for moz-roller

Page 1: ...is not included in this kit The Foot Step and Front Guard included are not shown in this image Contact If you have questions or need help please contact the shop where you purchased this product or t...

Page 2: ...ers While supporting yourself find the best place to put your foot down when needed If you have cleats on your shoes be extra careful not to slip on the frame or the floor An optional foot step is ava...

Page 3: ...ed rubber sheet on top of the Mid Frame on the side you usually place your leg to support yourself When using the optional Foot Step at all times you should put it on opposite side About The Hole for...

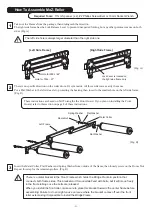
Page 4: ...possible to install the Bridge Frame How To Assemble MoZ Roller Take out the Frames from the package then distinguish the direction The right side frame has the Lock Release Lever to prevent unexpecte...

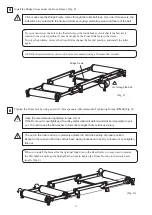
Page 5: ...al Collar must be inserted from the larger left side Flat Washer Metal Collar Flat Washer Dome Nut Left Frame Spring Washer If you will install the optional Mag Unit to increase the resistance power p...

Page 6: ...using a pair of 17mm spanners Recommended Tightening Torque 8 N m Fig G 6 When you install the bracket for the optional Mag unit on the Rear Roller you may need to remove the Flat Washer and keep the...

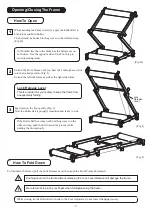
Page 7: ...has the belt groove on both sides Use the opposite side of the Foot Step to avoid jamming issues 2 Extend the Front Frame until you hear the Locking Lever click into the locked position Fig I Extend t...

Page 8: ...Rear Frame to move the bike itself 20mm a half pitch of the holes forward At this moment you can use the 1 000mm position as 980mm size This number corresponds to the wheelbase when the Rear Roller i...

Page 9: ...ody again Put the Lock Nut through the Adjuster and screw into the Long Nut 4 Set the Adjuster length to 110mm from the groove bottom to the adjuster top Tighten the Lock Nut toward the Long Nut with...

Page 10: ...not work on other Minoura rollers Install the Mount Bracket to the Rear Roller Either side is OK Hook the V belt to both roller drum and the pulley Push down to lock If the belt tension is too loose...

Reviews: