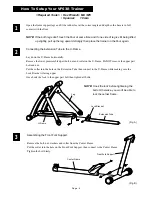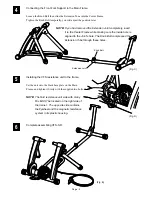
Open both couplings by turning the left side knob (Fig.F) and the right
side hub handle (Fig. G) anti-clockwise.
Do NOT overloosen the couplings, otherwise the knob or hub handle may
become unthreaded inside the frame.
NOTE:
We suggest you do not need to move the left side coupling
away so much. It should be fine to move by the center of its
length (Fig. H), but it needs to be adjusted depends on the
hub width.
1
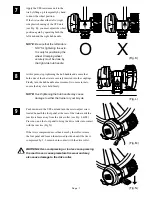
Insert the left side of the skewer (quick lever side) into the left side
coupling, and adjust the rotation of the coupling so the skewer lever
sits securely in the large cut-out (Fig. I).
This will prevent damage to the skewer during use.
4
(Fig. F)
(Fig. G)
(Fig. H)
(Fig. I)
How To Install Your Bike On Trainer
2
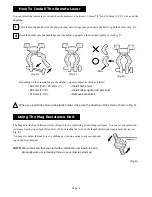
Hold the bike firmly by hand and turn the right side hub handle clockwise until the coupling come into
contact with the right side skewer nut.
3
Remove the front wheel and insert the fork end to the fork clamping quick release skewer, then grab the
fork end temporally.
NOTE:
You will adjust the wheel base later, so you don't need to fix the foek end firmly in this
step.
5
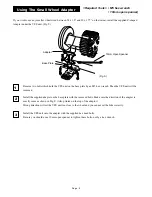
Loosen the Knob Bolt on the Center Frame for adjusting the wheel base until the horizontal
bar of the Front Fork Support touches the Center Frame (see Fig. J), then tighten the Knob
Bolt firmly.
NOTE:
Not touching the Front Fork Support and the Center Frame will disturb the
stability while using. Make sure they are touching each other before ride.
(Fig. J)
6
Tighten the quick release skewer on the Front Fork Support.
Page : 6

