background image

2

ASSEMBLY INSTRUCTIONS

YOUR SAFETY IS OUR CONCERN. READ ALL SAFETY RULES AND OPERATING INSTRUCTIONS BEFORE
ATTEMPTING TO OPERATE THIS EQUIPMENT. FAILURE TO FOLLOW SAFETY RULES AND OPERATING
INSTRUCTIONS MAY RESULT IN SERIOUS INJURY.

The unit covered by this owner’s guide is shipped complete in one carton and will take a minimum amount of time and
effort to assemble. Follow all assembly instructions carefully. Whenever the terms left hand, right hand, or L.H., R.H.
are used, it should be understood to mean from a position behind the unit in the direction of forward travel. All hardware
is on the unit in its proper location. If something is missing, notify the dealer/distributor where unit was purchased. If
unable to obtain parts locally, contact the Parker Sweeper Company.

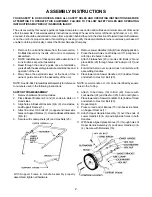
With Support Frame & Handle Assembly properly
assembled, tighten all hardware.

1. Remove the unit and hardware from the main carton.

Do 

Not

 discard any inserts until unit is completely

assembled.

2. NOTE: Identification of these parts will be determined

in instructions at point of assembly.

3. Read through the owner’s guide once to familiarize

yourself with the assembly procedure, maintenance and
operation of the unit.

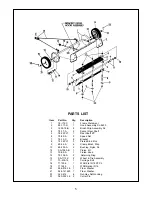
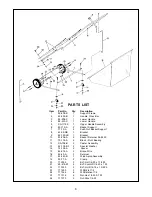
4. Many times the exploded views at the back of this

owner’s guide can aid in the assembly of the unit.

NOTE: See AF-844 Frame & Basket Assembly for reference
to numbers used in the following instructions.

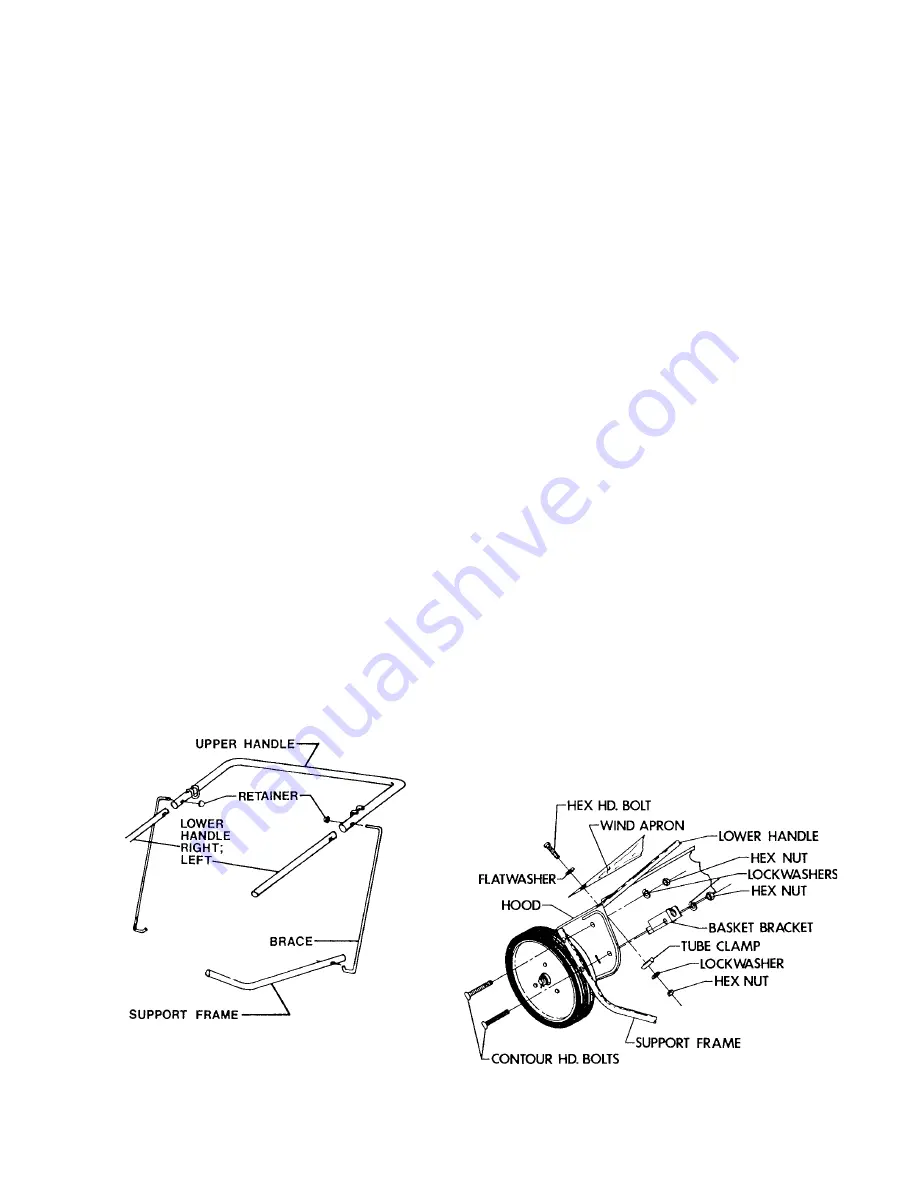
SUPPORT FRAME ASSEMBLY

1. Remove hardware from Hood sides.
2. Place Basket Brackets (8) and (9) ends into slots on

Hood sides.

3. Align holes in Basket Brackets (8) & (9), Hood sides,

and Support Frames (1).

4. Attach Contour Hd. bolts (21) to upper and lower side

holes on Support Frames (1), Hood and Basket Brackets
(8) & (9).

5. Secure with Lockwashers (24) and Hex Nuts (25).

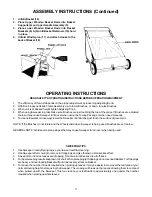
1. Remove Lower Handles (3) & (4) from shipping position.
2. Place the lower holes on Wind Apron (17) in alignment

with top side holes in Hood.

3. Attach Flatwashers (23) onto Hex Hd. Bolts (20) and

place Bolts (20) through holes in Wind Apron (17) and
Hood.

4. Fold Wind Apron over so item does not interfere with

assembling Handles.

5. Place lower end of Lower Handle L.H. (3) inside of Hood

and attach to Hex Hd. Bolt (20).

NOTE: Lower Handle L.H. (3) can be identified by square
holes in the Tubing.

6. Attach Tube Clamp (19) to Bolt (20). Secure with

Lockwasher (24) and Hex Nut (25), but do not tighten.

7. Place lower end of Lower Handle R.H. (4) inside of Hood

and attach to Hex Hd. Bolt (20).

8. Repeat step 6.
9. Place curved end of Braces (15) into back side holes

on Support Frames (1).

10. Attach Upper Handle Assembly (5) over the ends of

Lower Handles (3) & (4) and align side holes in both
Handles.

11. With holes aligned place braces (15 ) through holes of

Upper Handle Assembly (5) and Lower Handles (3) &
(4). Secure with Retainers (16).

Summary of Contents for Parker Sweep-A-Lawn SL8430

Page 1: ...Sweep A Lawn Model SL8430 Revised 2 95 OPERATION SERVICE PARTS CARE ...

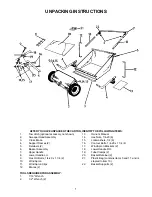
Page 2: ...s stapled to item 13 22 Basket Supports 2 1 Tow Hitch optional accessory not shown 2 Sweeper HeadAssembly 3 Cross Brace 4 Support Frames 2 5 Retainers 2 6 Basket Assembly 7 Upper Handle 8 Lower Handle L H 9 Hex Hd Bolts 1 4 20 x 1 1 4 2 10 WindApron 11 Wind Apron Clips 12 Braces 2 TOOLS REQUIRED FORASSEMBLY 1 7 16 Wrench 2 1 2 Wrench 2 UNPACKING INSTRUCTIONS AFTER YOU HAVE UNPACKED THE CARTON IDEN...

Page 3: ...s guide can aid in the assembly of the unit NOTE SeeAF 844 Frame BasketAssembly for reference to numbers used in the following instructions SUPPORT FRAMEASSEMBLY 1 Remove hardware from Hood sides 2 Place Basket Brackets 8 and 9 ends into slots on Hood sides 3 Align holes in Basket Brackets 8 9 Hood sides and Support Frames 1 4 Attach Contour Hd bolts 21 to upper and lower side holesonSupportFrames...

Page 4: ...ways lower the Sweeper until Brushes just touch the surface of pavement NOTE If the Brushes do not rotate and the Wheels slide when Sweeper is being used Brushes are set too low GENERAL NOTE Avoid severe steep slopes that may cause Sweeper to turn over when being used 1 Use Sweeper in early Spring to give your lawn a healthful cleaning 2 Use Sweeper after mowing to remove turf clippings and give t...

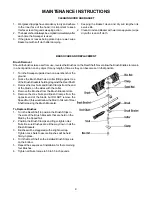
Page 5: ... or the ground 2 Notice the Brush Stud has a collar fitting against one of the Brush Brackets holding it against the Reel Shaft 3 Remove the Hex Nuts and Brush Clamps from the end of the Studs on the sides with the collar 4 Remove the Brushes from the Brush Bracket slots 5 Remove the Hex Nuts and Brush Clamps from the opposite end of the Studs but DO NOT remove the Speed Nut this would allow the S...

Page 6: ...13 C 6 Bracket 8 74 16PLT 3 Plated Stud Zinc 9 69 04 A 6 Clamp Brush Strip 10 69 233 A 2 Bushing Nylon SL 12 SA 1580 B 1 Pinion Kit 13 79 94 A 1 Fluted Knob 14 79 104 A 2 Retaining Ring 15 SA 1112 C 2 Wheel Tire Assembly 17 70 516 16 1 Carriage Bolt 18 711506 1 WSR Flat 5 16 ST PL 19 711545 1 WSR Helical 5 16 20 946 816 16 1 Fiber Washer 21 946 121620 1 Fiber Washer 22 362 416 6 Nut Hex Self Locki...

Page 7: ...racket 10 83 206 A 2 Basket Retainer SL 8430 11 79 174 A 2 Block Pivot Bearing 12 SA 706 B 2 Caster Assembly 13 82 138 B 1 2 Special Washer 14 74 126 A 2 Spacer 15 82 214 A 2 Brace Wire 16 59 45 A 2 Retainer 17 82 240 B 1 Wind Apron Assembly 19 59 77 A 2 Clamp 20 713005 2 BLT HH 1 4 20 x 1 1 2 5 21 69 416 20 4 BLT Cont HD 1 4 20 x 1 25 22 713030 2 BLT HH 5 16 18 x 1 3 4 5 23 711505 2 WSR Flat 1 4 ...

Page 8: ...ms become the sole property of Parker Sweeper Company or its original manufacturer whichever the case may be Parker Sweeper Company disclaims any implied warranty including the warranty of merchantability and the warranty of fitness for a particular purpose Parker Sweeper Company assumes no responsibility for any special incidental or consequential damages This limited warranty is applicable only ...

Reviews: