background image

Mio VELO User Guide

04

Wearing Your Mio VELO

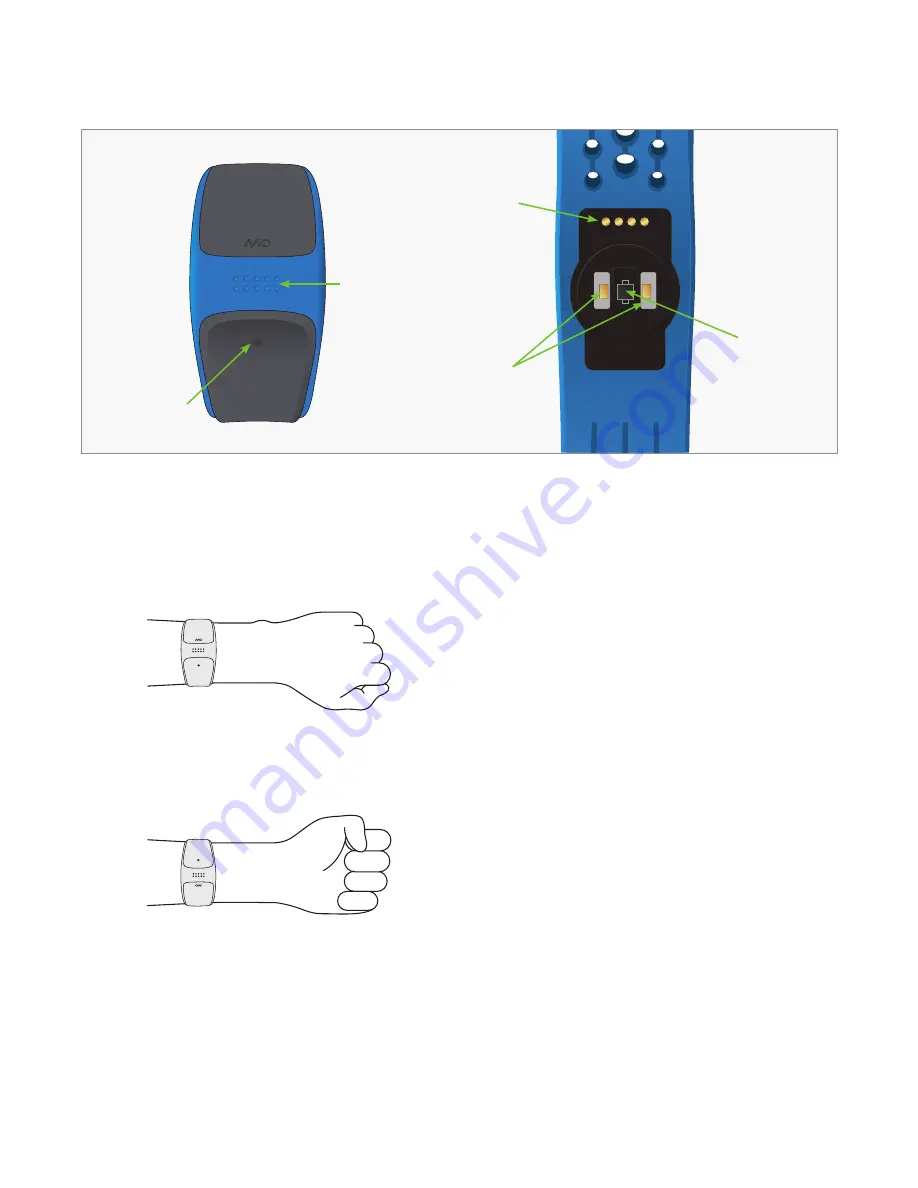
To accurately monitor your heart rate:

1.  Fasten Mio VELO snugly on your lower forearm, about 1–3 inches (3–8cm) above your 

wrist bone. The optical sensor on the back should make good contact with your skin.

2.  If you have a smaller wrist, wear Mio VELO higher on your forearm.
3.  For cyclists or users with concave wrists, wear the Mio VELO higher and on the 

underside of your forearm, since bending of the wrist may affect the heart rate 

reading. 

4.  If you are using Mio VELO with an ANT + sport device, wear both devices on the same 

arm for a better ANT+ connection.

Important:

 For optimal heart rate accuracy, especially if you often have cold hands or poor 

circulation, we strongly recommend doing a warm up exercise for a few minutes before you 

begin to track your heart rate.

LED

Optical 

Sensor

Charging 

Pins

Sensor 

Lights

YOUR MIO VELO

Button

Summary of Contents for VELO

Page 1: ...COMPLETE USER GUIDE mioglobal com...

Page 2: ...Mio VELO 11 Mio VELO Specifications Warranty and Regulations 12 Warranty Service 13 Exclusions And Limitations Of Liability Disclaimers 14 Copyright and Trademarks 14 Regulations and Conformity HAVE...

Page 3: ...register your Mio VELO online at mioglobal com register to receive full warranty service GETTING STARTED What s Included 1 Mio VELO 2 USB Charger 3 Quick Start Guide 2 3 QUICK START GUIDE Set up your...

Page 4: ...with concave wrists wear the Mio VELO higher and on the underside of your forearm since bending of the wrist may affect the heart rate reading 4 If you are using Mio VELO with an ANT sport device wea...

Page 5: ...eart Rate Zones If no valid heart rate signal is found within the initial 2 minutes the LED will light up in red for 2 seconds then Mio VELO will automatically leave Heart Rate Mode and turn off Pleas...

Page 6: ...ne Alerts Training Zone Mode 5 Zone is the factory default on Mio VELO To switch to Zone Alert Mode 1 Zone or to customize the upper and lower boundaries of each HR zone please refer to Set Up Trainin...

Page 7: ...ress and hold the Button to turn on HR Mode 3 Turn on the Bluetooth function of your smartphone or tablet 4 Open the Mio GO app If you are opening the app for the first time you will be asked to set u...

Page 8: ...sensors and devices Position the receiving device as close to your Mio VELO as possible within 1 meter 3 feet Wear the receiving device on your arm in your front pocket or in front of you on a belt o...

Page 9: ...ur device will register the Mio VELO MAINTAINING YOUR MIO VELO CHARGING THE BATTERY Mio VELO contains a rechargeable lithium polymer battery Follow these instructions and guidelines to maintain the ba...

Page 10: ...32 F to 77 F Do not disassemble puncture or incinerate the Mio VELO strap or battery If the band casing breaks and the battery is exposed keep the battery away from children Contact your local recycl...

Page 11: ...omes irritated wear VELO on the other arm or discontinue wearing until the irritation clears Other Care Tips Do not attempt to disassemble or service your Mio VELO Protect your VELO from impact shocks...

Page 12: ...te of purchase and lasts for one year ending on the first anniversary of the date of purchase Your store dealer or its importer or distributor may have offered you a longer warranty period as part of...

Page 13: ...SHALL NOT BE LIABLE FOR SPECIAL INCIDENTAL PUNITIVE INDIRECT OR CONSEQUENTIAL DAMAGES INCLUDING BUT NOT LIMITED TO LOSS OF ANTICIPATED BENEFITS LOSS OF DATA LOSS OF USE COST OF CAPITAL COST OF ANY SU...

Page 14: ...trademarks owned by Bluetooth SIG Inc and any use of such marks by Physical Enterprises Inc or Mio is under license Other trademarks and trade names are those of their respective owners REGULATIONS A...

Reviews: