6
1245548-W2-A
INSTALLATION
x3
x3
6mm
x3
x3
A
FITTING INSTRUCTIONS
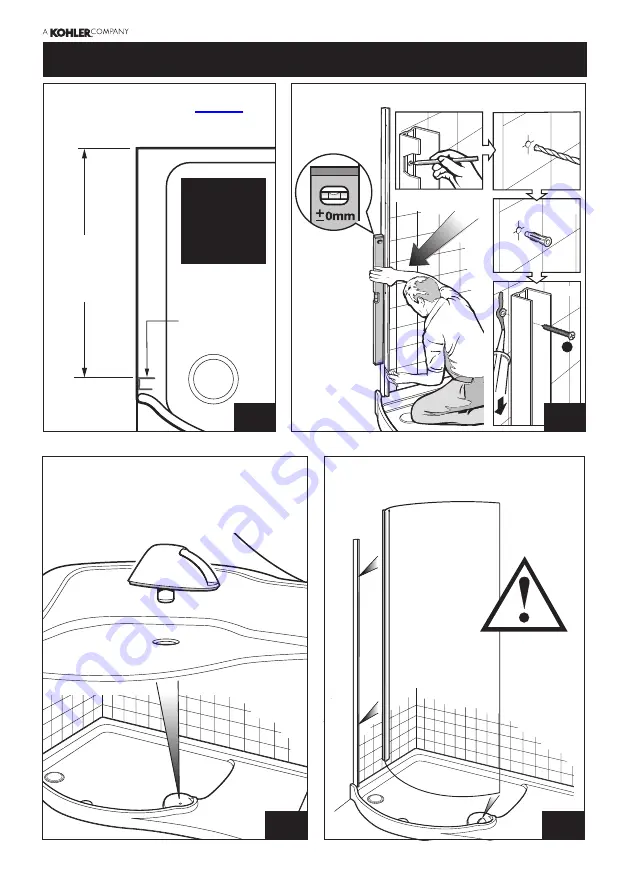
The tray should be fitted and the walls tiled
before installation of the enclosure.
Mark the position of the wall channel
from the wall tiles on the back wall.
STEP
1
STEP
2
STEP
4
STEP
3
Back edge
of wall
channel
Wall channel
MUST
be
vertical on
the front face.
Fit the curved panel wall channel to the wall.
Place the glass mounting block into the tray.
IMPORTANT
Do not remove the adhesive backing from the
underside of the mounting block at this stage.
Carefully lift the glass into place. The jamb fits
onto the wall channel and the bottom corner of the
glass fits into the mounting block (see Step 5).
NOTE:
LH VERSION
SHOWN.
RH FITTING
MIRRORS THE
INSTALLATION
SHOWN.
4
CFI270G
745mm (1400 tray)
640mm (1700 tray)
(adjust the dimension
if other than
10mm tile thickness)
Summary of Contents for Leap Walk In
Page 2: ...2 1245548 W2 A ...
Page 13: ...13 1245548 W2 A NOTES ...
Page 14: ...14 1245548 W2 A NOTES ...


