4
Operation
. You also need to install Symphonie-R-M or –R-C rear module for
complete installation.
1.
Remove the front panel door by pulling on the door handles and gently lowering
it.
2.
Select an empty compartment.
3.
Carefully place the FRS-111i between the module guides and slowly push the
module towards the rear of the frame until the module's edge connector is
secured to its rear module. A light pressure to mate the connectors may be
required. Pull lightly on the module verifying that it does not move.
4.
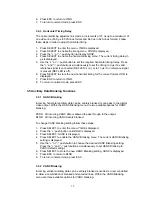
Replace the front panel door.
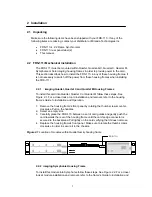
Figure 2.2
Location of modules within imaging Symphonie housing frame
2.2.3
imaging
Solo Housing Frame
To install this card into Solo follow these steps. For a closer look at card installation and
removal, refer to the housing frame's
Guide to Installation and Operation
.
1.
In order to remove the housing frame's front panel, gently pull on it.
2.
Carefully place the FRS-111i between the card guides and gently push the card
towards the rear of the housing frame until the card's edge connector is secured to
the backplane. Pull lightly on the card verifying that it does not move.
3.
Replace the housing frame's front panel.
2.3 Rear Panel Label
2.3.1
imaging
Quartet/Quartet-C/Quartet-M/Solo Connector Label
Connector labels have been shipped with your FRS-111i. Select the label according to
your housing frame model. This label is to be installed on the housing frame's rear panel
in order to identify the FRS-111i external connectors. To install the label, follow these
steps.
Summary of Contents for FRS-111i
Page 21: ...17 ...


