Detailed Directions
361
7. Click
Apply settings
.
The Kaleido-X system must be restarted for changes to the network configuration to take effect. A
message appears prompting you to reboot the system immediately.
8. Click
OK
.
9. Remember to change your client PC’s IP address to one that matches the new subnet. You will also
need to edit the XAdmin URL in your Web browser's address bar, in order to log on to the multi-viewer
again.
Configuring a Multi-Viewer’s IP Settings Without a Client PC
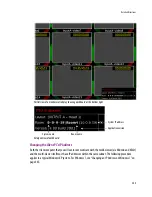
The IP address, system name, and other parameters can be set via a control panel, directly on the monitor
wall.
To change the multi-viewer’s system IP address, and adjust your system’s configuration:
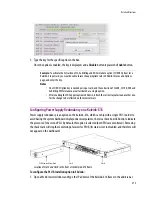
1. Connect a mouse to any USB port on the multi-viewer.
2. Right-click anywhere on the monitor wall. On the shortcut menu, point to
Monitor Wall
, and then
click
System Configuration.
3. Change the configuration settings as necessary, and then click
OK
.
Note:
Settings cannot be applied to a multi-viewer system while an upgrade is in progress. If the multi-
viewer does not reboot after 10 seconds or so, try clicking
Apply settings
again after a minute or two,
until the multi-viewer reboots.
Summary of Contents for Kaleido-X
Page 1: ...Kaleido X User s Manual Part Number M770 2800 111 1 June 2011 ...
Page 8: ...viii toc ...
Page 33: ...Loading a Layout 25 Kaleido X16 ...
Page 34: ...26 Getting Started 2 Kaleido X 4RU ...
Page 152: ...144 Creating Logical Sources 7 ...
Page 178: ...170 Setting Up Rooms 8 ...
Page 244: ...236 Creating Layouts 9 ...
Page 253: ...Detailed Directions 245 3 Under Properties General type a Friendly name for the Action ...
Page 256: ...248 Creating Actions 10 ...
Page 272: ...264 Managing Kaleido RCP2 Users 11 ...
Page 348: ...340 Tally Interface Devices 13 ...
Page 350: ......
Page 352: ...344 Using the Serial to TCP IP Dispatcher 15 ...
Page 406: ...398 Index ...


