Detailed Directions
367
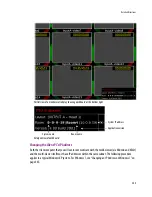
2. In the ROOM SELECTION display, press ENTER again to get the room list from the Kaleido-X systems that
are currently available on the network.
3. In the room list, select the room you wish to access by pressing the
2
key (to move up in the list) or the
8
key (to move down the list).
4. When the appropriate room name is highlighted, press ENTER to accept the new selection.
5. When prompted, log on to the selected room. See “Logging on to the Kaleido-RCP2” on page 368.
Connecting the RCP2 to Other Kaleido-X Systems
The unicast IP feature enables a Kaleido-RCP2 to find up to three Kaleido-X systems on different subnets
and connect to them (via network gateways), while maintaining connections to Kaleido-X systems in its
own subnet.
To configure a unicast IP address on the RCP2:
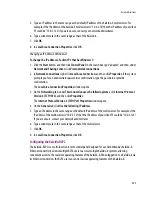
1. Press and hold the ENTER button until the ESC button lights up, to display the configuration menu.
2. Select ETHERNET OPTIONS on the LCD display, and then press ENTER.
3. Select
Unicast host IP
, and then press ENTER.
4. Select
Enable IP 1
, and then press ENTER.
The Enable IP x parameter instructs the RCP2 to query the selected IP address for a list of rooms.
5. Select
Host IP ADDR
, and then press ENTER.
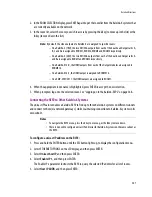
Note:
By default, the video outputs of a Kaleido-X are assigned to specific rooms:
– On a Kaleido-X (7RU), the two DVI/VGA outputs from each of the dual-head Output cards A,
B, C and D are assigned to ROOM1, ROOM2, ROOM3 and ROOM4 respectively.
– On a Kaleido-X (4RU), the two DVI/VGA outputs from each of the dual-head Output cards A
and B are assigned to ROOM1 and ROOM2 respectively.
– On a Kaleido-X16-D, the HDMI outputs from each of the Output modules are assigned to
ROOMX16.
– On a Kaleido-X16-S, the HDMI output is assigned to ROOMX16.
– On a KMV-3901/3911, the HDMI outputs are assigned to ROOM1.
Notes
• To navigate the RCP2 menu, press the
2
key to move up, or the
8
key to move down.
• There is no need to configure unicast IP addresses for Kaleido-X systems on the same subnet as
the RCP2.
Summary of Contents for Kaleido-X
Page 1: ...Kaleido X User s Manual Part Number M770 2800 111 1 June 2011 ...
Page 8: ...viii toc ...
Page 33: ...Loading a Layout 25 Kaleido X16 ...
Page 34: ...26 Getting Started 2 Kaleido X 4RU ...
Page 152: ...144 Creating Logical Sources 7 ...
Page 178: ...170 Setting Up Rooms 8 ...
Page 244: ...236 Creating Layouts 9 ...
Page 253: ...Detailed Directions 245 3 Under Properties General type a Friendly name for the Action ...
Page 256: ...248 Creating Actions 10 ...
Page 272: ...264 Managing Kaleido RCP2 Users 11 ...
Page 348: ...340 Tally Interface Devices 13 ...
Page 350: ......
Page 352: ...344 Using the Serial to TCP IP Dispatcher 15 ...
Page 406: ...398 Index ...

