368
Administration and Servicing
16
6. Using the numeric keypad, type the IP address of a Kaleido-X on a remote subnet, and then press
ENTER.
7. Repeat step 4 to 6 to add unicast IP addresses for up to three remote Kaleido-X systems.
Logging on to the Kaleido-RCP2
As a network device, the RCP2 provides access to any room configuration on any Kaleido-X system on the
network. As a security measure, access is controlled by a login procedure.
To log on to a Kaleido-X system from the RCP2:
1. Press the LOGIN key.
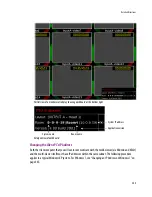
The following message will appear on the LCD display:
LOGIN Position
Admin
2. Press ENTER to select “Admin”.
A message prompting you to enter a password will appear on the LCD display.
3. Press ENTER again (by default, there is no password).
The message “Access granted” will appear on the LCD display if the login is successful. If a mouse is
connected to the RCP2, then you should be able to see and move the mouse pointer on the monitor
wall.
For more information, refer to the
Kaleido-RCP2 Guide to Installation and Operation
, available on the DVD
that shipped with your system.
Configuring an Audio Bridge Terminal
The optional Audio Bridge Terminal (ABT) is an external audio multiplexer/serializer for the Kaleido-X. The
Kaleido-X supports up to 128 inputs, and all of the video input connectors are located on the rear panels
associated with the KXI series of cards.
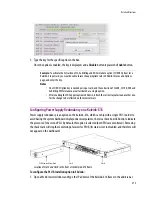
There is not enough space on the rear panels to also include the audio connectors. The ABT provides
connector space for the audio signal inputs, and multiplexes all the audio signals into combined serial
feeds on coaxial cables that connect to the KXI cards.
Note:
If at any time the message “Target system is offline” or “No login list available” appears on the LCD
display, press the ESC, ENTER and DEL keys simultaneously and go back to step 1.
Note:
The KMV-3901/3911 is not compatible with the Audio Bridge Terminal.
Summary of Contents for Kaleido-X
Page 1: ...Kaleido X User s Manual Part Number M770 2800 111 1 June 2011 ...
Page 8: ...viii toc ...
Page 33: ...Loading a Layout 25 Kaleido X16 ...
Page 34: ...26 Getting Started 2 Kaleido X 4RU ...
Page 152: ...144 Creating Logical Sources 7 ...
Page 178: ...170 Setting Up Rooms 8 ...
Page 244: ...236 Creating Layouts 9 ...
Page 253: ...Detailed Directions 245 3 Under Properties General type a Friendly name for the Action ...
Page 256: ...248 Creating Actions 10 ...
Page 272: ...264 Managing Kaleido RCP2 Users 11 ...
Page 348: ...340 Tally Interface Devices 13 ...
Page 350: ......
Page 352: ...344 Using the Serial to TCP IP Dispatcher 15 ...
Page 406: ...398 Index ...

