


LT-976A Rev 3
January 2017
2
D.
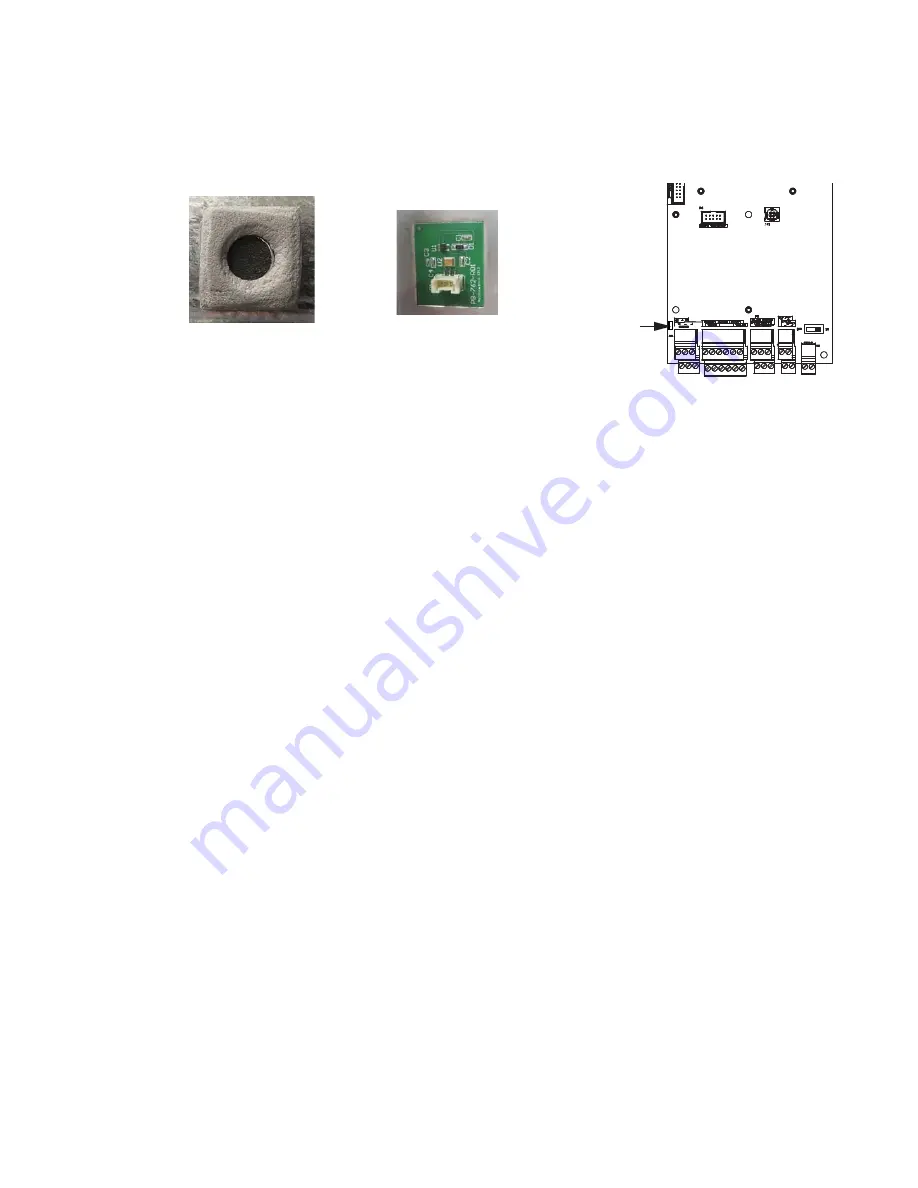
Set JW11
•
If the panel has the MC-009 microphone, close JW11.
•
If the panel has the MC-012 microphone, open JW11.
See Figure 2.
Figure 2 Microphones and JW11
E.
If you are installing RB-MD-1086 on a Touch Screen
1.
Set DIP switch 7 to ON. See Figures 3 and 4.
2.
Leave DIP switch 8 OFF.
3.
Turn on the main controller board.
4.
Turn on the Touch Screen.
You are done! If you need more help, call us at 1-888-660-4655.
F.
If you are installing RB-MD-1086 on a non-Touch Screen unit
1.
Set DIP switch 7 to OFF. See Figure 5.
2.
DIP switch 8:
•
Set DIP Switch 8 OFF if the IP address is assigned using a DHCP server.
•
Set DIP switch 8 ON if the IP address is assigned using the TX3 Configurator software.
3.
Turn on the main controller board.
You are done! If you need more help, call us at 1-888-660-4655.
MC-012 microphone
JW11 off or open
MC-009 microphone
JW11 on or closed
JW11


