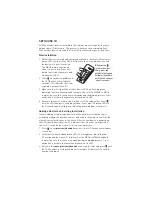
Scene Button Functions
The smaller buttons, labeled A—E in the illustrations, are used to record and
recall scenes. Until a new scene is recorded for the E button, all devices turn off
when the E scene button is pressed. Space is provided on the back of the remote
so you can write down a name for each button’s scene.
Record a Whole-House Scene
1. Press on the MRH5 until the LED begins fl ashing (about 2 seconds).
2. Press the scene button that you wish to program. The LEDs on all the
Wireless Miro devices begin to fl ash. You now have 10 minutes to complete
this process.
3. To include or exclude a device in the scene press on the device until the
LED changes color.
Yellow
fl ashing LED = Included in the active scene
Green
fl ashing LED = NOT included in the active scene
If you get to a device and it is NOT fl ashing, see TROUBLESHOOTING.
NOTE
: You must include devices that are off in the house scene if you want
them to turn off when that scene is recalled.
4. Return to the MRH5 used in step 1. Press for 2 seconds — the status LED
stops fl ashing, then all the status LEDs in the house turn green.
5. Go around the house and adjust light levels by pressing and holding or on
the devices that you want to adjust.
6. Return to the MRH5 used in step 1 and press and hold the same scene button
until the LED fl ashes once (about 2 seconds). Scene recording for this button
is complete. Repeat this process for each scene button.
Recall a Scene
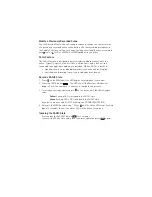
1. Press the appropriate scene button.
2. Watch the scene smoothly transition from the previous lighting state.
You can recall the same scene from any house scene controller assigned to the
same set of house scenes (see MORE SCENES).
Modify the Light Levels of a Scene
1. Recall the recorded scene.
2. Change lighting levels as desired by pressing or on individual devices.
3. Press and hold the scene button until the LED fl ashes twice (about 2 seconds)
to save the new settings.


