background image

15

14

Outer Vapor Cap and Inner Vapor Cap have similar designs.

Please make sure to use the right parts for each location.

How to differentiate various Vapor Caps

Location

Required / Optional

Optional

Required

Optional

Part Name

Outer Vapor Cap

Inner Vapor Cap

Splash Guard

Transparency

Translucent

Solid

Solid

Size

6.3″ / 16cm

3.54″ / 9cm

1.57″ / 4cm

Warning

Using hot water, hard water, or 

contaminated water can permanently 

damage the unit.

Warning

Overfilling the Water Bowl may cause 

the humidity output to decrease due to 

reduced airflow.

01. Fill the Water Bowl

MAX

Water bowl

Fill the Water Bowl with purified 

water, distilled water, or drinking 

water. Please remember 

that you breathe in the mist particles. 

We recommend using distilled water 

for prolonged use of the humidifier. 

Do NOT fill over the MAX line 

as indicated in Diagram B1-1

Diagram B1-1

Noise Muffler

Outer Vapor 

Cap

Inner

Vapor Cap

Outer

Funnel

Outer

Funnel

Splash Guard

Inner 

Vapor Cap

Miro Humidifier Assembly

Scan to watch 

the assembly 

video.

Summary of Contents for NR08 Series

Page 1: ...Know your Miro humidifier NR08 Series UserManual...

Page 2: ...r Bowl Cover Placing the Noise Muffler Placing the Outer Vapor Cap Floating the Main Unit Filling the Water Bowl 28 How to Wash Your Humidifier 31 Frequently Asked Questions 39 Product Specifications...

Page 3: ...all modules are in the box Contact support mirohome com if any module is missing Tip Size and the look of each module may differ based on the model Tip Please make sure to separate all the modules bef...

Page 4: ...Unit Assembly Miro Customer Care Portal 02 Checking other modules Please check to see if you have all the modules 01 Disassembling the Main Unit Outer Funnel Main Unit Inner Vapor Cap Floating Base Mi...

Page 5: ...m of the Floating Base The wires should maintain a 90 degree angle see Diagram 3 1 90 Diagram 3 1 Diagram 3 2 Warning Please treat Mist maker with care The unit may get damaged if you pull the cable o...

Page 6: ...p Warning The humidifier may not function properly if the Inner Funnel is misplaced Line up Inner Funnel groove on top of the fan and push it down See Diagram 6 1 06 Inner Funnel placement Warning The...

Page 7: ...sation around the humidifier depending on the temperature and humidity of your environment The Splash Guard can minimize the condensation effect Diagram 8 1 Warning Do NOT lift the Main Unit by holdin...

Page 8: ...n permanently damage the unit Warning Overfilling the Water Bowl may cause the humidity output to decrease due to reduced airflow 01 Fill the Water Bowl MAX Water bowl Fill the Water Bowl with purifie...

Page 9: ...ng the Main Unit 03 Placing the Water Bowl Cover Warning Overfilling the Water Bowl may cause the humidifier output to decrease significantly due to the reduced airflow Warning Make sure to keep the t...

Page 10: ...ease do not pull the wire when unplugging It might break the cable See Diagram B7 1 for more details Noise Muffler Water Bowl Cover Noise Muffler Outer Vapor Cap Warning Outer Vapor Cap can only be us...

Page 11: ...l not operate if the power cable is not pushed in fully Warning Please do not pull the wire when unplugging Maintaining 2ft away from the wall helps the circulation of vapor from the humidifier maximi...

Page 12: ...can adjust the humidification output level from 0 to 3 by pressing the output level icon Level 1 Level 2 Level 3 OFF Warning Miro recommends maintaining a low mist output throughout the day Only go u...

Page 13: ...idifier Low water level indicator Press the timer icon to set the timer to 1 hour 4 hours 8 hours or turning off the timer setting Timer The LED light cycles slowly through different colors when the h...

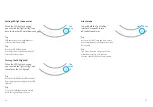
Page 14: ...ight setting icon for 2 3 seconds to turn off the button chimes Silent mode Hold 2 3 sec Tip Use the MiroT WiFi Chip and Miro Smart Home application to easily turn the LED light off Tip To turn the LE...

Page 15: ...d sponge Power OFF your humidifier before washing Use gentle dish soap with sponge to make foam Clean your humidifier Washable Modules Washing Your Mist maker Please make sure the USB port is complete...

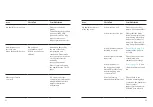
Page 16: ...rst PossibleSolution My Miro humidifier is not turning on Is the DC adapter plugged in correctly Plug the DC adapter into the power outlet correctly Is the Mist maker Fan Ultrasonic engine and USB cab...

Page 17: ...ormance Issue CheckFirst PossibleSolution My humidifier will not make any mists Is the water too hot Please do not use hot water with the humidifier Is the water level too low Please refill the Water...

Page 18: ...ot use essential oils with Miro humidifiers The oil residue is difficult to clean and may discolor damage your humidifier The emulsifying agent from the essential oil may permanently damage your humid...

Page 19: ...nect the Mist maker to the Controller then connect the power cable to the controller Not following this order may cause sparks Do NOT leave water inside the water tank for a long time Please do not be...

Page 20: ...ice We test all our units before sending them out Please don t be alarmed if you think the product has been opened Miro humidifiers are extremely powerful Please maintain low mist output Use high outp...

Page 21: ...s available on Miro s website If you purchase a Miro product from an unauthorized dealer or if the original factory serial number has been removed defaced or altered your Miro product warranty will be...

Page 22: ...urisdictions do not allow limitations on how long an implied warranty lasts so the above limitations may not apply to you This warranty gives you specific legal rights and you may also have other righ...

Page 23: ...ours Customer service protocol Customer Service Protocol Solutions Within warranty period After warranty period Defective items within 7 days from purchase date Replacement or full refund Not applicab...

Page 24: ...Miro Support support mirohome com mirohome com Rev 5 4...

Reviews: