


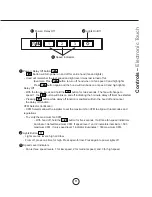
9
C/L
C/L
A
B
16
7/8
”
min
24”
4”
wood board
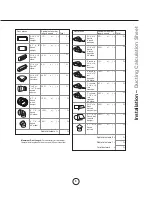
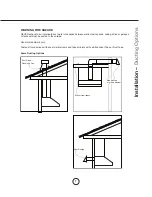
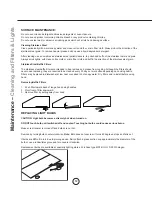
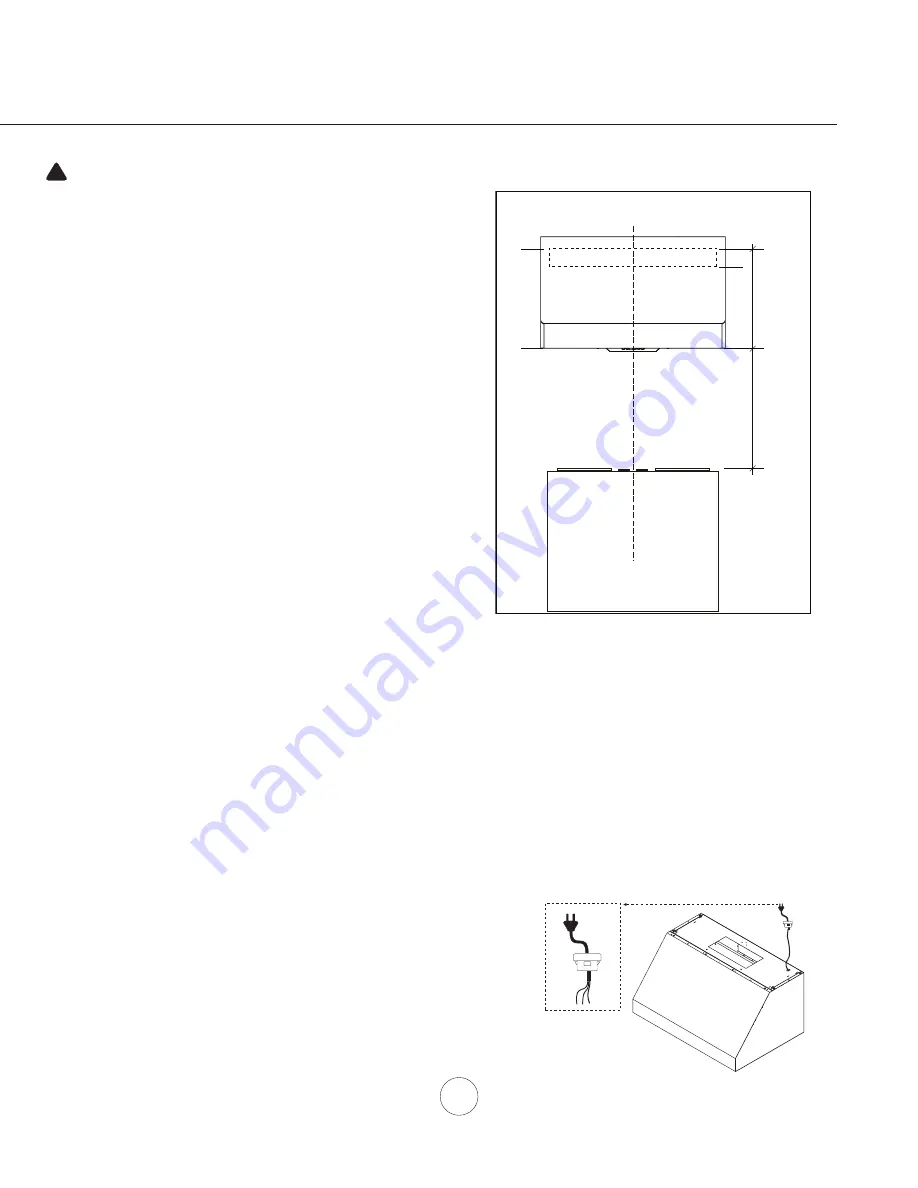
Installation –
Mounting the Range Hood
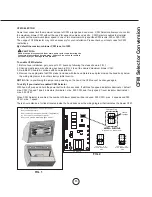
1. Select preferred ducting application (vertical or horizontal) and
prepare hood. Refer to page 11 for dual blower horizontal ducting.
2. Plum and mark center line.
3. Choose desired height above cooking surface
(24” min)
. Level and
mark line A (hood bottom).
4. Level and mark top of wood board line B,
1
6 7/8” from line A.
5. Mark center line of wood board. Center and align top of board with
line B. Secure wood board to studs using (4) M4 wood screws.
Wood
Board Dimensions
: (W x D x H)
MH70230BS - 27” x 1/2” x 4”
MH70236BS - 33” x 1/2” x 4”
MH70248BS - 45” x 1/2” x 4”
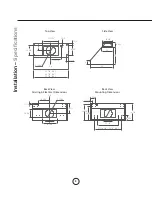
6. Prepare duct pipe and duct cut outs in upper cabinet or ceiling if
vertical ducting or prepare cut outs and ducting in wall If horizontally
ducting hood. Refer to hood specifications on page 8 for dimensions.
7. Prepare electrical wiring and electrical cut outs in upper cabinet or
ceiling if vertical ducting or prepare cut outs and electrical in wall if
horizontaly ducting.
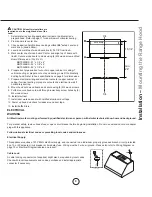
8. Mount hood onto wood board and secure using (8) M4 wood screws.
9. Further secure hood onto wall through lower body screw holes by (2)
M4 wood screws.
10. Install electrical.
11. Install duct work and seal with certified aluminum duct tape.
12. Power up hood and check for leaks around duct tape.
13. Install baffle filters.
CAUTION: At least two installers are
required due to the weight and size of the
hood.
!
ELECTRICAL
WARNING
All Electrical work must by performed by qualified electrician or person with similar technical know how and background.
For personal safety, remove house fuse or open circuit breaker before beginning installation. Do not use extension cord or adapter
plug with this appliance.
Follow national electrical codes or prevailing local codes and ordinances.
Electrical Supply:
This appliance requires a 120V 60Hz electrical supply, and connected to an individual, properly grounded branch circuit, protected
by a 15 or 20 ampere circuit breaker or time delay fuse. Wiring must be 2 wire w/ ground. Please also refer to Wiring Diagram on
page 15 or Electrical Diagram labeled on product.
Cable Lock:
A cable locking connector (not supplied) might also be required by local codes.
Check with local requirements and codes, purchase and install appropriate
connector if necessary.
Cable Lock


