179
Routine Maintenance
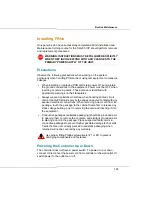
Installing FRUs
Only persons who have successfully completed a Mitel Installation and
Maintenance training course for the SX-200 ICP should perform removal
and replacement procedures.
Precautions
Observe the following precautions when working on the system,
particularly when handling PCB cards or using test equipment to measure
voltages.
•
When installing or replacing PCB cards turn power off, but maintain
the ground connections to the equipment. Power must be OFF when
inserting or removing cards. These cards are identified with
appropriate warnings on their faceplates.
•
Always wear an antistatic wrist strap when handling printed circuit
cards. Handle PCB cards only by the edges and avoid contact with any
exposed electrical connections. When removing a new card from its
package, touch the package to the cabinet frame first to release any
static voltage buildup, prior to removing the card and inserting it into
the equipment.
•
Conductive packages (antistatic packaging) should be grounded prior
to opening them to remove the contents, and similarly grounded prior
to placing a card in the package. Place suspected faulty cards in
conductive packages to prevent further possible damage to the cards.
Cards that are not correctly packed in antistatic packaging when
returned will not be covered by any warranty.
Powering the Controller Up or Down
The controller does not have a power switch. To power it up or down,
connect or disconnect the power cord from controller or the wall outlet. Or
switch power to the outlet on or off.
WARNING: INSTRUCTIONS MUST BE FOLLOWED EXPLICITLY
WHEN THEY INVOLVE WORK WITH AND CHANGES TO THE
PRIMARY POWER SUPPLY OF THE UNIT.
Use proper fitting Phillips screwdrivers (#1 or #2) to prevent
damaging components and fasteners.
Summary of Contents for SX-200 ICP - 1.0 5020
Page 1: ...Release 4 0 CX CXi Controller TECHNICIAN S HANDBOOK ...
Page 9: ...Chapter 1 Introduction ...
Page 10: ...2 SX 200 ICP CX CXi Technician s Handbook ...
Page 24: ...16 SX 200 ICP CX CXi Technician s Handbook ...
Page 25: ...Chapter 2 Basic Installation ...
Page 26: ...18 SX 200 ICP CX CXi Technician s Handbook ...
Page 75: ...Chapter 3 Basic Programming ...
Page 76: ...68 SX 200 ICP CX CXi Technician s Handbook ...
Page 89: ...81 Basic Programming The keys on the 5412 PKM are numbered as follows ...
Page 98: ...90 SX 200 ICP CX CXi Technician s Handbook Figure 10 Administrator Mailbox Menu ...
Page 142: ...134 SX 200 ICP CX CXi Technician s Handbook ...
Page 143: ...Chapter 4 Advanced Installation and Programming ...
Page 144: ...136 SX 200 ICP CX CXi Technician s Handbook ...
Page 183: ...Chapter 5 Routine Maintenance ...
Page 184: ...176 SX 200 ICP CX CXi Technician s Handbook ...
Page 219: ...Chapter 6 Basic Troubleshooting and Repair ...
Page 220: ...212 SX 200 ICP CX CXi Technician s Handbook ...
Page 245: ...Chapter 7 Advanced Troubleshooting and Repair ...
Page 246: ...238 SX 200 ICP CX CXi Technician s Handbook ...
Page 269: ...Appendix A Default Database Values ...
Page 270: ...262 SX 200 ICP CX CXi Technician s Handbook ...
Page 326: ...318 SX 200 ICP CX CXi Technician s Handbook ...
Page 327: ...Appendix B Part Numbers ...
Page 328: ...320 SX 200 ICP CX CXi Technician s Handbook ...
Page 336: ...328 SX 200 ICP CX CXi Technician s Handbook ...
Page 337: ...Appendix C System Cabling ...
Page 338: ...330 SX 200 ICP CX CXi Technician s Handbook ...
Page 343: ...Appendix D Folio Views E Docs Tips ...
Page 344: ...336 SX 200 ICP CX Technician s Handbook ...


