182
SX-200 ICP CX/CXi Technician’s Handbook
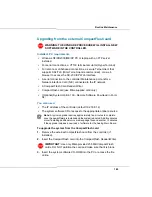
Replacing the Hard Drive or CompactFlash
Use these procedures to replace faulty internal media. To upgrade from a
CompactFlash card to a hard drive in a working system, follow the
procedure on page 39, “Installing an optional system hard drive.”
1.
Remove the external CompactFlash card, if inserted.
2.
Unplug the power cord from the controller.
3.
Remove the cover; see page 30 for instructions.
4.
If replacing the CompactFlash card, remove it, install the new one, and
then skip to step 6.
5.
If replacing the hard drive,
a.
Unplug the ribbon cable and the power cable from the old hard drive.
b.
Remove the screws connecting the bracket to the back of the
controller, then slide the bracket forward and remove it. (Removal is
unnecessary if the drive is installed in the upper bracket position.)
c.
Replace the drive with the new one and secure it to the bracket. (If
the bracket was removed, re-install it and secure it to the back of
the controller).
d.
Connect the ribbon cable and power cable to the new hard drive.
6.
Replace the cover.
7.
Restore power to the controller.
8.
If replacing the system hard drive or the CompactFlash card (not the
APC hard drive), perform an Initial (CompactFlash Card) installation
from the software CD; see page 48 for instructions.
Note:
Use Mitel-provided CompactFlash cards and hard drives only;
those obtained elsewhere are not supported.
Note:
Ensure that the jumpers on the new drive are set to the Master
setting.
Note:
When prompted for a database, select Custom to install a backup of
the original database (if available).
Summary of Contents for SX-200 ICP - 1.0 5020
Page 1: ...Release 4 0 CX CXi Controller TECHNICIAN S HANDBOOK ...
Page 9: ...Chapter 1 Introduction ...
Page 10: ...2 SX 200 ICP CX CXi Technician s Handbook ...
Page 24: ...16 SX 200 ICP CX CXi Technician s Handbook ...
Page 25: ...Chapter 2 Basic Installation ...
Page 26: ...18 SX 200 ICP CX CXi Technician s Handbook ...
Page 75: ...Chapter 3 Basic Programming ...
Page 76: ...68 SX 200 ICP CX CXi Technician s Handbook ...
Page 89: ...81 Basic Programming The keys on the 5412 PKM are numbered as follows ...
Page 98: ...90 SX 200 ICP CX CXi Technician s Handbook Figure 10 Administrator Mailbox Menu ...
Page 142: ...134 SX 200 ICP CX CXi Technician s Handbook ...
Page 143: ...Chapter 4 Advanced Installation and Programming ...
Page 144: ...136 SX 200 ICP CX CXi Technician s Handbook ...
Page 183: ...Chapter 5 Routine Maintenance ...
Page 184: ...176 SX 200 ICP CX CXi Technician s Handbook ...
Page 219: ...Chapter 6 Basic Troubleshooting and Repair ...
Page 220: ...212 SX 200 ICP CX CXi Technician s Handbook ...
Page 245: ...Chapter 7 Advanced Troubleshooting and Repair ...
Page 246: ...238 SX 200 ICP CX CXi Technician s Handbook ...
Page 269: ...Appendix A Default Database Values ...
Page 270: ...262 SX 200 ICP CX CXi Technician s Handbook ...
Page 326: ...318 SX 200 ICP CX CXi Technician s Handbook ...
Page 327: ...Appendix B Part Numbers ...
Page 328: ...320 SX 200 ICP CX CXi Technician s Handbook ...
Page 336: ...328 SX 200 ICP CX CXi Technician s Handbook ...
Page 337: ...Appendix C System Cabling ...
Page 338: ...330 SX 200 ICP CX CXi Technician s Handbook ...
Page 343: ...Appendix D Folio Views E Docs Tips ...
Page 344: ...336 SX 200 ICP CX Technician s Handbook ...


