background image

Summary of Contents for 88-DCDD

Page 1: ...2450 A amo SE Albuquerque NM 87t06 ...

Page 2: ...LY THE COMPLETE THEORY OF OPERATION WILL BE ADDED TO THE ASSEMBLY MANUAL AT A LATER DATE THE OPERATORS MANUAL AND DOS DOCUMENTATION WILL BE DEVELOPED IN A SINGLE MANUAL ALSO BOTH OF THESE AND ANY UPDATES TO THIS ENTIRE SYSTEM DOCUMENTATION WILL BE SENT IMMEDIATELY UPON THEIR PRINTING DATE ...

Page 3: ...ble connects the Disk Drive to the ALTAIR Disk Controller and Daisy Chains one Disk Drive to another in multiple Disk systems 4 OISK DRIVE CABINET a POWER SUPPLY The Disk Drive Cabinet contains a power supply for powering the Disk Buffer and Disk Drive b THE DISK BUFFER The Disk Buffer board contains the necessary line drivers and receivers for interconnection with long cables to the Disk Drive In...

Page 4: ...e left of board 1 f Connect 20 pin Molex connector on the Controller cable to the 20 pin connector on board 2 Note Keying g Take the 10 pin connector on the Controller cable with the orange and yellow wires connected to it and connect it to the 10 pin connector on board 2 Note Keying h Take the remaining 10 pin connector on the Controller cable with white and gray wires on it and connect it to the...

Page 5: ... from the disk controller the other is the output to additional disk dnves Up to 6 dnves may be attached to one controller The Mb DCDD consists of the disk controller and one disk dnve with an interconnect cable The M M Disk is one disk dnve for adding storage capability to the M M DCDD and includes the inter The AL7AJR Disk Format allows storage of over 300 000 bytes Since the disk is hard sector...

Page 6: ...D I S K S Y S T E M B L O C K D I A G R A M 10 NEXT DISK DRIVE ...

Page 7: ...r ...

Page 8: ... A T U S C I R C U I T S E C T O R t N O E X C I R C U I T o u T o n c o t CLOCK r I e LINES PIMT OH ALTM Vt7 IMPUT ALU POC B O A R D 2 W R I T E C I R C U I T 1 C I R C U I T I WHITE M T 4 o D I S K D R I V E S E L E C T o a D I S K D R I V E S E L E C T o c D I S K D R I V E S E L E C T 0 0 OHK ENA9LE 1 OHK ENA9LE STEP IX STEP IX F U N C T I O N F U N C T I O N C O N T R O L C I R C U I T C O N ...

Page 9: ...DISK CONTROLLER BLOCK DIAGRAM S H E E T 2 I N T E R N A L C O N N E C T I O N S 8 0 A R 0 I ...

Page 10: ...nables 1 of 16 drives each drive has a unique ad D1 dress selected by 4 jumper wires and enables con D2 troller on disk drive buffer P C card D3 MSB D4 D5 Not used don t care D6 D7 Clears disk control if set to 1 D0 D6 don t care Disables disk control Oisk control also cleared by opening door of disk drive or turning disk drive power off NOTE a If disk drive door is open drive and controller canno...

Page 11: ... 4 Always mark your Diskette with what is on them Use adhesive labels but don t write on them after they are attached to the Diskette 5 The Diskette used is hard Sectored 32 Sector holes 1 index hole Blank Diskettes are available from MITS for 15 00 each The Diskettes are not IBM compatible B OPERATING THE DISK DRIVE 1 Open door to Disk Drive by pulling out and down 2 Insert Diskette into Drive wi...

Page 12: ...step command May step every 10 ms Goes false for 40 ms after head load Goes false during Write and 475 us after Write to allow completion of trim erase D2 HS Head Status True 40 ms after head loaded or step command Ii f stepping with head already loaded Indicates when head is properly loaded for reading and writing Also enables sec tor position channel when true 03 Not Used 0 D4 Not Used 0 D5 INTE...

Page 13: ... be true when outputting a write instruction with the head on tracks 43 76 This reduces head current and optimizes resolution on inner tracks automatically reset at end of writing a sector D7 Write Enable initiates write sequence as follows 1 Disk selected and enabled head loaded enabling sector status 2 Sector True detected for desired sector write circuit enabled by software 3 200 us from Write ...

Page 14: ...k drive and controller enabled and 40 ms after head is loaded the sector information is as follows 00 SR0 Sector True True when 0 and is 30 ps long The write mode should begin as close as possible to the time that D0 goes true Write data will be requested 280 ps after D0 goes true Read data will be available 140 ps after SR0 goes true SECTOR 0 1 2 3 31 U1 SR1 0 1 0 1 1 D2 SR2 0 0 1 1 1 D3 SR3 0 0 ...

Page 15: ...E DATA ENWD J4 6 Board 2 SECTOR TRUE J soVs BOARD 1 F4 S WHITE DATA ENABLE BOARD 1 WRITE EhABLEF r BOARD 2 E2 9 EKhD Board 2 6 32 ps itrue J k DOWN TIME DEPENDENT ON SOFTWARE CYCLE TIML TRIM ERASE BOARD READ CLEAR BOARD 1 Jl 9 F 4 2SO t J S j 200 t J S j 4 0 J S If 5 2 M S 4 7 5 P S NRDA BOARD l a n 2ao ps ...

Page 16: ...heat sink should be used for either XI or X3 Mount both of these regulators directly to the board PAGE 95 Use a length of wire and connect the two pads labeled 8V to gether along the bottom edge of the board IT IS GENERALLY A GOOD IDEA TO GO THROUGH YOUR MANUAL AMD MARK THESE CHANGES ON THE PAGES INDICATED BEFORE BEGINNING THE ACTUAL PROCESS OF ASSEMBLING YOUR UNIT HITS Inc 3 16 76 ...

Page 17: ... k c c n t r o e r a s s e m b l y p r o c e d u r e ...

Page 18: ... kit against the enclosed parts list to make sure you have all the required components hardware and parts The components are in plastic envelopes do not open them until you need the components for an assembly step You will need the tools called for in the Kits Assembly Hints booklet As you construct your kit follow the instructions in the order they are presented in the assembly manual Always comp...

Page 19: ... install components may cause permanent damage to the component or the rest of the unit it will definitely void your warranty More specific instructions or procedures of a less general nature will be included within the assembly text itself Under no circumstances should you proceed with an assembly step without fully understanding the pro cedures involved A little patience at this stage will save ...

Page 20: ... REFER TO THE ABOVE DRAWING TO LOCATE PIN 1 OF THE IC s THEN USE THIS INFORMATION IN CONJUNCTION WITH THE INFORMATION BELOW TO PROPERLY ORIENT EACH IC FOR INSTALLATION j WARNINGl INCORRECTLY ORIENTED IC s MAY CAUSE PERMANENT DAMAGE L E C E B THE DRAWING ON THE LEFT INDICATES VARIOUS METHODS USED TO SHOW THE POSITION OF IC s ON THE PRINTED CIRCUIT BOARDS THESE ARE SILK SCREENED DIRECTLY ON THE BOAR...

Page 21: ...ne perpendicular to the body of the IC itself 1 Orient the IC so that Pin 1 coincides with the arrowhead on the PC board 4 Tape the IC into place on the board with a piece of masking tape 5 Turn the board over and solder each pin to the foil pattern on the back side of the board Be sure to sol der each pin and be careful not to leave any solder bridges 6 Turn the board over again and remove the pi...

Page 22: ...il ver band denotes the 10 tolerance Use this process to chose the correct resistor called for in the manual 2ND BAND VIOLET 1ST BAND RED 4TH BAND SiLVER 3RD BAND YELLOW RESISTOR COLOR CODES BANDS 3rd BAND COLOR 1 2 Multiplier Black 0 1 Brown 1 10 Red 2 10 Orange 3 10 Yellow 4 10 Green 5 105 Blue 6 106 Violet 7 10 Gray 8 10S White 9 109 Use the following procedure to install the resistors onto the...

Page 23: ...ntalum capacitors using the following procedure 1 Bend the two leads of the capacitor at right angles to match their re spective holes on the board Insert the capacitor into the holes on the silk screened side of the board Be sure to align the positive polarity side with the signs printed on the board 2 Holding the capacitor in place tum the board over and bend the two leads slightly outward Solde...

Page 24: ...the holes on the silk screened side of the board 2 Holding the transistor in place tum the board over and bend the three leads slightly outward NOTE Diodes are marked with a band on one end indicating the cathode end Each diode must be installed so that the end with the band is oriented towards the band printed on the PC board Fail ure to orient the diodes oorrectly may result in permanent damage ...

Page 25: ... TOGETHER WITH THE INFORMATION IN THE ASSEMBLY MANUAL FOR THE CORRECT ORIENTATION OF THE TRANSISTORS AS YOU INSTALL THEM THE FOLLOWING IS A LIST OF POSSIBLE SUBSTITUTIONS IF ANY OTHERS ARE USED YOU WILL RISK DAMAGING YOUR UNIT 2N4410 EN4410 CS4410 CS4437 CS4438 TIS98 ST98 S38473 NPN EN2907 2N2907 PN2907 ST2907 CS4439 PNP WHEN MAKING SUBSTITUTIONS REFER TO THE ILLUSTRATION TO DETERMINE THE CORRECT ...

Page 26: ...disk drive assembly procedure ...

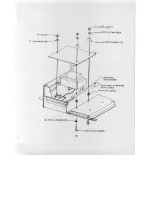
Page 27: ... case by withdrawing the two screws indicated in the drawing below Slide the case top backwards lifting the back slightly to remove it entirely from the chassis Also remove the 4 screws in the side of the case bottom and remove the entire chassis assembly ...

Page 28: ... the back panel from the case by withdrawing each of the four screws in the comers of the panel These four screws are shown inserted in the draw ing below Save these four screws for remounting the back panel later in the assembly procedure ...

Page 29: ...el as shown in the drawing below Use the screw sizes and other hardware indicated in the drawing NOTE Be sure that the back panel is oriented as shown be careful not to mount the terminal block on the wrong side of the panel Tighten all four screws firmly into place 13 ...

Page 30: ...ch of the eleven transformer wires Mounting Refering to the drawings following the Transformer Wire Preparation drawing mount transformers Tl T2 to the back panel NOTE For proper orientation transformer Tl should have the two yellow wires towards the top of the panel with reference to the drawings and T2 should have the two black wires to wards the top of the panel Be sure to install a terminal lu...

Page 31: ...cut off YELLOW GREEN TRANSFORMER WIRE PREPARATION STRIP r i BEND TERMINAL 5 ...

Page 32: ...16 ...

Page 33: ...ng below mount the fuse holder to the back panel using the rubber washer and nut provided Tighten it firmly into place Remove the cap and place the fuse provided with your kit into the holder then replace the cap BACK P A N E L RUBBER WASHER NUT 17 ...

Page 34: ...luded with this kit NOTE One side of the clip is slightly shorter than the other The shorter side should be mounted against the back panel with the longer side extending at 90 Install the clip as shown below and tighten the screws firmly into place Be sure that clip remains square with the panel when tightening the screws ...

Page 35: ...two terminals on the fan in one of the comers Solder the ends of the two wires opposite the crimp terminals to the terminals on the fan Refering to the drawing below mount the fan and screen to the back panel using the hardware indicated For proper orientation the terminals with the two wires attached should be towards the bottom on the side nearest the terminal block The arrow printed on the fan ...

Page 36: ...es Strip 1 4 inch of insulation from the ends of each of the three wires Place the strain relief included with the kit over the power cord Be sure that the larger diameter end of the relief is towards the male plug end of the cord Be sure that there is approximately three inches of the cord s black insulation case extending beyond the strain relief then snap it into place on the back panel as show...

Page 37: ...the specified color wire to the length indicated Black 25 1 2 Strip 1 2 inch of insulation from White 18 6 one end and 1 4 inch from the other White 17 3 4 8 3 Tin the wire exposed 1 4 inch by ap plying a thin coat of solder Orange 17 3 4 7 4 According to the instructions on Orange 18 1 2 4 page connect a screw mount crimp terminal to the 1 2 inch Orange 18 1 4 5 stripped end 5 Approximately 5 inc...

Page 38: ... of any electronic system Check the wiring here several times to be sure you have it correct Be sure that each of the wires is in the proper loca tion and that all of the screws on the terminal block are tight Use the drawing below for reference and connect all of the wires as indicated Match the tags on the wires prepared earlier with the numbered positions on the terminal block There should be a...

Page 39: ...w RH Mou rrm t m WRAPS c r r p 11 W n P t o POWER CORD 0 TIE WRAPS 4 A C POWER CORD Jll BACK PANEL WIRING X T 2 O s OFF ON SW 23 o o o FAX ...

Page 40: ... the assembly process RESISTOR INSTALLATION Install the following 2 resistors according to the instructions listed on page 5 RESISTOR VALUES AND COLOR CODES R1 is 33 ohm orange orange black 1 2 W R2 is 7 5 ohm 5 W this may be color coded violet green 3rd band white or gold or it may be a solid body color with the value printed directly on the resistor itself 24 ...

Page 41: ...o O O o o o o o f o y o O O O O O O f O o o 25 ...

Page 42: ...CAPACITOR INSTALLATION CAPACITOR VALUES Install the following 3 ceramic disk capacitors according to the instructions on page 6 C2 luf 50V C5 luf 50V C8 luf 50V 27 ...

Page 43: ... INSTALLATION Install the following 6 electrolytic capacitors according to the instruc tions listed on page 6 CAPACITOR VALUES J CI 2200uf 50V C3 33uf 50V Y C4 3300uf 16V C6 33uf 50V C7 lOOOuf 25V C9 33uf 50V 43 ...

Page 44: ...r M TS o D SK POWER SUPPLY R 2 T C5 000 O o C 8 C C3 t D O O O O O 29 o ...

Page 45: ...DIODE INSTALLATION Install the following 2 diodes according to the instructions on page 7 D1 1N4004 D2 1N4004 3 3 1 3 O t O _ _ Q j D 9 o o Q i o o o o o o 3 ...

Page 46: ...ds using needle nose pliers at right angles from the printed side of the component NOTE Use heat sink grease when in stalling this component Apply it to the surface where the reg ulator board come in contact 4 Referring to the drawing set the regulator in place on the silk screened side of the board Secure it to the board using a 6 32 nut and screw Hold the regulator in place as you tighten the nu...

Page 47: ...VOLTAGE REGULATOR INSTALLATION XI 7824 X3 7805 MtTS D SK POWER SUPPLY 11 11itiiiimm rnntmn C4 C6 C9l O X3 B Ct 33 ...

Page 48: ...HESE TWO COMPONENTS Install the rectifiers according to the following procedure 1 Insert the four leads of the BR1 rectifier into their res pective holes from the non silk screened side of the board Be sure the lead of the rectifier is inserted in the hole labeled on the silk screened side of the board 2 Insert the BR2 rectifier in the same manner Be sure both recti fiers are pushed all the way ag...

Page 49: ...BRIDGE RECTIFIER INSTALLATION BR1 VJ048 BR2 VJ048 BR2 O t O _ _ _ Q o D D2 BR 01 o O O O O O 35 ...

Page 50: ... Board according to the mathod described on page 4 o o o o o o o o IC SILK SCREEN DESIGNATIONS AND PART NUMBERS A B D E 8T97 o o o o c 8198 F 74L30 G 9601 o o o o lO o o o o o r ID o o o o o o o o o o o o o O O o O o o o o o o o o o o o o o o o o o o o o o o o o o o O o 1 f Q O 0 0 o 0 0 O 27 ...

Page 51: ...ed red brown 1 2 W R34 is 330 ohm orange orange brcwn 1 2 W R31 R29 R27 R25 are 220 ohn red red brown 1 2 W R32 R30 R28 R26 are 330 ohn orange orange brown 1 2 W R36 R35 R37 are 150 ohm brown green brown 1 4 W R40 is t 3 3 i y ohn orang orange brown 1 2 W f red red brown 1 2 W R38 is IX ohm brown black red 1 2 W R41 is 39K ohn orange v tite orange 1 2 W R20 R22 R24 are 330 ohm orange orange brown ...

Page 52: ... nsert Page IALTAIR FLOPPY OISKl Disk Drive Assembly Procedure Resistor Value Changes page 38 R39 should be 330 ohms R40 should be 220 ohms HITS Inc August 1976 38 ...

Page 53: ...o l o o o o o o o o o o r o o o o o o I o o o o o o o o o o o o o o o 0 E O o o 0 0 o O o o i s c o 0 0 39 o 00 o ...

Page 54: ...DIODE INSTALLATION Install diode D6 according to the instructions on page 7 D6 1N914 o 0 0 o 54 ...

Page 55: ...acitors CIO Cll C12 and C13 are ceranic disk capacitors Install these ccmponents according to the instructions listed on page 6 CAPACITOR VALUES Different voltages may be sub stituted in some cases C14 500 uf 25V electrolytic CIO Cll C12 C13 are 1 uf 12V ceramic disks 42 ...

Page 56: ...o o o o o o o o o o o o o o o o o o o o a o r o o o o o o o o o o o o o o o 0 o o o o o o o o o t t O D s o o o e O c 0 o o 2 D t o o o o o o o o o o o o o o i o o o o o o o 00 43 o 0 0 O ...

Page 57: ...e pieces you have just cut The two 18 lengths will be prepared identically The cable sheath itself may be cut using scissors and can be stripped by simply pulling it apart You will note that the plastic sheath has welds ap proximately every inch between the twist ed pairs Try not to make any cuts on the welds themselves Each time a 1 4 of insulation is stripped from the wires themselves the bare e...

Page 58: ...18 INCH RIBBON CABLES 18 14 CUT TO 2 STRIP 1 8 TIN j i r t t i i T r r t 2 Pr STEP CASING EVENLY APPROX EVERY INCH CUT TO 2 STRIP 1 4 TIN 45 ...

Page 59: ...25 INCH RIBBON CABLE CUT TO 5 STRIP 1 2 TIN 4 PAIR CUT TO 2 STRIP 1 4 TIN 2 PAIR 2 PAIR 2 PAIR 1 PAIR STEP CASING EVENLY APPROXIMATELY 1 1 2 STEPS CUT TO 2 1 4 STRIP 1 4 TIN 7 46 ...

Page 60: ... following procedure and later steps involving ribbon cable be sure that you fully understand all of the instructions before you begin These points are the most likely areas for assembly errors to occur Cable Assembly The following procedure should be used for assembling both of the 18 inch cables In order to minimize the pos sibility of error the cables will be attached to the 37 pin connectors a...

Page 61: ...er moving across the ribbon cable one pair at a time until all 18 twisted pairs are in place Be sure that you do not connect any wires to pin 12 on the connector NOTE Take your time and be careful while soldering the wires to the connectors Do not melt any of the wire insulation or leave any solder bridges Check your work as you go along and be sure that 1 is connected to 1 2 to 2 3 to 3 etc be ca...

Page 62: ...37 PIN MALE CONNECTOR PIN 12 NOT USED 49 ...

Page 63: ...o o o o o 50 ...

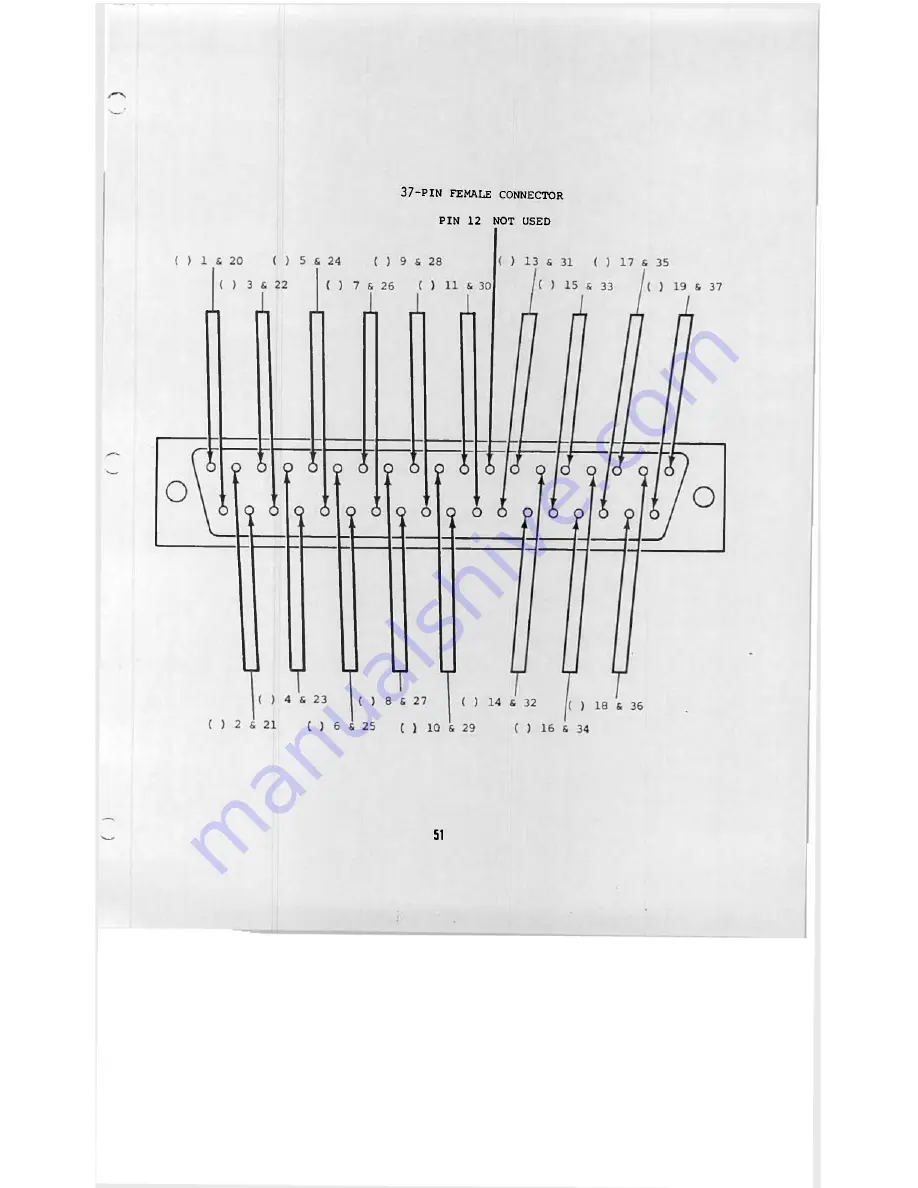
Page 64: ...37 PIN FEMALE CONNECTOR PIN 12 NOT USEO 51 ...

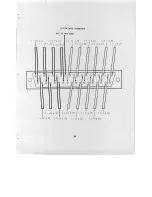
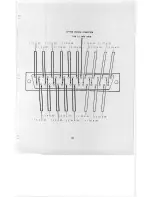
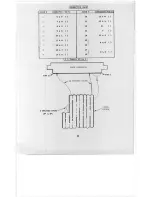
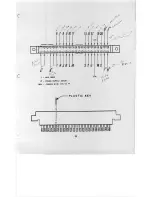
Page 65: ...one For twisted pairs 15 16 all four of the wires should first be twisted together and then all four attached to both of the pins A B Do the same for pairs 17 18 to connect them to pins D E Be sure that there is a solid electrical con nection between both of the pins in each case see drawing below A pairs 15 16 B pairs 17 18 H Z The Connection Chart on the following page indicates where on the edg...

Page 66: ...ION CHART PAIR CONNECTOR PIN S PAIR CONNECTOR PIN S 6 S F 7 H 8 J 9 K 10 S L 11 M 15 S S 16 T 17 S U 10 11 12 13 14 15 16 17 18 19 W 20 X 21 Y 22 Z A B D S E Jumper 18 to V PIN 22 PIN 1 4 TWISTED PAIRS A B 54 ...

Page 67: ... f 6 7 g r J 9 2 0 O r p r p r p r r t r p r p r y t r r t i f r r f f i p f f g F j r M s r t NOT USED r POWER SUPPLY BOARD JUMPER WIRE 18 to V o C PLASTtC KEY a a a a a a a M M M M M t o 0 55 ...

Page 68: ...hat all but two of the connections involve more than one of the wires The two wires of pair 12 should be twist ed together and both connected to pad D Pair 13 should connect to pad F in the same manner Twisted pairs 15 16 should have all four wires 2 each twisted together and connected to pad A Pairs 17 18 should be connected to pad B in the same manner Only twisted pair 14 should be separated and...

Page 69: ......

Page 70: ...markings on the components face away from the bracket Insert the two regulators from the bottom side of the board as shewn Use heatsink conpound between all mating surfaces Be sure to place the mica insulating washer between Q1 and the bracket and the shoulder washer between Q1 and the mounting nut Tighten the mounting screws firmly being sure not to twist the component leads as you do so Solder a...

Page 71: ...VOLTAGE REGULATOR INSTALLATION X2 7805 01 TIP 145 w Mica insulatinq washer and shoulder washer B C E 59 ...

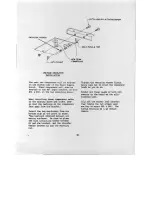
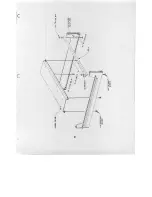
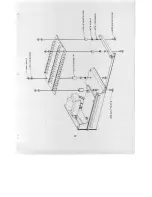
Page 72: ...this time Save the screws used to mount the panel to the chassis 3 Refering to the same drawing again mount the rail as shown in the 2nd hole frcm the front Be sure to include the 2 spacers as shewn on each side There are 6 additional screws to be added to the chassis members 4 on the beam and 2 on the rail 4 Install two 6 32 x 3 4 screws onto the rail in the positions indicated on the sane draw i...

Page 73: ...c c 61 ...

Page 74: ... panel to the rear of the chassis as shown below using the same scres s previously used to mount it Be careful not to catch any v i r e s between the chassis and the panel B A C K P A N E L 4 E X I S T t N G S C R E W S C H A S S t S 63 ...

Page 75: ...t the PcMer Supply board to the 90 angle clip and bracket as shown Study the drawing carefully before beginning N3TE The 4 40 screw shewn are those installed earlier Be careful not to disturb the wire connects previously made between this board and the buffer board and cables 64 ...

Page 76: ......

Page 77: ... the drawing on the following page mount the Disk Buffer board as shown Again study the drawing carefully before beginning The screws shewn have already been installed The oonnectors on the three cables should faoe towards the back panel 66 ...

Page 78: ...67 ...

Page 79: ...placed on them earlier 2 Insert all of the wires frcnt the silk screened side of the board alrrost to the insulation Add solder from the same side of the board except wire 3 G and then continue applying heat while pushing the wires down as far as possible until the insu lation just touches the solder Be careful not to melt any insu lation 3 Turn the board over to solder wire 3 G and then clip off ...

Page 80: ...ALTAIR FLOPPY DISK DRIVE POWER SUPPLY WIRING DIAGRAM u ...

Page 81: ...the two 37 pin connectors to the back panel as shown Be sure to mount the male connector into the slot labeled TO and tha female ccnnector into the slot labeled FROM CH both connectors pin 1 should be towards the top CONNECTOR TO CONTROLLER 214L0CKWASHER 70 ...

Page 82: ...iously used to mount the sub panel to re neunt it to the chassis as shewn in the drawing belcw Note when setting the dress panel in place that it is a floating panel Installing the pewer switch as shewn at this time will temporarily hold it in place Be sure the lettering on the dress panel is facing outwards 71 ...

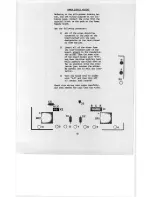
Page 83: ...s make sure that the cathode leads are in the pads marked K and the anode leads in the pads marked A Improper orientation when installing LED s may cause permanent damage to the component As is shown in the drawing on this page these three components also require special spacing and bending of the leads in order to fit the unit properly 1 Set the LED s in place one at a tirro and bend as neoes sar...

Page 84: ...ive to heat Use a minimum application of heat with your iron when making these solder con nections LED Installation c D3 RL 21 LED D4 RL 21 LED D5 RL 21 LED O O O o o M M D K0 0 o o o o o o o o 0 0 o o o o o o jp O oor o o o t OS Ko o 73 ...

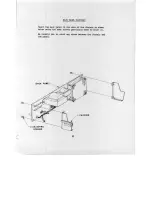
Page 85: ...ing page for the proper orienta tion 4 Refering again to the drawing on the following page in sert the two mounting screws and lockwashers on the front side of the drive unit Do not tighten the screws down at this time 5 Refering to the same drawing install the spacer bar and mounting hardware for the rear end of the drive unit Tighten all four mounting screws firmly 6 The 44 pin edge connector sh...

Page 86: ...e under each mounting hole to catch any metal particles 2 Install a 6 32 x 3 4 self tapping screw HITS part number 100957 Bag 7 into each hole 3 Remove the screws and the masking tape B Step 2 of the instructions given on page 74 may be omitted C If difficulty is encountered while installing the Disk Drive Unit into the chassis remove the upper right hand flat heat screw near the bezel on the Disk...

Page 87: ......

Page 88: ...of the chassis This spacer bar has been replaced with either a 1 2 x 1 4 x 1 rectangular spacer or a 5 8 x 1 4 round spacer The new spacer will be installed in the right rear mounting hole only This spacer allows the PERTEC FD 400 to be mounted at three points on the chassis instead of four thus avoiding the possibility of warping the FD 400 drive chassis The part number for the new spacer 1s 1018...

Page 89: ... Enable light should come on B Now open disk drive door Tlie drive motor should stop and Disk Enable light should turn off Close the door and the motor should start up 5 10 seconds later the Disk Enable light should turn on timing controlled by IC G C With another cup lead test the mechanical disk functions by groundinq on the left edge of board 1 Wire 8 Head Load The Head Load solenoid should ene...

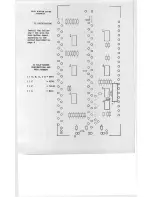
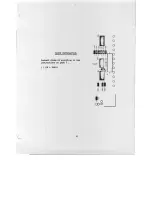
Page 90: ...the silk screened side of the board and solder than on either side lb oomply with HITS software the board should be jumpered to address 0 unless it is a part of a multiple disk drive system Refering to the silk screen drawing on the right jumper as follws for address PAD TO PAD 1 A 2 B 3 C 4 D Consult the jumper chart in the Theory of Operation section if a different address is desired ...

Page 91: ...ed into the outer case F fer to the drawing on the foilwing page and mount the chas sis as shewn To insert it start by setting it slightly tcwards the back of the case and then slide it forward until the screw holes align Tighten the four screws firmly 78 ...

Page 92: ... 1 is ...

Page 93: ...CASE TOP INSTALLATION Rg install tha case top onto the unit as shown belcw Do not however use the sams screws which held it originally Use 6 32 x 1 4 screws to secure the case top 93 ...

Page 94: ...ONTROLLER ASSEMBLY The Disk Controller will now be assembled This consists of two PC boards and inter connecting cables The Disk Controller mounts directly into the computer main chassis and uses two slots 83 ...

Page 95: ...o o o o o o o o o o o o o o o o o o o o i r 0 0 O a E D 87 ...

Page 96: ...except for electrolytic capacitors CAPACITORS A Cl 001 uf C2 001 uf C3 1 0 uf C4 22 uf C5 electrolytic 4 7 uf C6 electrolytic 10 uf C7 1 uf C8 1 uf C9 electrolytic 35 uf C10 1 uf Cll 1 uf C12 1 uf C13 1 uf C14 1 uf C15 1 uf C16 1 uf C17 1 uf C18 1 uf C19 1 uf C20 1 uf C21 1 uf C22 1 uf C23 1 uf C24 1 uf C25 1 uf C26 1 uf C27 1 uf C28 1 uf C29 1 uf C30 1 uf C31 elect 7 88 ...

Page 97: ...K 1 E 0 E L J EI 1 m n Ln O a E D 89 ...

Page 98: ...Diode Installat ion Install the following two diodes according to the instructions on page 7 DIODES Dl 1N914 D2 1N914 90 ...

Page 99: ...t6 C O t o E I 3 E 3 d n cn ...

Page 100: ...Voltage Regulator Installation Install the voltage regulator according to the instructions on page 32 VOLTAGE REGULATOR 7805 92 ...

Page 101: ...E6 1 o Y L E 3 C 3 L 3 r r n J ...

Page 102: ...ed pairs of wire from an 8 inch length of ribbon cable Leave the two wires in each pair twisted to gether Strip 1 4 inch of insulation from both ends of all of the wires and tin the exposed portions Beginning with the bottom pad on the board connect one of the twisted pairs to pads CB1 CB2 Continue up the row of pads connecting a twisted pair to each two pads as you go along NOTE The twisted pairs...

Page 103: ...S t B 3 JJ o a E 3 a a i a a a a c i 4 W R 8 C o o o o o o o o o o o o o o o o o o o o ...

Page 104: ...er tie wrap around the wires and also through the holes in the PC board just to the right of the 20 pads can c t ce C 9 W ct W c t A 20 in fcmjlu conncctor will now be attached to the free ends of the 20 wires First connector pins must be attached to the ends of all of the wires The drawings below illustrate a typical con nector of this type and the method for attaching and inserting the pins Conn...

Page 105: ...n Designation A1 A2 A3 A4 A5 B1 B2 B3 B4 B5 El E2 E3 E4 E5 F1 Number 74123 74L02 74L20 74L10 74L10 93L16 74L74 74L73 74L11 74L04 74123 74L00 74L73 74L04 74L00 74123 Silk Screen Designation F2 F3 F4 F5 G1 G2 G3 G4 G5 HI H2 H3 H4 H5 J3 Number 74L73 74L73 74123 74L30 74164 74L00 74L75 7493 74L04 74L75 8T97 8T97 8T97 8T97 74L04 98 ...

Page 106: ... After all of the Cs have been installed connect a jumper wire from pin 7 of IC B3 to the pad labelled SSC pin 9 of IC B5 There should be nothing connected directly to the pad under pin 7 of IC B3 Make a note on the schematic for Disk Controller Board 1 sheet 1 of 3 for IC B3 pin 7 The J input of the fli2 flop pin 7 now connects to pin 9 of IC B5 on sheet 2 of 3 HS not head status 98A HITS Inc Aug...

Page 107: ...J I I I i L a J I I I I I i J L o O O a J L J I I L L3 99 ...

Page 108: ...k Orange 1 4 or 1 2 W R5 Brown Black Orange 1 4 or 1 2 W R6 Red Black Orange 1 4 or 1 2 W R7 Green Blue Red 1 4 or 1 2 W R8 Brown Black Orange 1 4 or 1 2 W R9 Orange Orange Brown 1 4 or 1 2 W RIO Red Red Brown 1 4 or 1 2 W Rll Brown Black Orange 1 4 or 1 2 W R12 Red Black Orange 1 4 or 1 2 W R13 Red Red Brown 1 4 or 1 2 W R14 Orange Orange Brown 1 4 or 1 2 W R15 Brown Black Red 1 4 or 1 2 W R16 Br...

Page 109: ... e r r o J I L J I Ci l O I I I L t L 3 a z I I I I L A I O O O J I L I L O C J EU E D a cP J I I I L t n r n n E U O O 3 J L I I LLJ E D o 0 ...

Page 110: ...page 6 Note that all capacitors are installed in the same manner except for electrolytic capacitors CAPACITORS CI 1 uf C2 68 uf C3 047 uf C4 68 uf C5 430 pf C6 910 pf C7 electrolytic 33 uf C8 01 uf C9 047 uf C10 1 uf Cll 1 uf C12 1 uf C13 1 uf C25 electrolytic 35 L 7 102 ...

Page 111: ... o i i I U i i i i i i i 1 t 1 e i 1 1 1 I O i s i Z 5 i i i t A 63 1 L an 1 i t I I I 1 1 I I 1 I o i i L O t n j t n a a 1 1 t 8 lO F S HH a c o 103 ...

Page 112: ...Voltage Regulator Installation Install the voltage regulator according to the instructions on page 32 VOLTAGE REGULATOR Kl 7805 104 ...

Page 113: ...J I L J J J BtttO S J I I i I i i L I I L ...

Page 114: ...is as it is very important Pads labeled 1 below route through arrow 1 2 through 2 and 3 through 3 Cut the wires to the necessary length and install them through the paths as shown Use ribbon cable wires for the two twisted pair connections The GND pad for the twisted pairs is the one closest to the other connection stated Connect the following jumpers IND to IND GND to G N D RD to RD CUD to GND WD...

Page 115: ... J L 3 5 5 if i i i E n m o I I L E I L 9 2 3 p 8 J LSJ L OS 07 ...

Page 116: ... a 10 pin and a 20 pin female connector onto the board in the same manner as described on page 94 for board 2 NOTE The only exception to the above statement is that pin 6 is to be cut off instead of pin 4 on the 20 pin connector 08 ...

Page 117: ...c L E T 1 E J E U E Z 3 C D i t t 1 5 1 1 1 I I 1 tBt M P I i i t i 1 t i n 3 i O S 09 6 ...

Page 118: ...last pin on the bottom side of the board is to be cut off before in stalling the strips Be careful when installing these strips that you do not push the strips down tight enough to damage the jumper wires or to short any of the PC lands Insert them as shown below and solder them on the non silk screened side of the board no t ...

Page 119: ......

Page 120: ...or shown at the top of the drawing is one of the FEMALE connectors included with your kit The 10 20 pin connectors shown at the bottom of the drawing are of the same type as that on page 97 female connectors and should be assembled in the same man ner Use the drawing on the following page and the chart and drawing following after that to construct this cable in the same relative manner as the prev...

Page 121: ...DISK CONTROLLER CABLE 17 PIN CONNECTOR STRIP 1 8 INCH TIN RIBBON CABLE SHEATH INCH 13 ...

Page 122: ...portion of the assembly is essentially identical with that shown on page 51 Use the orientation for this process shown on page 113 It would be adviseable to connect the varied colored wires from each pair to pins 1 through 19 and the same colored wire from each pair to pins 20 through 37 37 PIN FEMALE CONNECTOR NOT USED 17 16 15 14 13 12 11 10 9 8 7 8 5 4 3 2 O 114 ...

Page 123: ...both of their wires attached to a single connector pin Once this is completed the pins can be inserted into the female connectors The numbers in the drawing on the right refer to the 37 pin connector pin numbers Use the same procedure as with the previous ribbon cables and insert the pins into the connec tors correlating the 37 pin connec tor pin numbers on the right with the with the proper wires...

Page 124: ...f insulation from both ends of each of the cable wires and tin the exposed portion 4 Prepare the two remaining 37 pin connectors one male one female in the same manner as the previous 37 pin connectors 5 For this cable the connections will simply run pin to pin That is connect pin 1 of the male connector to pin 1 of the female connector BE SURE NOT TO CONNECT ANY WIRES TO PIN 12 OF EITHER CONNECTO...

Page 125: ...cription of how to hook up and operate this system The above mentioned documentation includes an abreviated version of both the theory and the operation of the ALTAIR FLOPPY DISK SYSTEM An updated complete version of this documention will be sent at a later date as described in the front of this manual 117 ...

Page 126: ...hannel 10 333 Input nor 3 11 011 Sector Position Channel 12 333 Input 13 010 Disk Status Channel Note 1 Disk Drive should be enabled at the end of these 4 instructions Note 2 Disk Drive Head should be loaded at the end of these 4 instructions Note 3 After single stepping these two instructions the ALTAIR data lights should indicate as follows D0 on all the time D1 on all the time flashing very fas...

Page 127: ... Testing Individual Functions To test individual disk functions an output of the correct data pattern tgram Note The disk must must be done on Channel 011 For example to step the head in use this be enabled before doing any disk functions Address Instruction 000 000 076 MVI A 1 000 Disk Drive Addr 2 323 Output 3 010 Disk Enable Chan 333 Input S 377 From Sense SW 6 323 Output 7 011 Disk Control Cha...

Page 128: ...r and surround it on all sides with a thick layer of pack ing material You can use shredded newspaper foamed plastic or excelsior The packed carton should be neatly sealed with gummed tape and tied with a stout cord Be sure to tape a letter containing your name and address a description of the malfunction and the original invoice if the unit is still under warranty to the outside of the box Mail t...

Page 129: ...7 1 sync bit 2nd byte data on sense switch 3rd byte 2nd 1 4th byte 2nd 2 n th byte 001 last byte 000 If sense switch is set to program will stop READ The read data is stored in memory starting at address 001 236g and consists of the data written by the write program OUTPUT After the read program the data is outputted to a terminal Teletype CRT etc The output program is set to output on channel 1 T...

Page 130: ...imultaneously the two programs may be run together by changing 1 Data in locations 000 154 and 000 155 to 037 001 as indicated 2 Data in location 001 034 to 303 as indicated Start the program at 001 000 the start of the stepping program The disk head will step out to track 0 The head will then load and a write read wilt occur The head will then unload and output will take place After output the he...

Page 131: ...READ URITE OUTPUT PROGRAM t T O MO 0 7 4 i M S 1 wtm t h CM 4 D C t l C t m t l In L ...

Page 132: ......

Page 133: ...STEPPING PROGRAM ...

Page 134: ... will be sent to you within a short period for insertion This documentation contains the entire assembly and check out information for both the disk controller and drive units The Theory of Operation and some additional information will be in the insertation A i t a i r F t o p p y D i s k drive controHer hardware documentation ...

Page 135: ...101967 1 7 5 ohm 5w 101987 1 Heat Sink 101775 1 33 ohm w 101921 1 Heat Sink Spacer 5 101835 1 Disk Drive Spacer 9 101841 BAG 4 1 Right Angle Bracket 101717 1 Strain Relief 101719 17 220 ohm w 101925 1 Terminal Block 101868 3 RL21 100702 30 Insulated Terminals 101803 2 VJ048 100711 1 Fuse Holder 101813 2 IN4004 100718 2 DC37S Connector 102114 1 TIP 145 or 146 102820 2 DC37P Connector 102115 1 IN914...

Page 136: ...01040 2 10 Pin Right Angle Wafer 101798 1 8T98 101043 2 20 Pin Right Angle Wafer 101788 2 7805 101074 2 10 Pin Connector 101720 2 20 Pin Connector 101789 BAG 2 70 Terminal Pins 101723 4 Polarizing Keys 101791 37 lmf 12v 20 100348 2 Fastwrap 103037 1 Heat Sink Grease BAG 3 2 Heat Sink large 101870 4 Card Guides 101714 1 430pf 500v 5 100322 1 910pf 500v 5 100356 MISC 2 OOlmf lkv 20 100328 1 Olmf 16v...

Page 137: ... J Tt 0 TIP 145 HEATSINK ON CHASSIS DISK DRIVE POWER S U P P L Y ...

Page 138: ...Disc PC Card ...

Page 139: ......

Page 140: ...e ...

Page 141: ...J c ct K Q c ct K Q c a HH s i r Ml C6 o I caa I 33C DISK CONTROLLER BC READ DATA CIRCUIT c BY 3t Q 5 5 t6 na Al R Q D i s c 1 2 t W W W ...

Page 142: ...MD QND GK 0 3 t IO ZS J a 37 CMO o CB 9 o CBiS O CS 7 o CBlS O CB 4 o CB1S O CB t O CBn o CB O o CB9 O CBB O CB7 O CB O CBB O CB4 O CBS O CBZ o CB o CMC CD SMO DC KEY DCL GMO S O B IWT CMC 6 M D E t J V D wD SM0 HS 3ND SMD tjOTEs I ALU D ODES MS A UMutH OTHERwse SRCCIFiED r n A TA t BUSS CC o o u Disc 1 3 ...

Page 143: ...Disc 2 1 ...

Page 144: ...CO B B Disc 2 2 ...

Page 145: ...EM cc 0 SUD 0 A T E OATA B E 4 c o s 0 CUD c o t 0 CO 7 0 c S R t s C D S 0 M S C 3 A 0 S r t R OUT 7 t c C D S 0 tMO c o 0 wEAO O A O a CD 0 GMO C O O 0 DiSK EN s s 0 SN CO 0 OA A C D 7 0 5MD C O 0 CA B C D S 0 6MD c o c 0 3A C C O S 0 GNO c o t 0 0 7 ss co 0 5MO S t s o s t w kiNuESS S R C C CO 20 20 wiRES DC HS GfC C C O l v e Disc 2 3 ...

Page 146: ...J T Ourosjir MurRp si QAS l I s l 7 a C R JT c 03 5 I 1 k 33 J READ 54 Q tot C 3 tnd 3 H r r r t ci B on EE s i S EETZ MS H 1 DISK CONTROLLER BOARD 1 SHEET 1 OF 3 ADDRESS CONTROL INDEX SECTOR CIRCUIT ...

Page 147: ...DTSK CONTROLLER BOARD 1 SHEET 2 OF 3 ...

Page 148: ... 1 UC AEF SPAAE Tf E GMO e5 EA 5S JS 7 i L C 4 A 7 EZ ES 32 74LOO A 7 B4 7 A 1 1 4 7 A4 AB 74LIO 1 4 7 AS 74LEO 1 4 7 rs 74L30 4 7 At 74LOZ 4 7 97 97 4 a BB ES t s 74L73 4 Ai C n fA 74i s 4 6 GA 7A33 S 1 0 B s Bt f 7A 7A A 7 GB m 7AL75 S Z Gi 74GA i 4 7 HI 7603 a 3 ...

Page 149: ...DISK CONTROLLER BOARD 2 SHEET 1 OF 3 WRITE DATA S DISK ENABLE CIRCUITS ...

Page 150: ... a a a 4 7 R5 J f a n a Ci S L I O Q C a A 3 C S 4 s o c i I L cctn r t Lf J j US L sccm DISK CONTROLLER BOARD t t 2 SHEET 2 OF 3 DISK DRIVE CONTROL ...

Page 151: ... CBi I O CB9 o c a o CB7 O CB O 1B4 0 CB3 t CBC o CBI 0 CONM CB S REF TfRE C C SNO 4 7 fi E 74LOO a 7 74L04 4 7 Jt 9T9B H a E4 74nO 4 7 Mt 74 H 5 74L7S 9 z 9 J4 7 4 I 7 A 4 7 AZ EZ H 74L79 4 1 7AIZ S a K3 a797 9 7COB z 5 c 3 v RE5ULA7E0 DISK CONTROT LER 10AH0 2 a 1 ...

Page 152: ...p s n a 7 PCEA FLEXILE DISK DPivE ECTRO iCS EASic A j r ...

Page 153: ...JimH iim W W a ...

Page 154: ......

Page 155: ... t 0 OOV P 79 5 X P30 SX 02 4 C 34 ots o oov C27 30 J 3 3 20 5y tt C32 750Pf C87 92o oov TPS 00 C97 4 7K r 2 i s 0 S 4 i S3 as 00 rP3 C37 3 3 a a n 2 7 X 7 7 U 3 S7 20 C4 47Pf I rP7 M I 07 hT V 39 3 3 J L C 40 OOPP I t 5 500V 20 X D 600I9C 4 4 2 1 ...

Page 156: ...4 3 2 1 SM S J 3 3 svy F T WZtTE RUSY KETUEM b 6 0 0 1 9 0 D A J f at 5 ...

Page 157: ... rt p v R E TORN v 20 7 04 7 P37t UiS 330 5 P3B 7404 7404 330 P40 PPO P4 i 330 WPT UI Y RS5 7 P40 Lc 8 tL 4 4 7 f OSh OV TP PC 3 7407 OfO 6 TP 7 4107 j 0 cx 0 Li US 7400 7407 j U4 TP 9 7400 7407 O 74 7402 TPS 330 UfO r Ul H O ua ...

Page 158: ...7 t 32 oa o 5 j a _ 3 _ 3_ cz ...

Page 159: ...rc m c C C n rn r U 5 O 13 rn m r ...

Page 160: ...o X US m rs L t o u 5 O c o 3 3 o u t M 71 3 5 ...

Page 161: ...J OR Vf ...

Page 162: ...j faff 24 4 24 3 SV fM P2 Z c D f Jl 7 OPfM sw rcw J2 124 V 5 csa V R3 220 7404 J 032 330 O rP33 74t32 1 NC V O I t 4 KS 3 5 D ODfS 4 L f S A v PCB V C j s o o y O C S WV V C 7 S 3 V 3 ...

Page 163: ...D 6 0 0 1 9 0 D 3 ot j E ...

Page 164: ...7 4 02 1 D c 0 0 l 9 0 r ...

Page 165: ......

Page 166: ...4 3 TTAC K 33EO CE D Ss rE xseoo 1 SH05 f I 5 K 4 3 ...

Page 167: ......

Page 168: ... cco r i B 1 o 02 D t Q Ac A A B 1 5 A 6 B V 3 CETUtZki v J r i S TEP V E3 A i 0 CH tMv BTM t r m r L Lt rrrrL L b cn rcM a r t t l vat X 5 6 0 0 rv c ELEMENTS sa i c S 1A3 s c ...

Page 169: ...er wires to be sure there are no shorts to bus strins insulation on wires melted and check jumper wires for cor rect wiring 5 On both Board 1 and 2 check Stab Connector for shorts on fingers File at an angle along the length of the Stab Connector and the bevel edge of the card to remove any shorts 6 Be sure all interconnect cables are wired correctly and the pins are making good contact 7 Check on...

Page 170: ...ng or incorrectly installed ICs 2 On the Power Supply Board be sure XI and X3 are properly installed as indicated on the errata sheet 3 If you suspect difficulty with the Disk Drive DO NOT attempt to service it Any work done on the Pertec FD 400 will void the warranty Typical service charges for customer damaged FD 400 s are 100 00 4 Do not plug the FD 400 connector in backwards Be sure to install...

Page 171: ...tor 0 3 Solution Prevent valid index detection for at least 10 ms after disk enabled 4 Fix On controller Board 1 connect head load status line to index detect circuit This prevents valid index from being detected until 45 ms after head is loaded 5 Correction For units already assembled Cut pin 7 of I C B3 and lift up from board Connect jumper wire from pin 7 of I C B3 to pad labled SSC pin 9 of I ...

Reviews: