26
NP180/160 Series Setup Manual
Color calibration memory
Auto color calibration
By calculating the optimum values from the color
data retained in each LED unit, the luminance and
color can be automatically calibrated to uniform in
an LED wall.
1.
In the control unit select area, select all the
control units.
2.
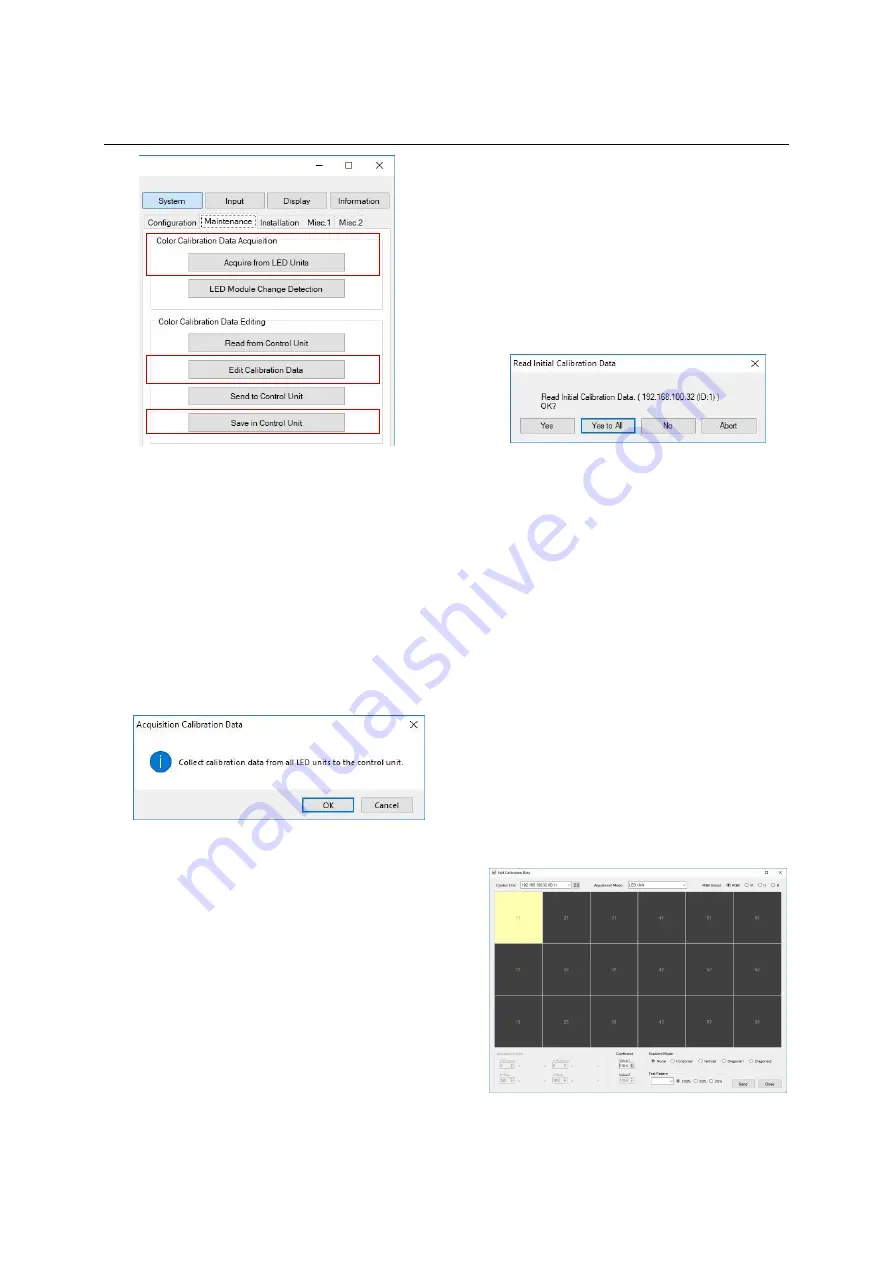
Click the “Acquire from LED Units” button in the
“Color Calibration Data Acquisition” in the
“Maintenance” tab to collect all the color data
from the LED units. The following window
appears. Click “OK” to start.
3.
The control units start receiving the color data
from all the selected LED units to calculate the
optimum values. Once calculated, they
automatically send back the calculated values
to each LED unit to reflect the result. The entire
process takes about 30 minutes regardless of
the number of the control units.
If an internal test pattern (p. 38) has been
displayed on the LED units, the brightness of
the LED units change in sequence subjected to
the progress.
Do not operate Wallaby during the process.
(The test patterns can be displayed although it
may take time to switch displaying.)
4.
After confirming the process is completed,
close the “Acquisition Calibration Data” window
with the “Close” button.
5.
The following window appears. Select “Yes to
all” to start transferring the values from all the
control units to Wallaby.
If necessary, the color can be fine-tuned
manually (p. 44).
6.
When any further adjustment such as edge
brightness compensation or manual color fine-
tuning is not needed, save all the calibrated
data in the control unit by following the chapter
“Color calibration memory saving” (p. 28).
Edge brightness compensation
If a gap between two LED units is narrower, the
border may look slightly brighter. It can be impaired
by reducing the edge brightness. In an opposite
manner, rather wide gaps can be obscured.
1.
Follow the boundary check (p. 18) procedure to
check if the boundary adjustment is needed.
2.
In the panel area, select a control unit that has
an LED unit to be adjusted.
3.
Click the “Edit Calibrated Data” button. The
following window appears.
Summary of Contents for 12NP180 Series
Page 50: ......


