Electrical adjustment
29
Input memory
The input memory can detect input signal formats
and display the image precisely. The following basic
setting is enough to display the most of the
standard image formats. It can display more
complicated signal types with the detailed input
memory setting (p. 36) according to the necessity.
1.
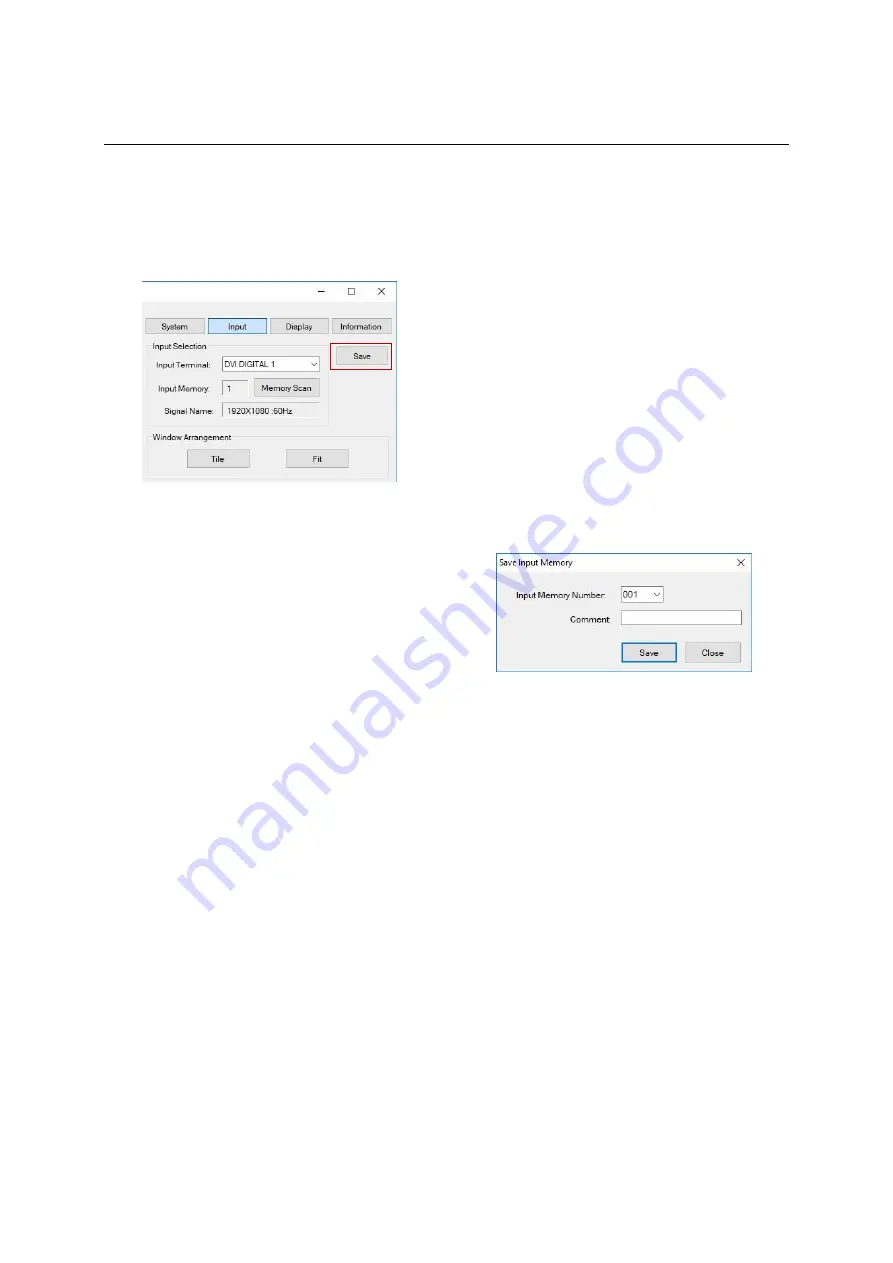
Specify the control unit(s) and select an input
port to be displayed in the “Input terminal”
menu.
2.
Click the “Memory scan” button to display the
image with a suitable signal frequency.
If the image is not precise yet even after that,
click the button a few more times till the correct
image will be displayed.
Window arrangement
You can display the image in the specified size. The
display memory has the same setting (p. 30).
Input memory saving
The scanned input signals can be saved in the input
memory. The stored setting will be applied when
the same image is displayed next time. 128
memories are available.
After scanning or further adjustment, surely click
“Save” button in the input memory menu to store
the setting in each control unit.
Specify an input memory number to save in and
click “Save” in the window. If the specified number
has been already registered, an overwrite
confirmation window will be displayed.
You can leave a comment such as its input signal
type in the comment field.
Summary of Contents for 12NP180 Series
Page 50: ......


