34
NP180/160 Series Setup Manual
Redundancy
It automatically switches to a specified secondary
image when the displaying image loses the signal,
which is mentioned “no signal” hereafter. The initial
setting is OFF.
If no signal is detected in one of the control unit
areas that have been set “On (all)”, all these areas
will switch to the secondary images.
“On (single)” setting switches only the selected
control unit area(s).
1.
Assign the primary and the secondary images
in the “Port redundancy” menu. It is
recommended configuring both images
identical.
2.
Set “Redundancy mode” ON.
It doesn’t switch when the specified secondary
image has no signal.
When the primary signal is recovered, the
displaying secondary image automatically
switches back to the original primary image.
3.
You can set the swap time longer in the “Swap
time” menu. The initial setting is 600 msec.
Some of the image switchers have some down
time when switching the signals and the
control units may recognize it as no signal.
Longer swap time setting may be able to
avoid it.
Noise reduction
It is a 2-dimensional noise reduction function.
Bigger values reduce the noise much while it tends
to blur the entire image. The initial setting is OFF.
Auto contrast
It finds balance between brighter areas and darker
areas in an image to improve the visibility on the
darker areas. Bigger values emphasize the details
on the black parts in the image. The initial setting is
OFF.
When you use multiple control units to display
one big image, set this function OFF. It may
compensate differently by each control unit
display area.
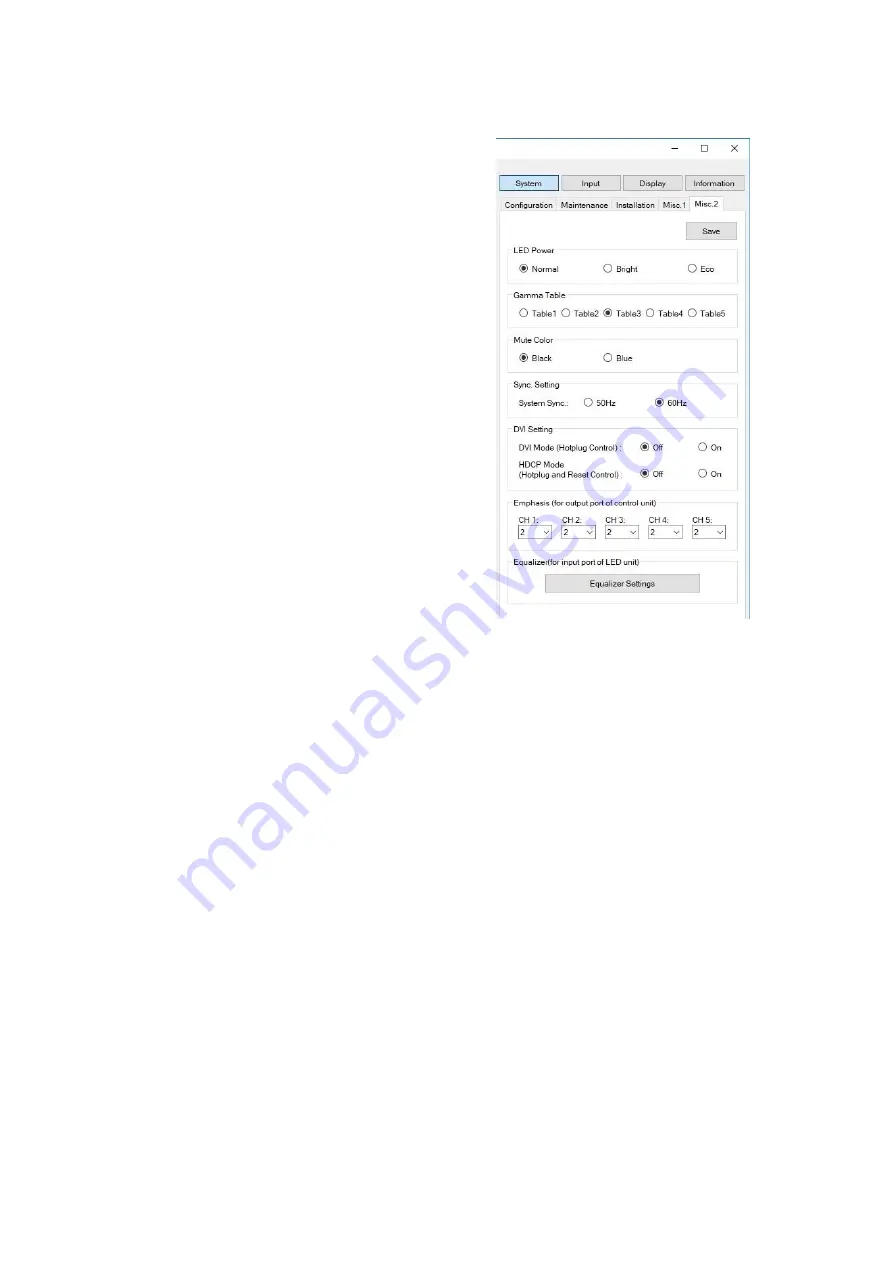
Misc. 2 tab
LED power
It switches the brightness level. The initial setting is
Bright.
Gamma table
It corrects the gamma curve. Try “Table 4” if the
original image source is an HDMI signal. Leave
“Table 3” (the initial setting) for the most other cases.
Smaller values may lose the texture in a dark section
depending on the displaying contents.
Mute color
It sets the back ground color in no signal windows.
Black or blue can be selected. The initial setting is
Black.
Sync. setting
Set the frequency according to the refresh rate of
the displaying image. The initial setting is 60 Hz. It
is nothing to do with power line frequency.
The frequency of the entire LED wall follows the
sync setting in the master control unit (p. 20).
With FRAME LOCK setting (p. 36), you can set to
synchronize with an input signal frequency.
Summary of Contents for 12NP180 Series
Page 50: ......


