


Maintenance
39
4x spacers
Maintenance
1.
LED module replacement
In case of a failure, each LED module in an LED unit can be replaced in the following way.
An LED unit consists of 4 LED modules.
During the work, be careful not to make an impact or apply pressure on the LED surface and the edges.
Front maintenance models
Each LED module has 2 screws on its back that can
be tightened/loosened with an optional LED
detachment tool, S-160DT. The tool has magnetic
plates inside, which will attract the screws behind
the module to engage with magnetically.
1.
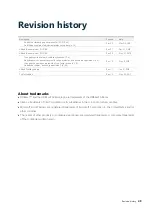
Insert spacers (p. 6) on all 4 edges of the LED
module to be replaced and temporarily tape
them not to drop off.
The standard gap width between the LED
modules are 0.125 mm for 12NP and 0.19 mm
for 15NP. Here, thinner spacers than that are
recommended to keep a certain adjustment
margin.
2.
The spare LED modules are shipped in the
condition to attach on the top left area in the
LED unit. Change the position of the screws
behind the module accordingly when the
location is other than that.
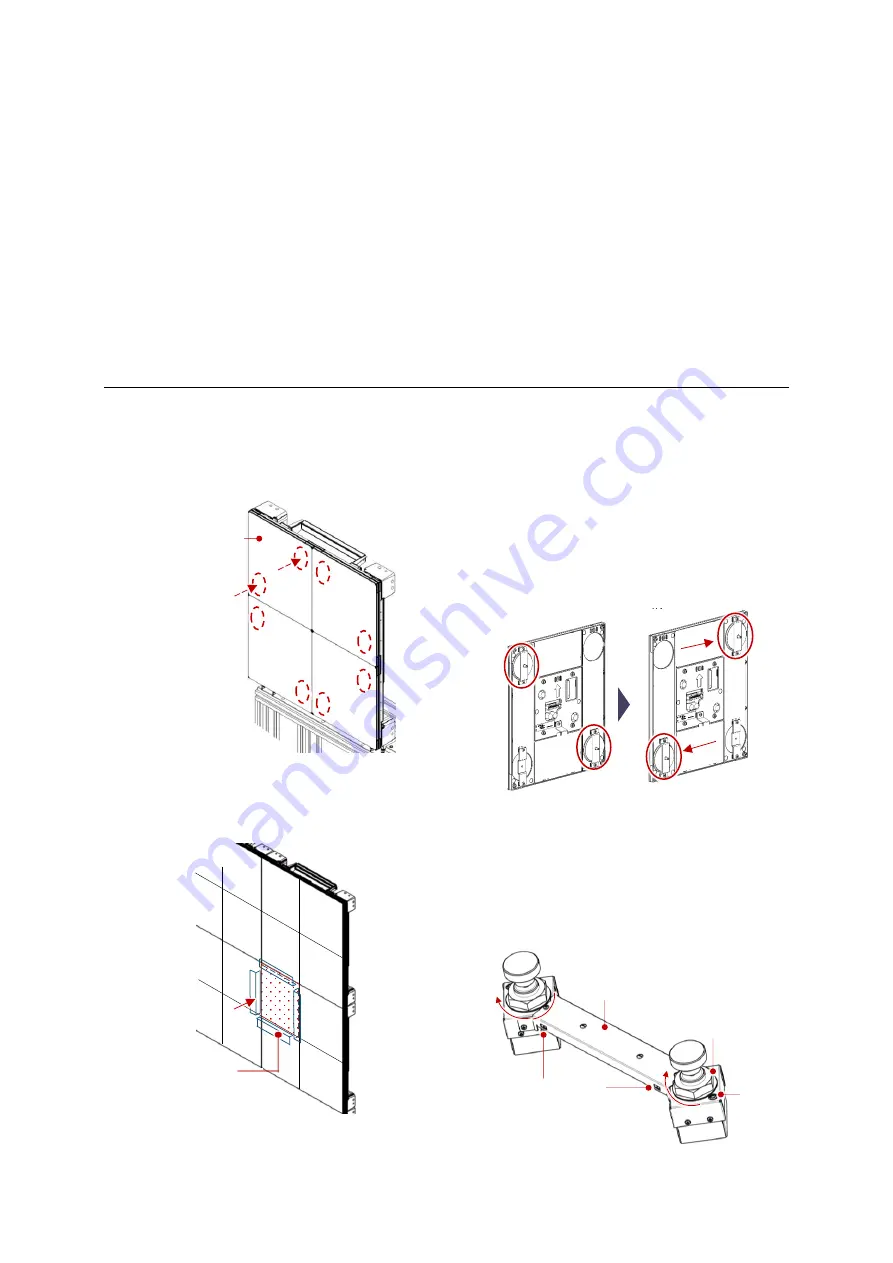
3.
Prior to attaching on the LED unit, rotate two
inner nuts clockwise till they stop. It moves the
magnetic plates away from the engagement
surface and the magnetic attraction will weaken.
Without that, the tool may impact the LED
surface by magnetic attraction at attaching.
Detachment tool
Inner nuts
Blue mark
Strap holes
4x LED modules
Screw position
Summary of Contents for 12NP180 Series
Page 50: ......


