40
NP180/160 Series Setup Manual
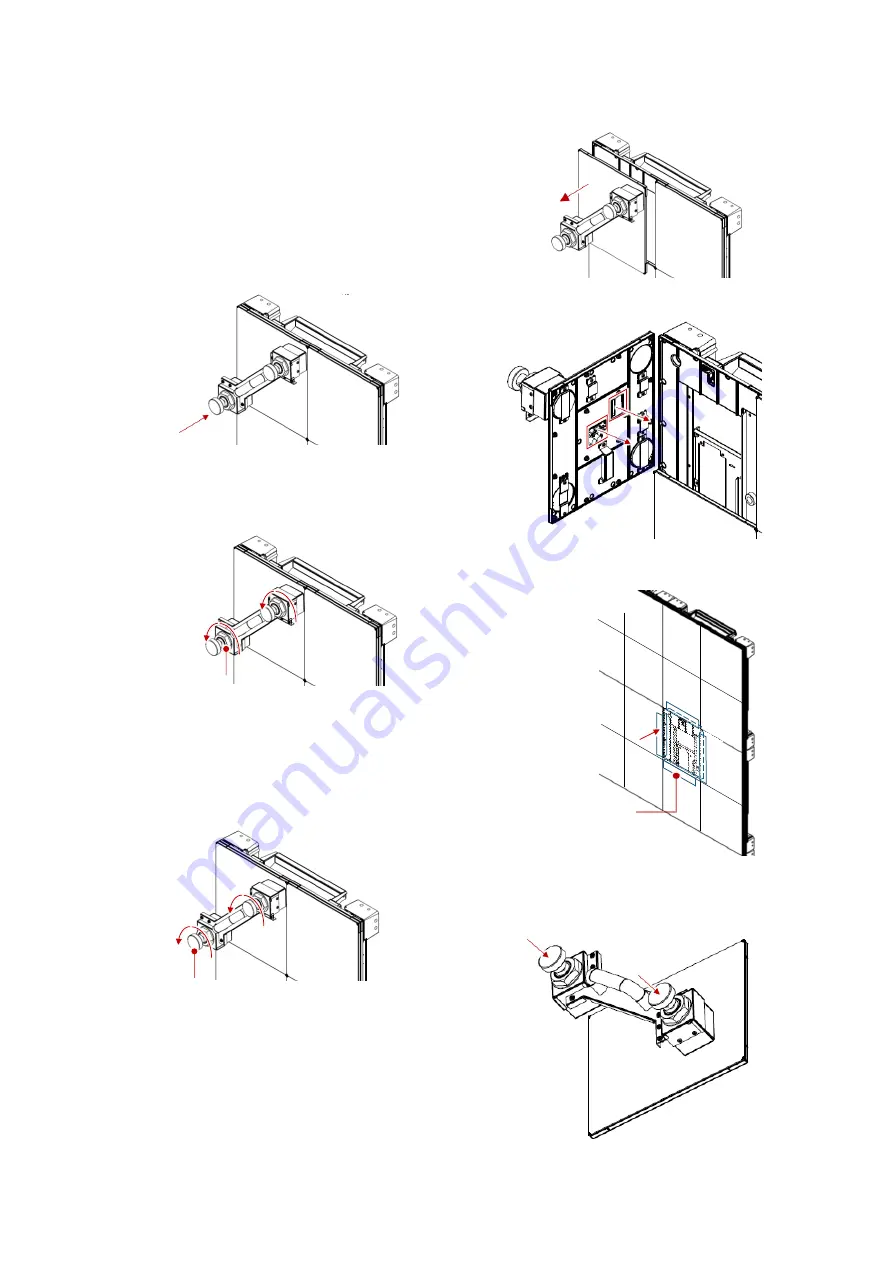
Detachment tool
The blue marks move up and down along with
the magnetic plates. The marks get visible as
the plates move away from the surface.
Take a measure not to drop the tool when
working in high places.
4.
Gently put the detachment tool on the LED
module to be removed, considering the
location of the 2 screws behind the module.
5.
Rotate the inner nuts anti-clockwise till they
stop. The tool will attach to the LED module by
magnetic attraction.
The magnetic plates don’t touch the LED
module directly and they don’t scratch the
surface of it.
6.
Rotate the outer knobs anti-clockwise, which
loosen the screws behind the module.
7.
Detach the module.
8.
Disconnect 2 connectors on the back of the
module.
9.
Leave the spacers as they will be used to attach
the new LED module as well.
10.
Prior to attaching a new module on the LED
unit, put the detachment tool on the module in
the same manner as the step 3 to 5.
Inner nuts
Outer knobs
4x spacers
Summary of Contents for 12NP180 Series
Page 50: ......


