Maintenance
45
9.
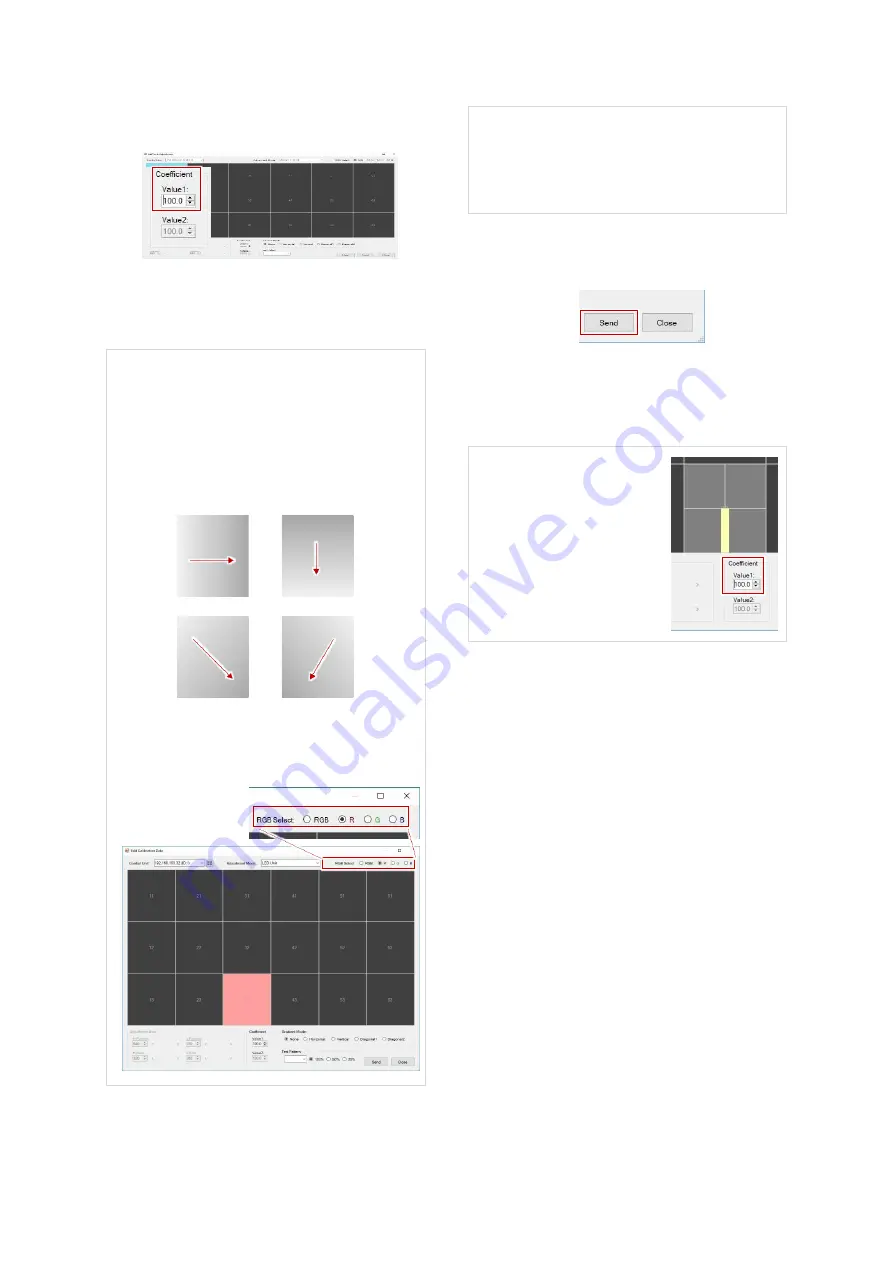
Change the brightness level with the
“Coefficient” menu.
The adjustment range is 80 % to 120 %.
The scroll wheel on a mouse changes the values
by 1.5 %.
The “Test pattern” menu located on the lower
right side of the “Coefficient” menu can show
internal test patterns. The “Test patterns” menu
in the menu bar (p. 38) also shows them.
In the “gradient mode” menu, you can set two
different brightness level in a module that
gradually shifts to the other end.
When you choose “R”, “G” or ”B” in the “RGB
select” menu, you can adjust the brightness on
each color.
Double-clicking an LED module / LED unit on
Wallaby shows a crosshatched pattern on the
actual display briefly so that you can check the
location where you’re adjusting (p. 27).
10.
Click the “Send” button on the bottom of the
window to reflect the result on the LEDs.
11.
Repeat the step till you get an appropriate
result.
You can modify multiple border values and the
“Send” button reflects all the result at a time.
When replaced an LED
module and a border on the
module looks brighter or
darker, you can compensate
the brightness. The step is the
same as the edge brightness
compensation (p. 26).
12.
Once
completed
all
the
necessary
compensation, save all the compensated
values in the control unit by following the
chapter “Color calibration memory saving”
(p. 28).
Value 1
Value 2
Value 1
Value 2
Horizontal
Vertical
Diagonal 1
Diagonal 2
Value 1
Value 2
Value 1
Value 2
Summary of Contents for 12NP180 Series
Page 50: ......


