4
2. Operation
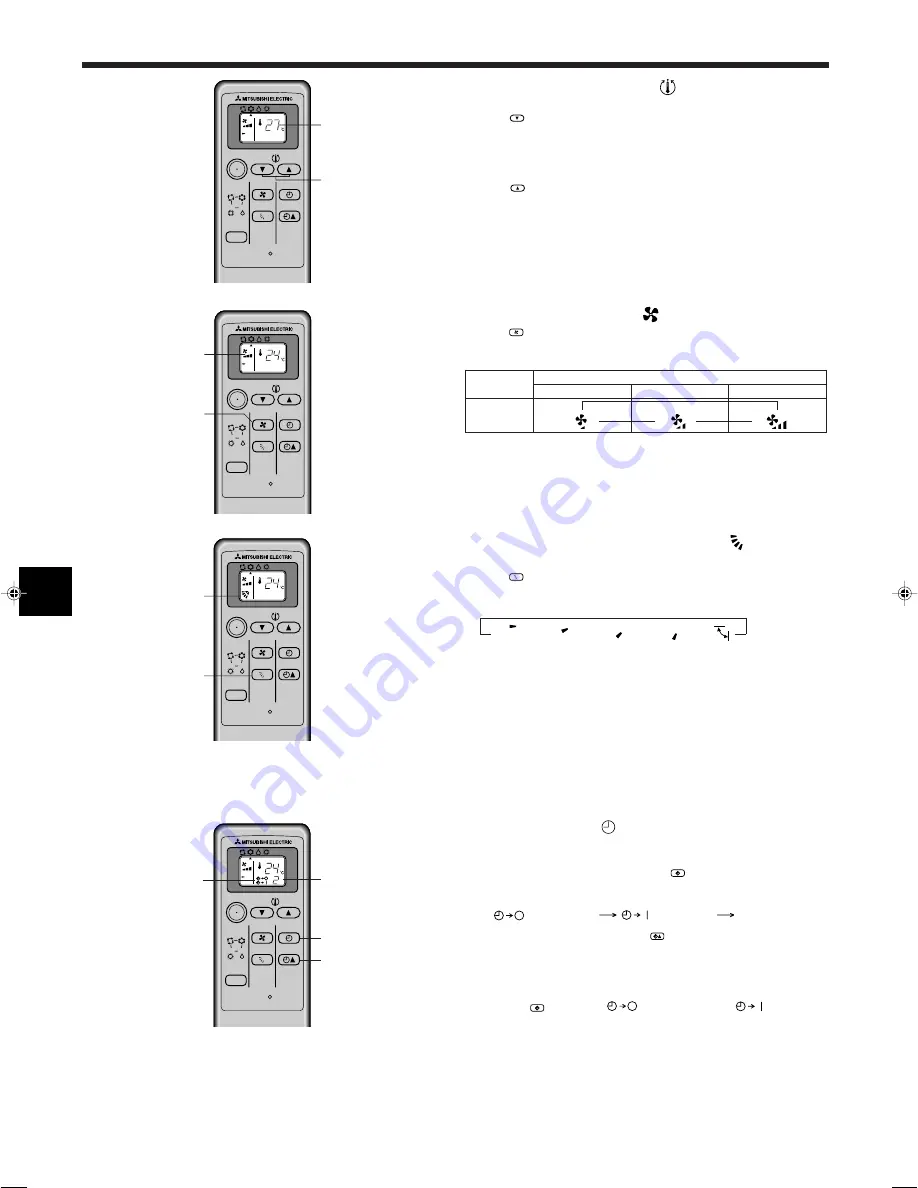
2.5. Selecting a temperature
s
s
s
s
s
To decrease the room temperature:
1
Press
TOO
WARM
button to set the desired temperature.
A
The selected temperature is displayed.
• Each time you press the button, the temperature value decreases by 1 °C.
s
s
s
s
s
To increase the room temperature:
1
Press
TOO
COOL
button to set the desired temperature.
A
The selected temperature is displayed.
• Each time you press the button, the temperature value increases by 1 °C.
• Available temperature ranges are as follows:
Cooling/Drying:
19 - 30 °C
Heating:
17 - 28 °C
Automatic:
19 - 28 °C
2.6. Selecting a fan speed
1
Press
FAN
button to select a desired fan speed.
• Each time you press the button, available options change with the dis-
play
A
on the remote controller, as shown below.
Fan speed
Remote controller display
Low
Medium
High
3-stage
In the following situations, the display differs from the fan speed of the unit.
• In the case of DEFROST/STAND BY lamp lighting of the unit.
• Just after the heating mode (while waiting to change to another mode).
• When the temperature of the room is higher than the temperature set-
ting of the unit operating in the heating mode.
• In drying mode, the indoor fan sometimes stops.
2.7. Adjusting vertical airflow direction
The vertical air vane helps select the vertical direction of the airflow.
1
Press
VANE
button to select the vertical airflow direction.
A
Each time you press the button, the option changes are displayed on
the remote controller, as shown below.
1
→
2
→
3
→
4
→
5
1
Horizontal airfrow 30°
4
Downword airfrow 70°
2
Downword airfrow 45°
5
Swing
3
Downword airfrow 55°
• In either cooling or drying mode, if you select
2
or
3
or
4
when the fan
speed is Low or Medium, the airconditioner will switch automatically to
Horizontal airflow
1
mode after one hour.
In the following situations, the display differs from the vertical airflow direc-
tion of the unit.
• In the case of DEFROST/STAND BY lamp lighting of the unit.
• When the temperature of the room is higher than the temperature set-
ting of the unit operating in the heating mode.
2.8. Using the timer
It is convenient to set the timer when you go to bed, when you get home,
when you get up, etc.
1
Select the timer mode by pressing the
SELECT
button during operation.
A
Each time this button is pressed, the timer mode is changed in se-
quence:
(OFF TIMER)
(ON TIMER)
TIMER RELEASE
2
Set the time of the timer using the
TIME
button.
B
Each time this button is pressed, the set time increases by 1 hour to
12 hours.
To release the timer:
• Press the
SELECT
button until
(OFF TIMER) and
(ON TIMER)
are not displayed.
Note:
The OFF TIMER and the ON TIMER cannot be set at the same time.
▼
▼
▼
ON/OFF
RESET
TOO
WARM
TOO
COOL
MODE
AUTO COOL
DRY
HEAT
FAN
VANE
SELECT
TIME
1
A
For SLZ-A09/A12/A18AR
ON/OFF
RESET
TOO
WARM
TOO
COOL
MODE
AUTO COOL
DRY
HEAT
FAN
VANE
SELECT
TIME
1
A
ON/OFF
RESET
TOO
WARM
TOO
COOL
MODE
AUTO COOL
DRY
HEAT
FAN
VANE
SELECT
TIME
1
A
For SLZ-A09/A12/A18AR
For SLZ-A09/A12/A18AR
ON/OFF
RESET
TOO
WARM
TOO
COOL
MODE
AUTO COOL
DRY
HEAT
FAN
VANE
SELECT
TIME
h
1
B
A
2
s
For SLZ-A09/A12/A18AR


