background image


PCKN-OIL738 

32

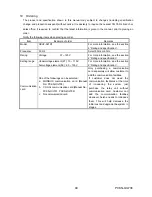
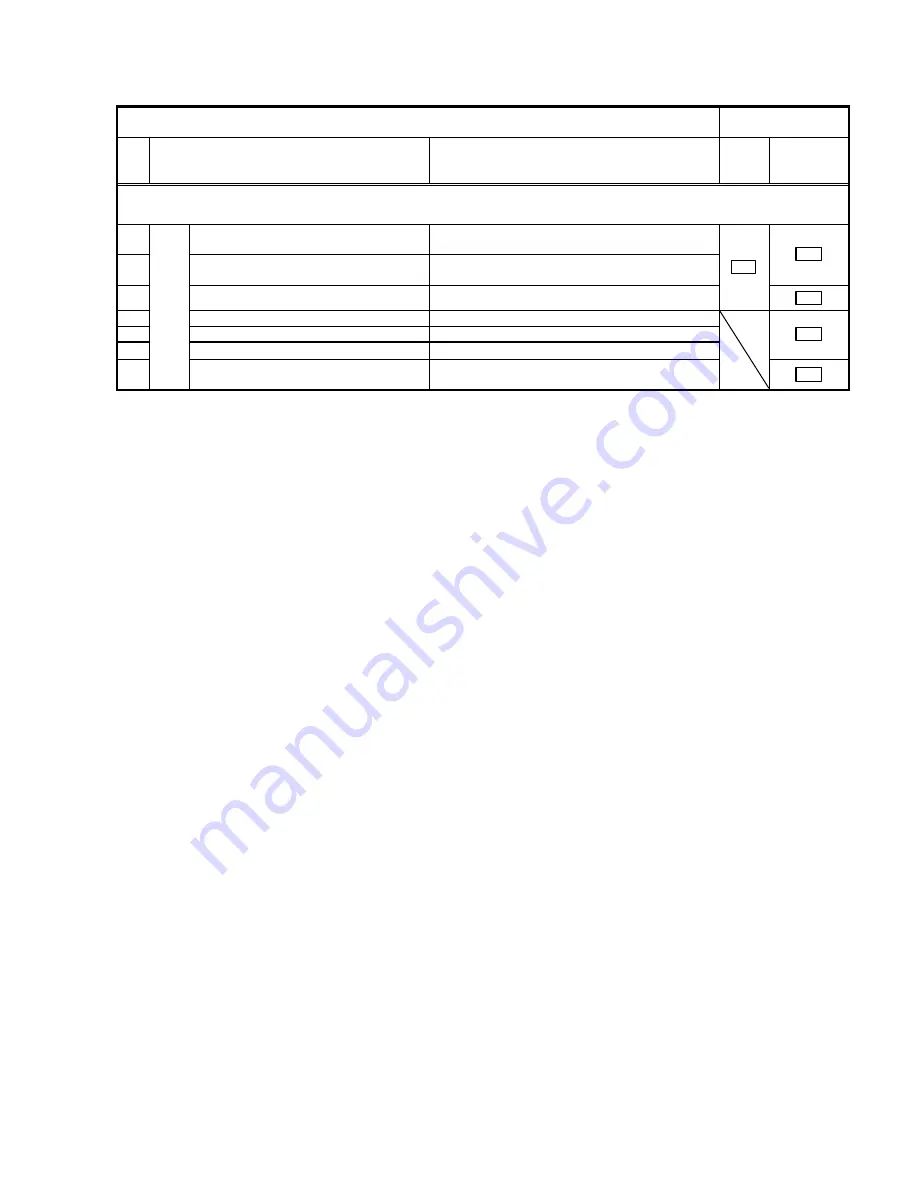
6.4.2.2    Relay with RS232C communication I/F 

Item 

Corresponding section of 

general operation manual 

No. Designation 

Description 

Indication 

mode 

Setting / forced 

operation / 

option mode 

As the same as Table 6.3 described in item 6.4.2.1 about the No. 010

860. 

901 

VT primary side [V] 

Set the VT primary voltage of the voltage circuit 
connected to the relay. 

902 

VT secondary side [V] 

Set the VT secondary voltage of the voltage circuit 
connected to the relay. 

D-3  

903 

Relay password enable/disable option 

Set relay password enable or disable for setting. 

A-7

D-9  

904 

Max. record reset 

Clear data of the max. record. 

905 

Fault record reset 

Clear data of the fault record. 

906 

Self-diagnosis

 (ALARM) reset 

Clear data of the s

elf-diagnosis

 record. 

D-4  

907 


LED lamp test 

Carry out forced illumination of all the LED lamps 
on the front of the relay unit. 


D-5  

Summary of Contents for CBV2-A01D1

Page 1: ...KN 0IL738 A 1 MITSUBISHI ELECTRIC Mitsubishi Digital Protection Relay MELPRO TM D Series CBV2 A01D1 VOLTAGE RELAY INSTRUCTION MANUAL MITSUBISHI ELECTRIC CORPORATION Changed Jan 2005 Changes for the Better ...

Page 2: ... Operation Manual PCKN OIL750 When the protection relay is used together with a communication card use the following documents too For CC Link Title of document Document No MELPRO D Series Protection Relay CC COM Communication Card CC Link Operation Manual General information PCKN OIL751 MELPRO D Series Protection Relay CC COM Communication Card CC Link Operation Manual Model specific information ...

Page 3: ...10 4 2 Measurement 13 4 3 Self diagnosis 14 4 4 Communication 15 5 Configuration 17 5 1 Internal configuration 17 5 2 External connection 20 6 Handling 25 6 1 Unpacking 25 6 2 Transportation and storage 25 6 3 Appearance and how to pull sub unit out 25 6 4 How to use front control panel 28 7 Mounting 35 7 1 Mounting dimension 35 7 2 Standard operating environment 35 8 Test 36 8 1 Appearance inspec...

Page 4: ... etc can be performed from a remote location In consideration of future network system variations and compatibility with communication networks communication features are mounted in the relay using a replaceable card 3 Measurement Recording Functions Real time monitor of relay input data The relay can measure steady state relay input values supporting energy management Fault Data Monitor When a fa...

Page 5: ...re adopted as draw out unit mechanisms with automatic CT shorting at drawing thereby making maintenance easy 9 Easy wiring check It is possible to carry out forced operation of the output contacts individually This will allow an easy wiring check ...

Page 6: ...0A 0 5 s L R 0 s Break 110VDC 0 3A L R 40 ms 220VDC 0 15A L R 40 ms For trip Carry 1 5 A continuously Make and Break 500 VA cosφ 0 4 60W L R 0 007 s Max current 5 A Output contacts Capacity For signaling and self diagnosis output Max voltage 380VAC 125VDC Voltage circuit 1 VA or less with rated current Zero phase voltage circuit 0 15 VA or less with rated current Burden Auxiliary power supply circ...

Page 7: ...elay input value VT primary setting VT secondary setting Range 22 0 00 VT primary setting VT secondary setting 165 V Real time Update Approx 200 ms Conversion Indication value Relay input value VT primary setting VT secondary setting Max record Range 22 0 00 VT primary setting VT secondary setting 165 V Conversion Indication value Relay input value VT primary setting VT secondary setting Display V...

Page 8: ...t Common conditions Operation value 95 or more Undervoltage element Rated voltage Æ Setting 70 For setting of INST 40ms or less For setting of 0 4s or less Setting value 25ms For setting of 0 5s or more Setting value 5 Operation time Overvoltage element 0 Æ Setting 120 For setting of INST 50ms or less For setting of 0 4s or less Setting value 25ms For setting of 0 5s or more Setting value 5 Underv...

Page 9: ...each independent circuit being connected together 2 Between independent circuits the terminals of each independent circuit being connected together IEC60255 5 Common mode 2 5kV peak 1MHz with 200Ω source impedance for 2s Between independent circuits and between independent circuit and earth High frequency disturbance test Differential mode 1 0kV peak 1MHz with 200Ω source impedance for 2s Across t...

Page 10: ...AB phase VBC VCA CA phase processing Same as processing in AB phase Figure 4 1 Undervoltage element internal function diagram 4 1 2 Overvoltage elements Fig 4 2 Overvoltage element internal function block diagram shows operation of the overvoltage elements Overvoltage element compares input voltages of voltage circuit with the operation setting If an input voltage is larger than the specified oper...

Page 11: ...e corresponding operation indicator LED will blink to allow you check the starting value The LED lamp will come on as soon as an operation output is made when a period of operation time has elapsed The operation indicator LED has been set to self hold in the factory This setting can be freely changed to auto reset With the self hold setting data of the latest operation indication will be stored in...

Page 12: ...d to self hold X0 X5 X3 X4 I I I I Signaling 4 circuits Trip 2 circuits Set output logic as desired by using OR logic Figure 4 3 Schematic image of Programmable Outputs example COC4 A01 5 Forced operation It is possible to carry out forced operation of any of the signaling outputs X0 to X3 and trip outputs X4 and X5 independently Forced operation is useful for checking the wiring When forced opera...

Page 13: ... fault record reset operation however both of the data items will be all cleared Records older than the 5th phenomenon will automatically be cleared Item No History Sequence of recording 211 1st phenomena 212 2nd phenomena 213 3rd phenomena 214 4th phenomena 215 5th phenomena Latest fault record data Oldest fault record data The following fault waveform data can be collected if a communication car...

Page 14: ...ET ALARM operation was made are accumulated in the memory To clear the record data carry out self diagnosis reset RESET ALARM operation Table 4 1 Output for protection relay failures Output Display Status Detected items RUN Defect code ALARM break contact Operation output lock Normal On Open Not locked Power circuit failure Locked CPU failure No display Not locked ROM check 0001 RAM check 0002 A D...

Page 15: ...as well as remote operation such as change of settings Thereby efficient operation and maintenance are realized ModBus RS485 CC Link RTU Remote Operation and Monitoring By connecting PC with relay via the RS232C port located on the relay panel local operation and monitoring are enabled as same as the remote operation and monitoring Thereby the maintenance work at site is strongly supported RS232C ...

Page 16: ... the result of self diagnosis Operation element Read the elements that operated at the time of trip Operation time Read the time at the time of trip Current time Read the internal time of the communication card Remote Monitoring RTU Protection relay Waveform record Read the wave form at the time of trip Setting Change the setting of the protection relay Indicator reset Reset the LED lamp that came...

Page 17: ...e signals are converted to digital signals sequentially in the converter to be sent to the CPU The setting circuit is used to input setting data into the CPU These inputs will be used to carry out the functions shown in Fig 5 2 Internal function block diagram and then issue output signals to the display and output relay 2 Self diagnosis circuit When the self diagnosis function detects that the ele...

Page 18: ...upply A 03 Y X5 B 19 B 20 X4 B 17 B 18 Trip contacts Programmable output B 07 B 08 X0 B 09 B 10 X1 B 11 B 12 X2 B 13 B 14 X3 Signaling Self diagnosis output Y Self diagnosis output B 05 B 06 Serial communication bus DA B 01 DB B 02 DG B 03 SLD B 04 E A 02 Run indication Self diagnosis Except comm card Communication card Self diagnosis only comm card Reception circuit Transmission circuit MPX CPU O...

Page 19: ...01 DB B 02 DG B 03 SLD B 04 E A 02 Run indication Communication indication Auxiliary power supply AC DC DC DC Power sourse Communication card Self diagnosis only comm card Reception circuit Transmission circuit Serial communication bus Self diagnosis output Programmable output U Overvoltage element A 09 VBC A 10 A 11 VCA A 12 Undervoltage Undervoltage Undervoltage Overvoltage Overvoltage Overvolta...

Page 20: ... use an AC DC converter of CPS1 type manufactured by TM T D or uninterruptible power source UPS that is commercially available d Inrush current of auxiliary supply Since inrush current may flow in the relay when the auxiliary power supply is turned on as shown in the figure below make consideration of this point when selecting the breaker for the auxiliary power supply circuit Input voltage Inrush...

Page 21: ...use burns Therefore connect the timer to the external wiring See Fig 5 6 DC circuit connection diagram g Earth circuit Be sure to earth the earth terminal located on the back of the relay according to the Class D earth wiring method ...

Page 22: ...ammable output U Figure 5 4 External connection diagram for CBV2 A01D1 relay Phase to phase voltage detection E DA DB SLD DG B 06 B 05 B 07 B 08 B 09 B 10 B 11 B 12 B 13 B 14 B 17 B 18 B 19 B 20 B 01 B 02 B 03 B 04 A 02 A 01 A 03 Y X0 X1 X3 X4 X5 X2 Auxiliary power supply Serial communication bus Comm card A 07 A 08 A 09 A 10 A 11 A 12 A B C VC VT VA VB U Self diagnosis output Signaling Trip Progr...

Page 23: ... contact will allow the relay to continue automatic self check even after the built in power fuse burns Therefore the break contact is closed when the power is applied and will be opened after about 50ms If the auxiliary power supply of the relay and the self diagnosis output contact shares a same power source the break contact will be closed temporarily after the auxiliary power supply is turned ...

Page 24: ...L738 24 02 04 06 08 10 12 01 03 05 07 09 11 02 04 06 08 10 12 14 16 18 20 01 03 05 07 09 11 13 15 17 19 A B Auxiliary power supply Earth circuit ED 32 M3 5 screws Figure 5 6 Rear view of type CBV2 A01D1 relay ...

Page 25: ... be deformed or broken 6 3 Appearance and how to pull sub unit out The relay is so constructed that the sub unit can be drawn out in order to facilitate inspection or test It is possible to pull the sub unit out without disconnecting the external wiring Note that the sub unit should not be drawn out with the line hot Before drawing out be sure to take the following actions Lock the tripping circui...

Page 26: ...your thumbs to pull the sub unit towards you Note The sub unit is so designed that it can not be removed unless it is pulled out with a relatively strong force in consideration of quake proof measures When the relay unit is to be removed independently it is recommended to draw it out with the case held by other operator When about a half portion of the sub unit is pulled out of the case just stop ...

Page 27: ...nit into the case until you hear a click while pressing the handles located on both sides of the front of the sub unit Note Please note that inserting the sub unit incompletely may only establish a poor contact of the terminals located on the back of the unit which may cause operational failure or heating 2 Attaching the cover Fit the cover straight to the case Hold the cover frame to fully push t...

Page 28: ...R SERIAL RATING Aux V STYLE VOLTAGE RELAY CBV2 A01D1 RESET TRIP OPERATION INDICATOR VT SECONDARY V 02 03 04 RESET MAX REC 05 RESET 06 RESET ALARM TEST LED VT PRIMARY V 60 50 00 OPTION REF MANUAL OP IND HOLD 01 9 8 REF MANUAL CONT X0 X5 OP 13 UV TEST UV TEST UCA UC CA PHASE BC PHASE AB PHASE U 1 Setting Cancel switch 16 Operation indicator LEDs 7 Operation Indicator Reset switch 6 Indication Indica...

Page 29: ...f settings and measurements With the cover operating button you can use the switch without removing the cover 7 Operational key switches Reset RESET Pressing this switch will reset output contacts after the relay operated and extinguish the operation indicator LEDs With the cover operating button you can use the switch without removing the cover 8 Item No Green A number allocated to the selected s...

Page 30: ... of item data indicator LEDs Item Item Designation Letters Display in item data box Designation Letters Display in item data box On ON USE OFF Off OFF AB phase AB Yes YES BC phase BC No NO UV Test CA phase CA Operation lock LOCK Instantaneou s INST ...

Page 31: ...ion is detected by the self diagnosis A 6 511 Operation voltage V 512 Operation time s 513 Undervoltage UV TEST 521 Operation voltage V 522 Setting Overvoltage Operation time s Set and display settings A 7 B 1 700 Contact X0 operation 710 Contact X1 operation 720 Contact X2 operation 730 Contact X3 operation 740 Contact X4 operation 750 Forced operation Contact X5 operation Carry out forced operat...

Page 32: ... voltage circuit connected to the relay 902 VT secondary side V Set the VT secondary voltage of the voltage circuit connected to the relay D 3 903 Relay password enable disable option Set relay password enable or disable for setting A 7 D 9 904 Max record reset Clear data of the max record 905 Fault record reset Clear data of the fault record 906 Self diagnosis ALARM reset Clear data of the self d...

Page 33: ...ot used X 0 0 0 0 0 0 0 0 0 ditto ditto 0 Contact arrangement data 0 Conversion from binary number to hexadecimal Binary Æ Hexadecimal Binary Æ Hexadecimal Binary Æ Hexadecimal 0 0 0 0 Æ 0 0 1 1 0 Æ 6 1 1 0 0 Æ C 0 0 0 1 Æ 1 0 1 1 1 Æ 7 1 1 0 1 Æ D 0 0 1 0 Æ 2 1 0 0 0 Æ 8 1 1 1 0 Æ E 0 0 1 1 Æ 3 1 0 0 1 Æ 9 1 1 1 1 Æ F 0 1 0 0 Æ 4 1 0 1 0 Æ A 0 1 0 1 Æ 5 1 0 1 1 Æ B ditto When the product is shipp...

Page 34: ...ge CA phase Reset Hold 8 Not used X 9 Not used X 10 Not used X 11 Not used X 12 Not used X 13 Not used X 14 Not used X 15 Not used X 0 0 0 0 0 0 0 0 0 ditto ditto 0 Operation indicator LED hold data 0 Conversion from binary number to hexadecimal Binary Æ Hexadecimal Binary Æ Hexadecimal Binary Æ Hexadecimal 0 0 0 0 Æ 0 0 1 1 0 Æ 6 1 1 0 0 Æ C 0 0 0 1 Æ 1 0 1 1 1 Æ 7 1 1 0 1 Æ D 0 0 1 0 Æ 2 1 0 0 0...

Page 35: ... Figure 7 1 Outside dimension drilling drawing 7 2 Standard operating environment Install the relay in the environment described in section 3 3 Common technical data In addition the following conditions should be kept Abnormal vibration shock inclination or magnetic field should be avoided Harmful smoke or gas salt gas excessive humidity water drop or vapor excessive dust or fine powder rain and w...

Page 36: ... of the printed card due to overheated parts 2 Contact between the printed card and connector Unit Mechanism 1 Deformation 2 Operation of the operating key switches 3 Damage of the draw out lever of the sub unit 4 Discoloring and deformation of the name plate on the front panel 5 Damage of the terminal section Case cover 1 Damage of the cover 2 Stain of the cover 3 Clouding of the cover 4 Damage o...

Page 37: ...tion setting first carry out a test at Characteristic control point at the time when the relay is received or put in service to determine the acceptance rejection Thereafter perform another test at each control point so that the data obtained can be used for future reference 3 Changing setting Change the setting according to the section 6 Handling 4 Operation judgment Determine the operation curre...

Page 38: ...7 A 08 BC phase A 09 A 10 CA phase A 11 A 12 Show the Ex AB phase 2 Test items and characteristic control point a Forced operation test See Front control panel operational procedure in the section 6 Handling b Operation value test See Operation and reset values in the 3 Characteristic c Operation time test See Operation time in the 3 Characteristic d Reset time test See Reset time in the 3 Charact...

Page 39: ...on chips have invaded into the unit Check that the cover is not clouded notably Check that abnormal noise is not generated Check that the RUN LED lamp is lit 9 2 Periodical inspection It is recommended to carry out periodic inspections to check the relay for proper function For periodical inspections perform the appearance inspection and characteristic test in accordance with the section 8 Test ...

Page 40: ...he section 2 Rating and specification Setting range Undervoltage element 27 10 110V 0vervoltage element 59 60 155V For more information see the section 2 Rating and specification Communication card One of the followings can be selected a MODBUS communication card Manual No PCKN OIL703 b CC Link communication card Manual No PCKN OIL751 PCKN OIL752 c No communication card Only purchasing a communica...

Reviews: