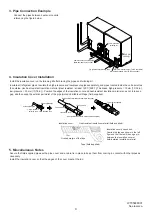
Downslope
Upward slope
To BC controller
To BC controller
High-pressure twinning pipe
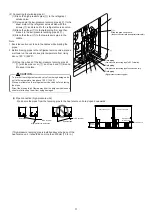
· If high-pressure twinning pipe is installed above the base of the
heat source unit, it should be no more than 200mm [7-7/8 in.].
200mm
[7-7/8 in.]
max.
High-pressure
twinning pipe
To indoor unit
Heat source unit 1
Heat source unit 2
(6) Pipe connection (high-pressure side)
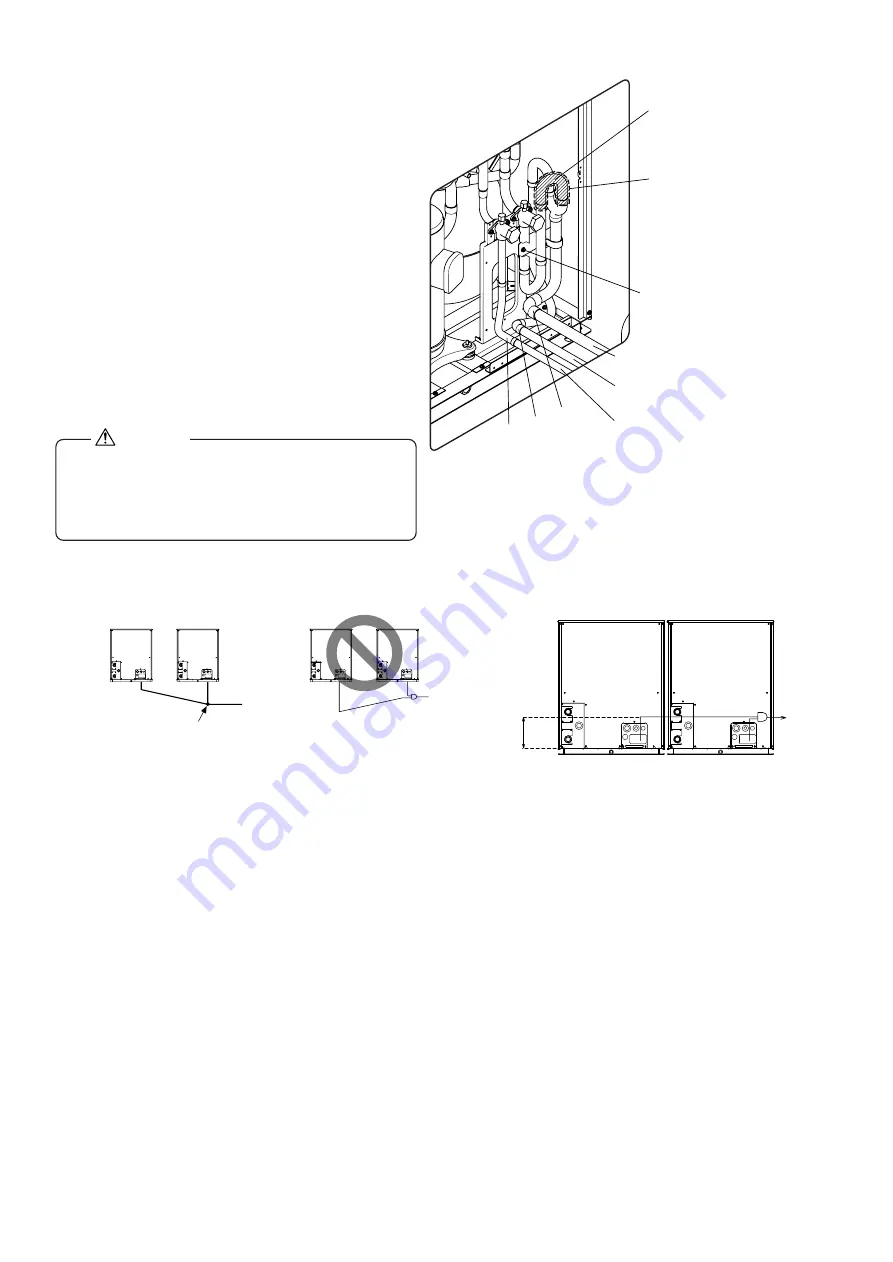
· Make sure the pipes from the twinning pipe to the heat source unit are sloped downwards.
3
Field piping
(Low-pressure connecting pipe:To BC Controller)
Field piping
(Low-pressure connecting pipe:To heat source unit)
Field piping
(High-pressure connecting pipe)
1
7C
Wrap the pipe cover here.
(Keep out of contact with the adjacent sheet metal.)
3
5
4
6
· To prevent the refrigerant service valve from being damaged, do
not let its temperature rise above 120 ˚C [248˚F].
Place a wet towel on the refrigerant service valve before brazing
the pipes.
· Direct the blazing torch flame away from the adjacent cables and
sheet metal to keep them from being damaged.
CAUTION
(2) Connecting the twinning pipe kit
(1) Braze the high-pressure pipe (
6
) to the refrigerant
service valve.
(2) Screw down the low-pressure twinning pipe kit (
1
) to the
sheet metal of the refrigerant service valve with the
screws (
3
), and braze it to the refrigerant service valve.
(3) Braze the elbow (
5
) to the field-piping first, and then
braze it to the low-pressure twinning pipe kit (
1
).
(4) Braze the elbow (
4
) to the low-pressure pipe in the
middle.
Note
1. Exercise caution not to burn the cables while brazing the
pipes.
2. Before brazing pipes to the refrigerant service valve, place a
wet towel on the valve to keep its temperature from rising
above 120 ˚C [248˚F].
(5) Wrap the u-bend of the low-pressure twinning pipe kit
(
1
) with the pipe cover (
7
), and tie a band (
C
) around
it to keep it in place.


