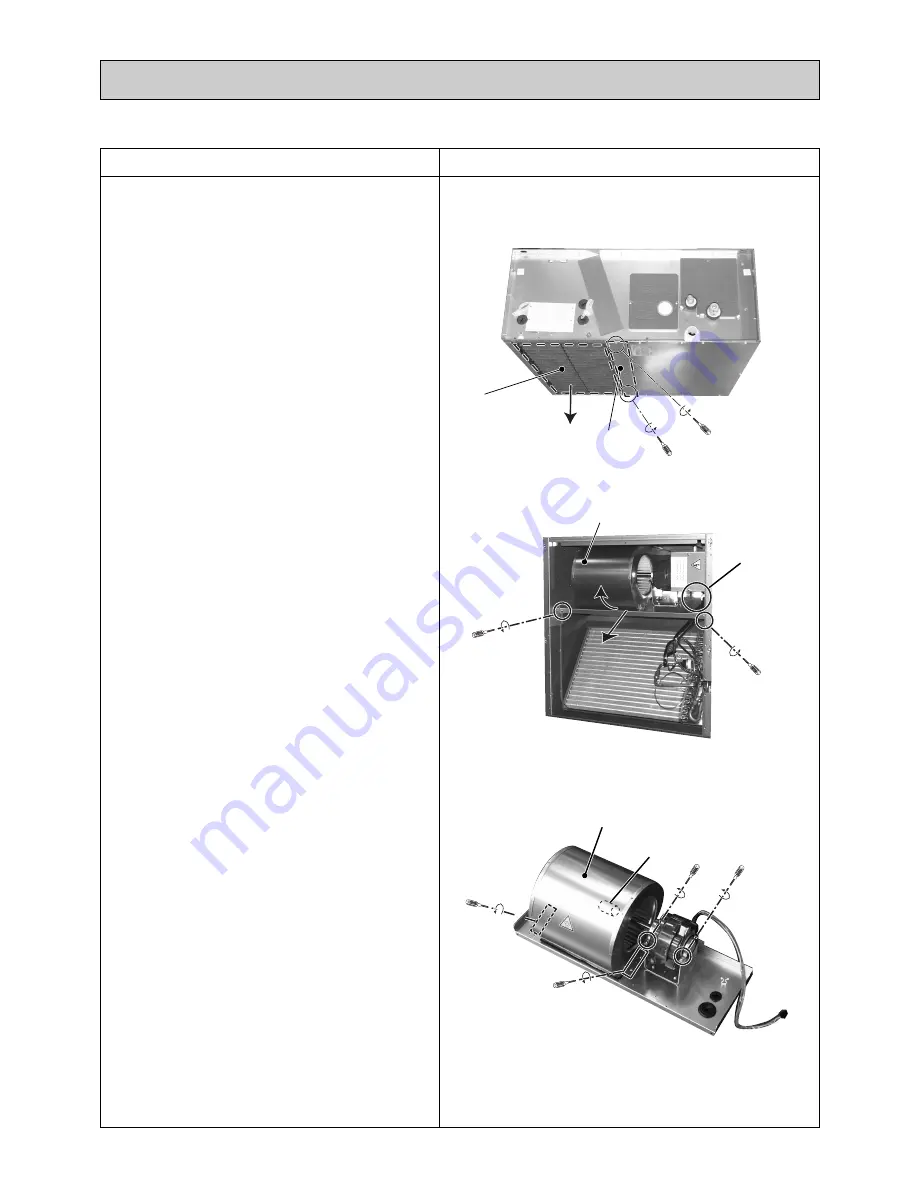
(M)
(N)
(R)
fan motor shaft
fixing screw
Fig.1
Fig.2
Fig.3
1
2
2
3
3
(P)
(Q)
22
OPERATING PROCEDURE
PHOTOS
8-6 FAN and FAN MOTOR
1.Removing the filter
(1)Press the tabs of the filter and remove the filter in
the direction of the arrow
1
.
2.Removing the control box with procedure 8-1
3.Removing the bottom plate
(1)Remove the fixing screws (two) of the bottom
plate(N) and remove the plate.
4.Removing the cable
(1)Remove the cable(P) threw the rubber bush.
5.Sliding the fan section
(1)Remove the fixing screws(two) of the fan base
plate.
(2)Pull up the fan section(Q) in direction of the arrow
2
and slide the direction of the arrow
3
.
6.Removing fan casing and sirroco fan
(1)Remove the fixing screws (four) of the fan cas-
ing(R).
(2)Remove the fan motor shaft fixing screw and
remove the fan casing(R) and sirroco fan.
7.Removing the fan motor
(1)Remove the condensor cable
(in case of Model:PDFY-P100,125VM)
(2)Remove the fixing screws of the motor fixtures
(two) and remove the motor.
Notice:Incase of the Model(PDFY-P40~125VM) stick
out the motor shafts on both side of the motor.


