17
8
DISASSEMBLY PROCEDURE
OPERATING PROCEDURE
PHOTOS
Models 40~140
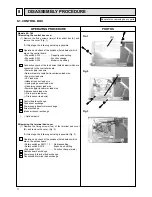
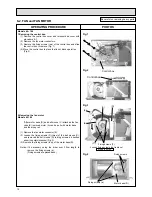
1.Removing the control box cover
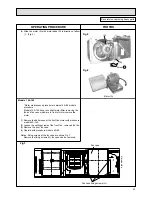
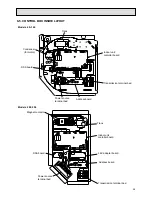
(1) Remove the fixing screws (two) of the control box (A), and
remove the cover. (Fig. 1)
*At this stage, the following servicing is possible.
1 Operation and check of the switches (listed below) which
are on the control board.
• Dip switch SW2 · · · · · · · · · · ·Capacity code setting
• Dip switch SW3 · · · · · · · · · · ·Function change
• Dip switch SW4 · · · · · · · · · · ·Model code setting
2 Connection check of the lead wires (listed below) which are
connected to the controller board.
• Power supply lead wire.
• Network remote contoller transmission lead wire.
• Fan motor lead wire.
• LEV lead wire
• Intake air sensor lead wire
• Liquid piping sensor lead wire
• Gas piping sensor lead wire
• Power supply transformer lead wire
Address board lead wire
(• Drain pump lead wire)
(• Drain sensor lead wire)
3 Control board exchange
4 Condenser exchange
5 Power supply transformer exchange
6 Arrest exchange
7 Intake air sensor exchange
( ):Optional parts
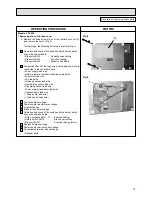
2.Removing the terminal bed cover
(1) Remove the fixing screws (two) of the terminal bed cover
(B), and remove the cover. (Fig. 2)
*At this stage, the following servicing is possible.(Fig. 3)
1 Operation and check of the switches (listed below) which
are on the adress board.
• Rotary switches SW11, 12 · · · Address setting
• Rotary switch SW14 · · · · · · · · ·Branch port setting
• Dip switch SW1 · · · · · · · · · · · · ·Function change (main)
2 Address board exchange
3 Power supply terminal bed exchange
4 Transmission terminal bed exchange
8-1. CONTROL BOX
Be careful on removing heavy parts.
Fig.1
Fig.2
Fig.3
(A)
(B)

