21
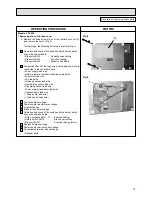
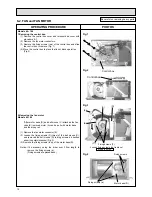
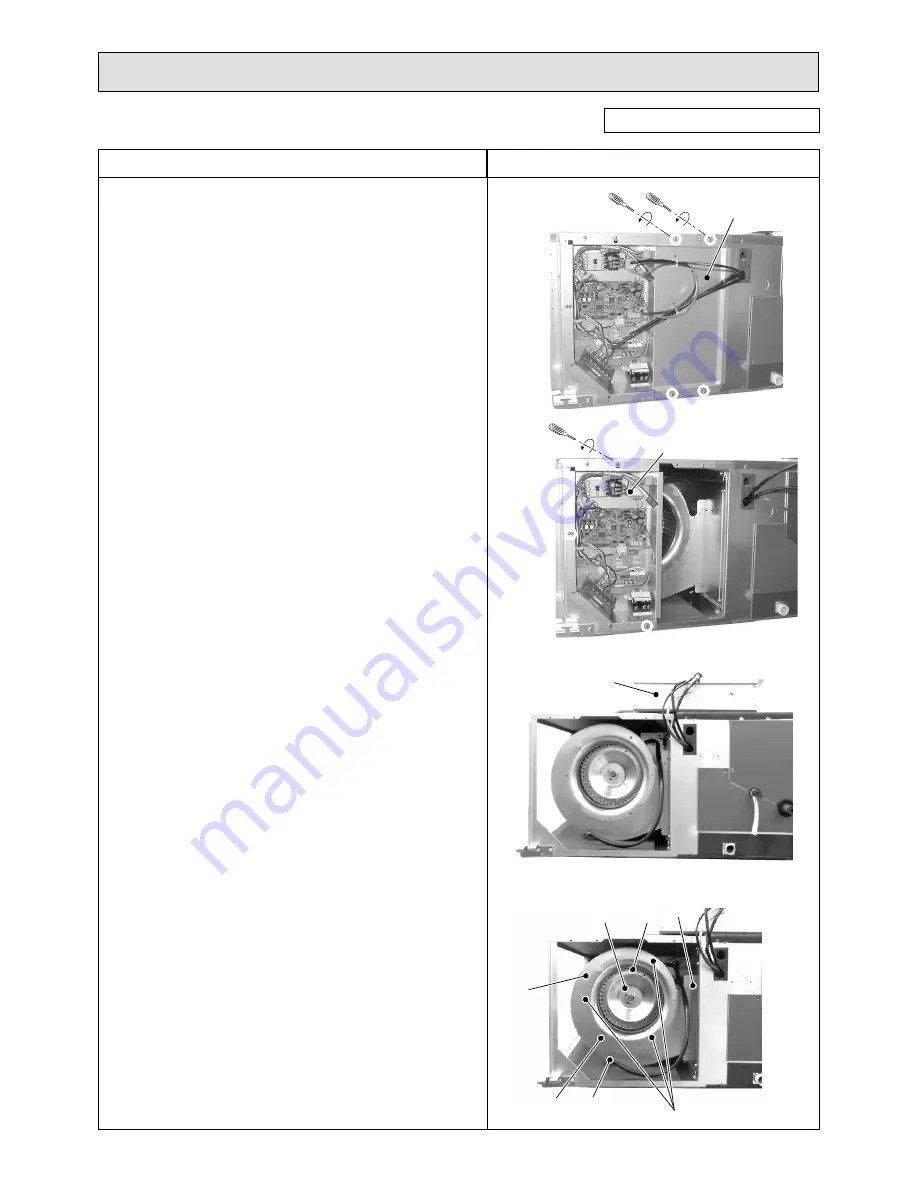
Fig.7
Fig.8
Fig.9
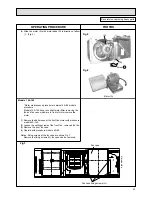
Fig.10
OPERATING PROCEDURE
PHOTOS
Models 200·250
1.Removing the control box.
(1) Remove the control box cover1 with procedure 8-1.
(2) Remove the fixing screws (four) of the control cover 2, and
remove the control cover2. (Fig. 7)
(3) Remove the fan motor connectors.
(4) Remove the fixing screws (three) of the control box and
remove the control box (Fig. 8)
(5) Move the control box to place that is not block operation.
(Fig. 9)
2.Removing the fan motor
*After the fan (A) ,the fan case (B) and the bell mouse (C)
removed, motor can be pull with motor base and inner fan
along rail.
(1) Remove the fixing screws (three) of the bell mouse (C), and
remove the bell mouse (C). (Fig. 3)
(2) Loosen the setting screws (G) of the front fan , removed the
fan.(Fig. 10)
Be careful on removing heavy parts.
Control box
cover 2
Control box
Control box
(A)
(E)
(B)
(C)
(D)
Fixing screws (F)
(G)

