


Summary of Contents for CITY MULTI PFFY-P20VCM-E
Page 1: ......
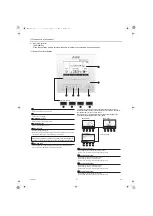
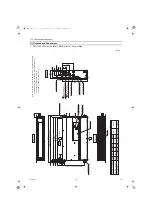
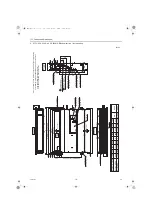
Page 5: ...HWE18160 GB HWE18160 book 2 ページ 2019年2月18日 月曜日 午前9時59分 ...
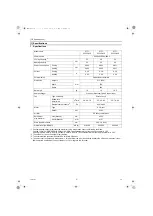
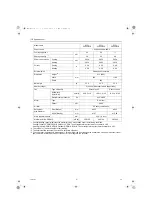
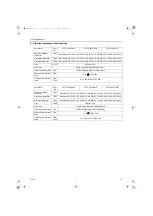
Page 39: ......
The Mitsubishi Electric CITY MULTI PFFY-P20VCM-E is a high-quality air conditioning system designed for both residential and commercial spaces. Ensure a seamless installation with the comprehensive Installation Manual, available for free download at 88.208.23.73:8080. This user-friendly manual provides step-by-step instructions and valuable insights for optimal use of the product.
Page 1: ......
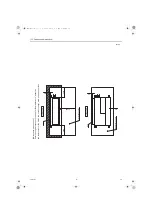
Page 5: ...HWE18160 GB HWE18160 book 2 ページ 2019年2月18日 月曜日 午前9時59分 ...
Page 39: ......


