2
ON/OFF
TEMP
FAN
VANE
TEST RUN
AUTO STOP
AUTO START
h
min
LOUVER
MODE
CHECK
RESET
SET
CLOCK
MODEL SELECT
NOT AVAILABLE
CHECK TEST RUN
°C
AMPM
AMPM
°F
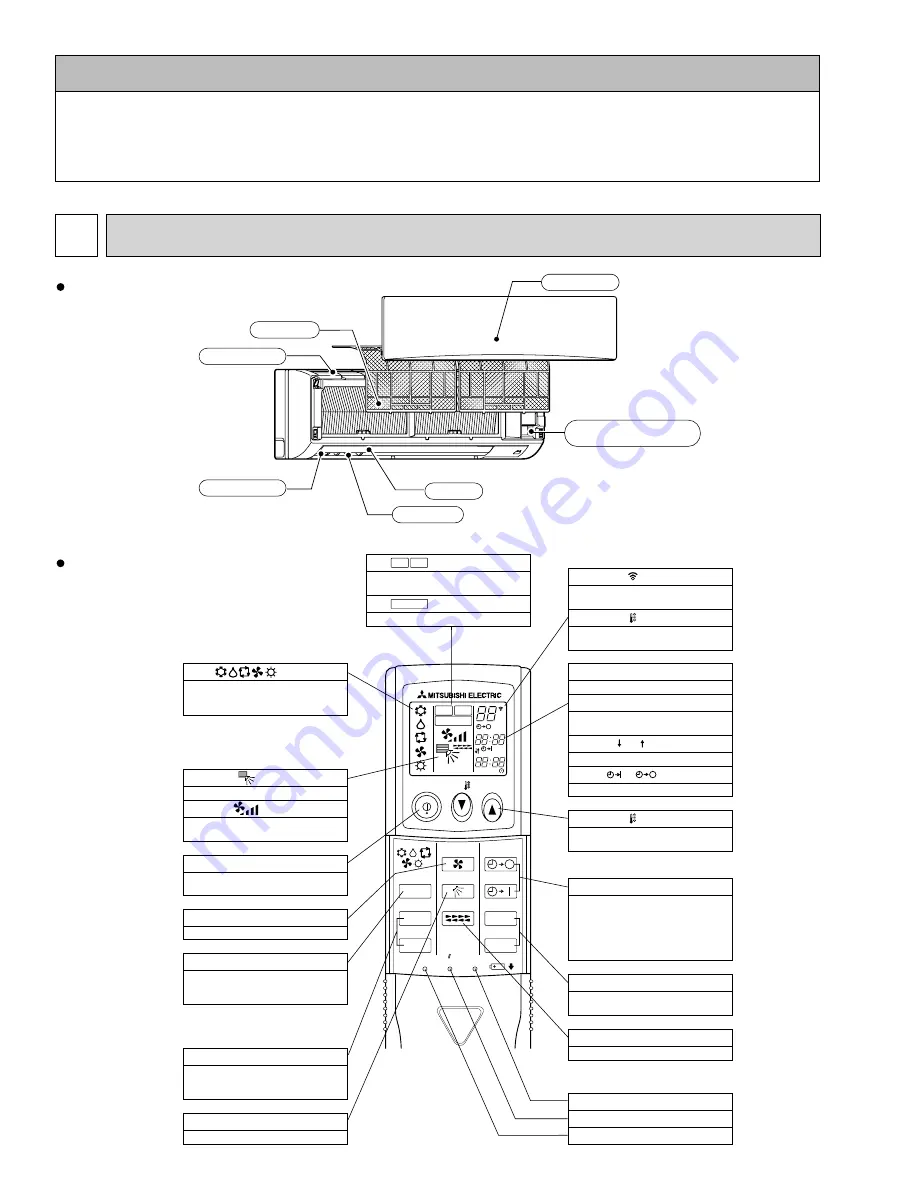
VANE CONTROL button
Used to change the air flow
CLOCK button
RESET button
SET button
ON/OFF button
The unit is turned ON and OFF alternately
each time the button is pressed.
LOUVER button
Changes left/right airflow direction.
(Not available for this model.)
MODE SELECT button
Used to switch the operation mode between
cooling, drying, fan, heating and auto mode.
CHECK-TEST RUN button
Only press this button to perform an
inspection check or test operation.
Do not use it for normal operation.
FAN SPEED SELECT button
Used to change the fan speed.
TIMER display
Displays when in timer operation or when
setting timer.
button
SET TEMPERATURE button sets any desired
room temperature.
CLOCK display
Displays the current time.
“ ” “ ” display
Displays the order of timer operation.
“ ” “ ” display
Displays whether timer is on or off.
+
In case the outdoor unit is cool only type,
the heating and auto mode are not
available.
Buttons used to set the “hour and minute” of
the current time and timer settings.
h and min buttons
display
display
FAN SPEED display indicates which fan
speed has been selected.
display
The vertical direction of air flow is indicated.
display
Blinks when model is selected.
display
display
CHECK and TEST RUN display indicate that
the unit is being checked or test-run.
display
OPERATION MODE display
Operation mode display indicates which
operation mode is in effect.
TIMER CONTROL buttons
AUTO STOP (OFF timer): when this switch is
set, the air conditioner will be automatically
stopped at the preset time.
AUTO START (ON timer): when this switch is
set, the air conditioner will be automatically
started at the preset time.
MODEL SELECT
CHECK TEST RUN
SET TEMP. display indicates the set desired
temperature.
Lights up while the signal is transmitted to
the indoor unit when the button is pressed.
1
PART NAMES AND FUNCTIONS
Indoor unit
Wireless
remote controller
Emergency operation
switch
Front grille
Air inlet
Filter
Air outlet
Louver
Vane
Use the speci
fi
ed refrigerant only.
Never use any refrigerant other than that speci
fi
ed.
Doing so may cause a burst, an explosion, or
fi
re when the unit is being used, serviced, or disposed of.
Correct refrigerant is speci
fi
ed in the manuals and on the spec labels provided with our products.
We will not be held responsible for mechanical failure, system malfunction, unit breakdown or accidents caused by failure to
follow the instructions.


