background image

Downloaded from Projector.com

EN – 2

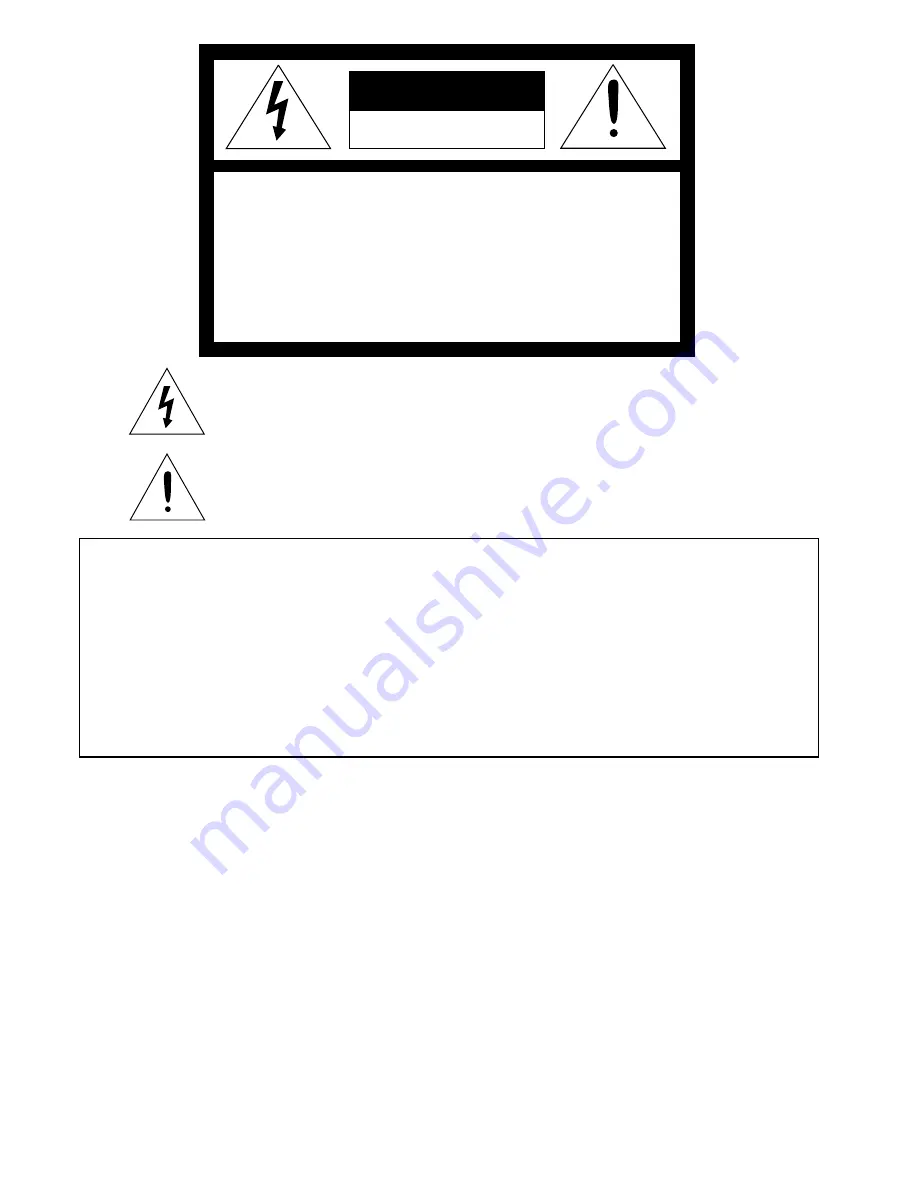
RISK OF ELECTRIC SHOCK

DO NOT OPEN

CAUTION

CAUTION

TO REDUCE THE RISK OF ELECTRIC SHOCK,

DO NOT REMOVE COVER (OR BACK)

NO USER-SERVICEABLE PARTS INSIDE

REFER SERVICING TO QUALIFIED

SERVICE PERSONNEL.

The lightning flash with arrowhead symbol, within an equilateral triangle, is intended
to alert the user to the presence of uninsulated “dangerous voltage” within the
product’s enclosure that may be of sufficient magnitude to constitute a risk of electric
shock.

The exclamation point within an equilateral triangle is intended to alert the user to the
presence of important operating and maintenance (servicing) instructions in the litera-
ture accompanying the appliance.

WARNING:

TO PREVENT FIRE OR SHOCK HAZARD, DO NOT EXPOSE THIS APPLIANCE TO RAIN OR MOISTURE.

CAUTION:

TO PREVENT ELECTRIC SHOCK, DO NOT USE THIS (POLARIZED) PLUG WITH AN EXTENSION
CORD, RECEPTACLE OR OTHER OUTLET UNLESS THE BLADES CAN BE FULLY INSERTED TO
PREVENT BLADE EXPOSURE.

NOTE:

SINCE THIS PROJECTOR IS PLUGGABLE EQUIPMENT, THE SOCKET-OUTLET SHALL BE IN-
STALLED NEAR THE EQUIPMENT AND SHALL BE EASILY ACCESSIBLE.

WARNING

Use the attached specified power supply cord. If you
use another power-supply cord, it may cause interfer-
ence with radio and television reception.

Use the attached  RS-232C cable, PS/2 adapter cable,
USB adapter cable and RGB cable with this equip-
ment so as to keep interference within the limit of a
FCC Class B device.

This apparatus must be grounded.

DO NOT LOOK DIRECTLY INTO THE LENS
WHEN PROJECTOR IS IN THE POWER ON
MODE.

When using the projector in Europe
COMPLIANCE NOTICE

This Projector complies with the requirements of the
EC Directive 89/336/EEC “EMC Directive” as
amended by Directive 93/68/EEC and 73/23/EEC
“Low Voltage Directive” as amended by Directive 93/
68/EEC.

The electro-magnetic susceptibility has been chosen
at a level that gains proper operation in residential
areas, on business and light industrial premises and
on small-scale enterprises, inside as well as outside
of  the buildings. All places of operation are
characterised by their connection to the public low
voltage power supply system.

WARNING

Use the attached RS-232C cable, PS/2 adapter cable,
USB adapter cable and RGB cable with this equip-
ment so as to keep interference within the limit of a
EN55022 Class B. Please follow WARNINGS instruc-
tions.

Summary of Contents for ColorView XD300U

Page 1: ...e do not make any claim of copyright The copyright remains the property of their respective owners ABOUT PROJECTOR COM Projector com http www projector com is your review and buying guide resource for DLP and LCD video projectors Visit the site to read the latest projector news and reviews read and comment on projector specifications download user manuals and much more ...

Page 2: ...D o w n l o a d e d f r o m P r o j e c t o r c o m EN 1 ENGLISH XD300 XD350 DATA PROJECTOR MODEL XD300U XD350U User Manual FRANÇAIS DEUTSCH ITALIANO ESPAÑOL ...

Page 3: ...NEAR THE EQUIPMENT AND SHALL BE EASILY ACCESSIBLE WARNING Use the attached specified power supply cord If you use another power supply cord it may cause interfer ence with radio and television reception Use the attached RS 232C cable PS 2 adapter cable USB adapter cable and RGB cable with this equip ment so as to keep interference within the limit of a FCC Class B device This apparatus must be gro...

Page 4: ...lation other device s remote commands 22 How to change the image displayed at the time of startup or mute 23 Lamp replacement 24 Maintenance 25 Indicators 26 Troubleshooting 27 Specifications 28 Kensington Lock 28 Connectors 29 Dimensional drawings 29 What s included in the box 29 Replacement part 29 Specification of RGB signals in each computer mode of the projector 30 Trademark Registered tradem...

Page 5: ...shock 13 Objects and liquids Never push objects of any kind through open ings of this projector as they may touch danger ous voltage points or short out parts that could result in a fire or electric shock Never spill liq uid of any kind on the projector 14 Servicing Do not attempt to service this projector yourself Refer all servicing to qualified service person nel 15 Damage requiring service Unp...

Page 6: ... an operating temperature humidity and altitude as specified below Operating temperature between 41 F 5 C and 95 F 35 C Operating humidity between 30 and 90 Never put any heat producing device under the projector so that the projector does not overheat Do not attach the projector to a place that is unstable or subject to vibration Do not install the projector near any equipment that produces a str...

Page 7: ...tton 6 COMPUTER button 7 STATUS indicator 8 POWER indicator While the MENU or KEYSTONE adjustment display appears on the screen the COMPUTER VIDEO POWER and AUTO POSITION button function as the and button respec tively While the MENU adjustment display appears on the screen the KEYSTONE button function as the ENTER button 1 Video Audio input terminals 2 COMPUTER AUDIO IN terminal 3 COMPUTER 2 COMP...

Page 8: ...trol Pressing the LASER button emits a laser beam Even when you keep holding down the LASER button it is emitted only one minute To keep emitting it longer press the LASER button again You can disable the LASER button to prevent laser radiation due to misuse of the button How to disable the LASER button While holding the LASER button down press the button three times How to enable the LASER button...

Page 9: ...lothes rinse with water If the solution comes in contact with your eyes rinse them with water and then consult your doctor Operation area The range for operation is about 10 m 33 feet when the remote control points to the projector The distance to the screen back to the projector must be less than 6 m 20 feet Depending on the type of screen the effective distance may be different Important Avoid d...

Page 10: ...es ventila tion from the fan at the bottom and might cause problems Place a hard board or similar item under the projector to facilitate ventilation of the unit Place the projector more than 50cm 20 in from the wall to prevent blocking the intake exhaust slots andventilation of this projector because hot air comes out of it Do not use the projector under the following circumstances which may cause...

Page 11: ...rojector DVD player or HDTV decoder In the case of a DVD player equipped with a COMPONENT VIDEO output 525i 625i connect the DVD player with the COMPUTER 2 COMPONENT IN connector When a DVD player is connected with the COMPUTER 1 IN connector the image may not be projected cor rectly When a 525p signal is inputted select YCBCR YPBPR for the COMPUTER INPUT in the SIGNAL menu Y PB PR is an example o...

Page 12: ...he available cable for the audio input terminal of the PC Some personal computer may not have the audio output terminal For using Macintosh A monitor output adapter is necessary for a Macintosh if it has no video port Please contact your dealer A MAC adapter for RGB cable may be necessary depending on the personal computer connected to this projec tor Please contact your dealer About DDC The COMPU...

Page 13: ...tment buttons and the front adjustment feet will slide out to their appropriate positions 3 Release the foot adjustment buttons to fix the feet in those positions 4 Turn the feet for fine adjustment The projection angle can be adjusted by turning the rear adjustment feet After using the projector 5 Put the front adjustment feet back into the projector Install the screen on a flat wall at 90 degree...

Page 14: ...ely on When the light source lamp does not light up wait until the STATUS indicator is turned off then press the POWER button again If the main power switch to the unit is turned off within two minutes of turning off the light source lamp power will not be applied to the lamp for one minute when the next time the main unit power switch is turned on When this happens the STATUS indicator will blink...

Page 15: ...ess the VOLUME or button to change the volume from the speaker The volume control bar will appear on the screen The volume control bar will disappear about 10 seconds after releasing the volume buttons The volume buttons do not work when MENU selection bar or MENU is displayed The volume from the AUDIO OUT jack is also changed by pressing the VOLUME or button on the remote control AV mute Image an...

Page 16: ...OFF SPLASH SCREEN IMAGE CAPTURE SETUP ON OFF x1 x2 FULL GLAY RED GREEN BLUE BLACK WHITE RED 50 GREEN 50 BLUE 50 BACK COLOR CAPTURE BACK COLOR SIZE BLUE BLACK IMAGE MUTE MODE BLACK IMAGE AUTO POWER OFF CCS CCS DCDi DCDi OFF FEATURE MENU POSITION UPPER LEFT LOWER RIGHT OFF 5 10 15 30 60 min VIDEO SIGNAL VIDEO MODE AUTO OFF CINEMA MODE AUTO NTSC PAL SECAM 4 43NTSC PAL M PAL N PAL 60 LANGUAGE SIGNAL H...

Page 17: ...ojector automatically by turning on an externally connected power switch such as a breaker even when the main power switch of the projector is off Use this setting when the projector is hanging from the ceiling The projector will be in the stand by mode when the lamp is off Use the remote control to turn on the lamp AUTO POWER OFF Set the time elapsed before the projector enters into the stand by ...

Page 18: ...pped with the SCART terminal may not be compatible with the projector When VIDEO SIGNAL is set toAUTO the image may not be projected with correct colors Change the setting of VIDEO SIGNAL depending on the input signal in such cases 4 SIGNAL HORIZ POSITION Use to adjust the horizontal position of the image VERT POSITION Use to adjust the vertical position of the image TRACKING Use to avoid image no...

Page 19: ... 0 OFF OFF STANDARD opt IMAGE TV60 GAMMA MODE DYNAMIC About color temperature The appearance of white can be affected by adjusting the color temperature With low color temperature white appears reddish and with high color temperature white appears to become more bluish The color temperature can be manually controlled by adjusting the red and blue contrast level To set the color temperature high Se...

Page 20: ...n to adjust the horizontal start position the left side of image 3 Select TRACKING in SIGNAL menu 4 Press the or button to adjust the horizontal end position the right side of image 5 Repeat steps 1 to 4 for fine adjustment 6 Select VERT POSITION in SIGNAL menu 7 Press the or button to adjust the vertical start position the top end of image CLAMP POSITION opt XGA60 SIGNAL SIGNAL USER 0 CLAMP WIDTH...

Page 21: ...largement does not work with video input or S video input During REAL mode Press the or buttons for fine adjustment During REAL mode the and buttons are not working At this time the prohibition mark appeares on the screen Picture in Picture PinP One of the special features of this unit is the picture in picture PinP mode PinP allows you to view differ ent sources at the same time Using the PinP mo...

Page 22: ...mputer is on the remote control mouse may not work In that case turn the projector on then restart the personal computer When you use an extension cable the function may not work correctly COMPUTER OUT COMPUTER 2 COMPONENT IN COMPUTER 1 IN COMPUTER AUDIO IN VIDEO 1 IN VIDEO 2 IN S VIDEO VIDEO AUDIO AC IN AUDIOOUT MAIN MOUSE RS 232C to MOUSE RS 232C terminal USB 4P type A to USB port Mini DIN 9P On...

Page 23: ...d for 6 seconds after step 3 and 4 the MEMORY button will go out automatically 2 5cm MEMORY button SELECT switch Programmable buttons 5 Hold down the button on the other device s remote control whose command you want to install until the MEMORY button start blinking When the MEMORY button blinks six times and then goes out the function has been installed successfully When the MEMORY button doesn t...

Page 24: ... the or button Capture the image 10 Select CAPTURE by pressing the or button 11 Press the ENTER button A red frame appears The size of the red frame is 295x222 pixels 12 Adjust the size of the image to be captured so that such image stays within the red frame Press the or button to move the red frame You can t move the red frame outside the screen 13 Press the ENTER button twice Image capture will...

Page 25: ...n time meter Plug in the power cord turn on the main power switch and reset lamp time by pressing the VIDEO button and ENTER button for 3 seconds simulta neously Make sure that the STATUS indicator flashed twice and the operation time meter has been reset Caution Do not spill liquid on the lamp or place it near flammable objects or where children can touch it Otherwise it could cause injury or fir...

Page 26: ...thoroughly and let it dry completely 5 Attach the air filter to the front grille Attach the air filter so that it is retained by the seven protrusions inside the front grille Then spread the air filter on the front grille by pressing it Make sure that the air filter is caught by the protrusions which prevent it from being displaced 6 Attach the front grille to the projector Make sure that the air ...

Page 27: ... Close the cover correctly or or Blinking Abnormal Contact your dealer Steady red Blinking green Off Steady red Steady Unusual temperature The ventilation slits or air filter is clogged with dust or debris The room temperature is too high The filter is dirty Remove the object from the ventilation slits Relocate the projector to a cooler place Clean the filter Replace the lamp Exchange with a new l...

Page 28: ... sequence Turn the power switch on and off several times Refer to Indicators on page 26 Replace the lamp with a new one Close the cover correctly Contact your dealer Take the lens cap off Replace the lamp with a new one Turn on the connected equipment Confirm the connections Select the correct source according to the equip ment connected to this projector Check whether a picture appears or not usi...

Page 29: ...400 Expand 1 024 x 768 Real 1 600 x 1 200 Compress Sync on Green available NTSC NTSC 4 43 PAL including PAL M N SECAM PAL 60 DVD Component HDTV 1080i 720p 525p 2 W mono Round type 8Ω 2W Luminance signal Vp p 1 0V 75Ω negative sync Chroma signal Vp p 0 286V 75Ω burst signal Vp p 1 0V 75Ω negative sync 350 mVrms 10kΩ or more RGB Vp p 0 7V 75Ω YCBCR Y Vp p 1 0V negative sync CBCR Vp p 0 7V HD CS TTL ...

Page 30: ... NO NAME I O 1 RXD IN 2 USB OUT 3 USB Vcc IN 4 GND 5 PS 2 Vcc IN 6 PS 2 CLK OUT 7 TXD OUT 8 PS 2 DATA OUT 9 USB OUT 1 Light shielding seal 620D070 10 1 User manual 871D349 50 1 Quick Start up For XD300U 857B070 10 For XD350U 857B070 30 2 Battery for remote 1 Carrying case 772P041 10 Replacement part Option Not included in the box Spare Mercury lamp 499B031 10 For XD300U VLT XD300LP What s included...

Page 31: ...0 x 400 37 86 85 08 1024 x 640 640 x 400 VGA60 640 x 480 31 47 59 94 1024 x 768 640 x 480 VGA72 640 x 480 37 86 72 81 1024 x 768 640 x 480 VGA75 640 x 480 37 50 75 00 1024 x 768 640 x 480 VGA85 640 x 480 43 27 85 01 1024 x 768 640 x 480 VGA120 640 x 480 61 89 120 17 1024 x 768 640 x 480 SVGA56 800 x 600 35 16 56 25 1024 x 768 800 x 600 SVGA60 800 x 600 37 88 60 32 1024 x 768 800 x 600 SVGA72 800 x...

Page 32: ...D o w n l o a d e d f r o m P r o j e c t o r c o m ENGLISH ...

Page 33: ...1927 E mail projector info meuk mee com Russia Mitsubishi Electric Europe B V Moscow Representative Office 52 bldg 5 Kosmodamianskaya Nab 113054 Moscow Russian Federation Sales Phone 7 095 721 2070 Fax 7 095 721 2071 Technical Phone 7 095 721 2070 Fax 7 095 721 2071 MITSUBISHI Projector Contact Information Asia RIL Ryoden Holdings Ltd http www ryoden com hk Hong Kong Office 15 F Manulife Tower 169...

Page 34: ...e do not make any claim of copyright The copyright remains the property of their respective owners ABOUT PROJECTOR COM Projector com http www projector com is your review and buying guide resource for DLP and LCD video projectors Visit the site to read the latest projector news and reviews read and comment on projector specifications download user manuals and much more ...

Reviews: