14
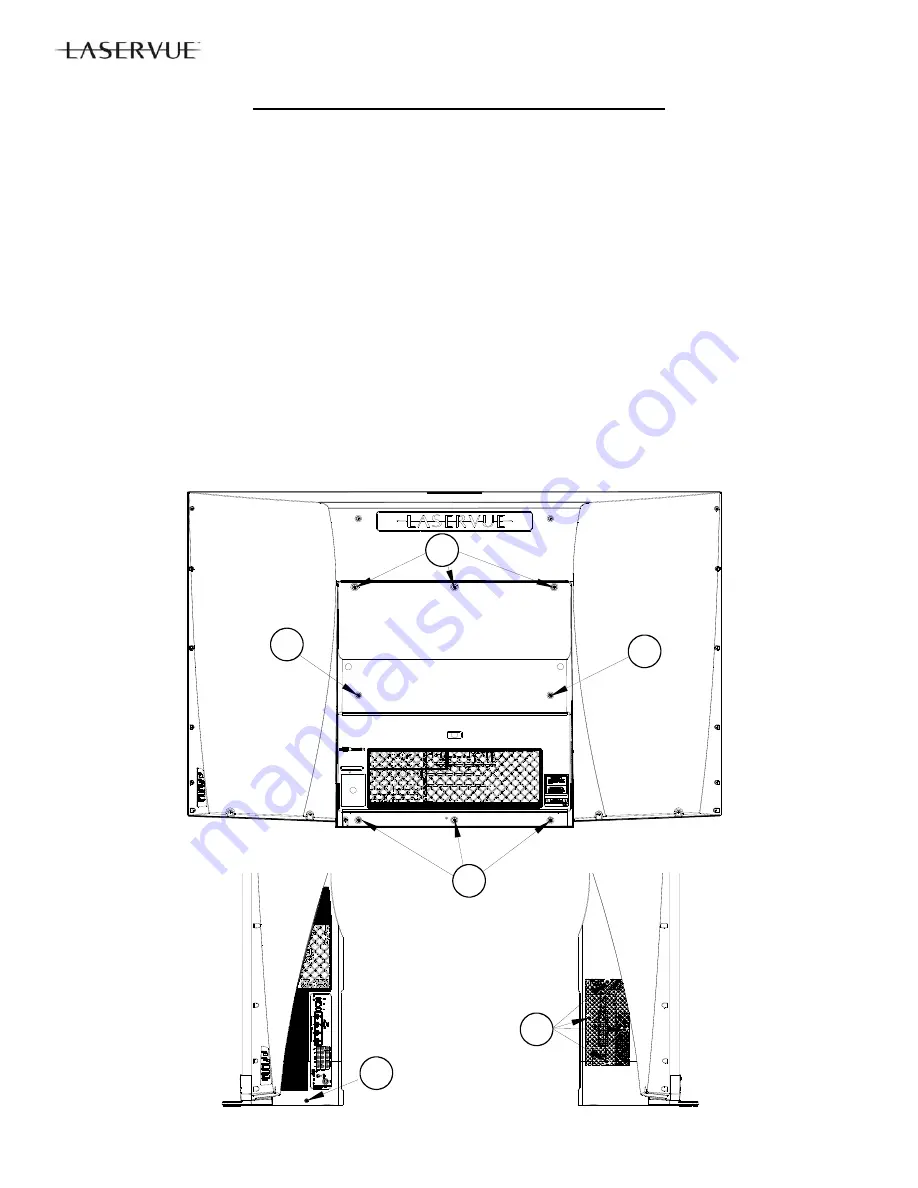
Back Cover Removal
1. Remove screws (A) from the back cover (Star Head/TORX
®
T20).
2. Remove the back cover from the TV.
DISASSEMBLY & PARTS REPLACEMENT
CAUTION: Prior to disassembly, remove AC power. Do not re-apply AC power until the set
has been fully re-assembled and inspected for safety as described on page 12.
IMPORTANT NOTES:
1. Disassembly beyond what is shown in this manual is not recommended.
2. The following assemblies are replacement items that
should not be disassembled:
Electrical Chassis—
Replacement is supplied complete with PWBs. However PWBs can be replaced
individually.
Light Source Unit—
Replacement is supplied complete with fans and ducts. However Exhaust Fans can
be replaced individually.
Optical Engine—
Replacement is supplied complete with the DMD fan. However the DMD Fan can be
replaced individually.
3. Do not allow the rear of the screen to come into contact with any other surface including cleaning cloths or
fingers. Remove dust or other debris by blowing with a dry air source.
A
A
A
A
A
A
Summary of Contents for DLP WD-82CB1
Page 2: ......
Page 4: ...4 ...
Page 9: ...9 Introduction ...
Page 69: ...DLP HOME CINEMA 69 CIRCUIT BLOCK DIAGRAMS ...
Page 70: ...DLP HOME CINEMA 70 CIRCUIT BLOCK DIAGRAMS ...
Page 71: ...DLP HOME CINEMA 71 ...
Page 72: ...DLP HOME CINEMA 72 ...
Page 73: ...DLP HOME CINEMA 73 ...
Page 74: ...DLP HOME CINEMA 74 ...
Page 75: ......


