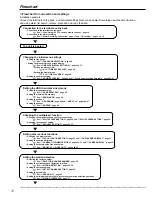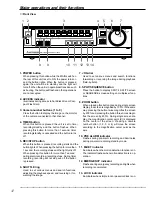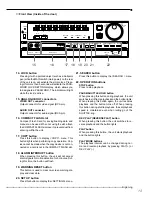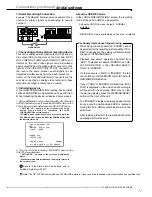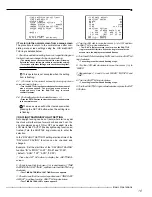
••••••••••••••••••••••••••••••••••••••••••••••••••••••••••••••••••••••••••••••••••••••••••••••••••••••••••••••••••••••••••••••••••• Flowchart
11
Setting the timer recording
• Selecting the normal & alarm recording or pre-alarm recording.
See “
■
Recording mode settings A - D for normal recording/alarm recording”, page 42.
• Setting the recording mode.
• Selecting the camera selection during the alarm recording.
See “
■
Recording mode settings for normal recording and alarm recording”, page 38.
• Setting the interval/picture grade for normal recording.
See “
■
Setting the recording interval and recording picture quality for normal recording”, pages 21, 22.
• Setting the interval/picture grade for alarm recording.
See “
■
Setting the recording interval and recording picture quality for normal recording”, pages 21, 22.
• Setting the duration of alarm recording.
See “
■
ALARM REC DURATION”, page 42.
• Setting the duration of pre-alarm recording.
See “
■
PRE ALARM REC”, page 42 and “
■
Pre-alarm recording time table”, pages 68, 69.
• Setting the timer program mode.
See “<TIMER PROGRAM SETTINGS>”, pages 40-42.
• Setting the holiday.
See “
■
HOLIDAY SETTING”, page 41.
• Setting the timer program.
See “
♦
Structure of the <TIMER PROGRAM> screen”, pages 40, 41.
• Selecting the day.
• Selecting the start time.
• Selecting the end time.
• Selecting the recording mode.
• Selecting the motion detection mode.
Timer recording is executed/completed
See “
■
Warnings and their appropriate countermeasures”, page 72.
Searching the recorded data
• Setting the device of searching.
See “
♦
PLAYBACK DEVICE”, page 58.
• Selecting the camera number of searching.
See “
♦
SELECTION CAMERA NO. ”, page 58.
• Selecting the search mode.
See “
♦
SEARCH TYPE”, page 58.
• Setting the alarm list search.
See “ALARM LIST SEARCH”, page 61.
• Setting the search time and date of alarm list.
See “
♦
DATE/TIME”, page 58.
The search is completed/The search result is displayed
Playback the search result
• Selecting the camera number of playback.
See “<MPX DISPLAY SETTINGS>”, pages 32-35.
• Selecting the sequence screen.
See “
♦
SPLIT/SEQUENCE button operations”, page 32.
• Playback
See “
■
Basic playback”, page 22.
• Selecting the speed of playback.
See “Various playback functions”, pages 56, 57.
Copy the data
• Inserting the Compact Flash Card.
See “
■
Inserting/Ejecting Compact Flash Card”, page 15.
• Setting the copy function.
See “Making copies”, pages 62, 63.
Summary of Contents for DX-TL900U
Page 75: ...75 Specifications ...
Page 76: ...872C276A8 PRINTED IN MALAYSIA ...


