38
••••••••••••••••••••••••••••••••••••••••••••••••••••••••••••••••••••••••••••••••••••••••••••••••••••••••••••••••••••••••••••••••••••••
<RECORD SETTINGS>
■
Settings concerning normal recording and
alarm recording
This unit allows independent settings for normal recording
and alarm recording. By this, more detailed settings are
possible such as changing the recording intervals of the
camera inputting the alarm signals while maintaining
normal recording.
During recording, the setting in the <RECORD
SETTING> menu screen cannot be changed.
When setting a camera number not connected
to recording mode camera in the setting, warning
display of “NON SIGNAL” appears (for details,
see “Warnings and CALL OUT output” page 72).
■
Recording mode settings for normal
recording and alarm recording
The recording intervals and recording picture quality for
normal recording and the recording intervals, recording pic-
ture quality and whether to perform pre-alarm recording
for alarm recording can be set here (for normal recording,
see “Basic manual recording” pages 21, 22). Pre-alarm
recording is a function to start recording a few seconds
before the ALARM IN terminal on the rear of the unit is
grounded or motion is detected (for details concerning pre-
alarm recording,
see page 54).
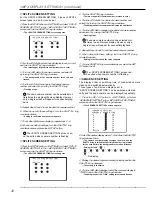
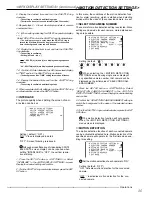
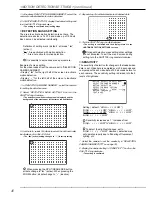
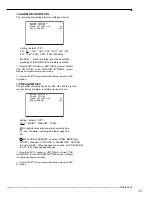
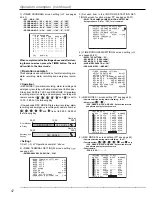
<RECORD SETTINGS>
>>RECORD SETTING
ALARM REC DURATION 5S
PRE ALARM REC OFF
1. Press the SET UP button
}
<SETTINGS>
}
Select
“RECORD SETTING” in the <RECORD SETTINGS> screen
and turn the SHUTTLE ring clockwise.
• The <RECORD SETTING> screen appears.
2. Turn the JOG dial and move the cursor to camera selection
item for alarm recording and turn the SHUTTLE ring clockwise.
• The background setting turns red and flashes.
9
7
4
5
6
1
2
3
8
CAUTION : For <ESTD REC>,
see “Continuous recording time table” , page 66.
<REC SETTIBG> ALARM PLUS
NO.PPS GRADE A-PPS A-GRADE
>> 1.667P STD 1.667P STD
1.667P STD 1.667P STD
1.667P STD 1.667P STD
1.667P STD 1.667P STD
1.667P STD 1.667P STD
1.667P STD 1.667P STD
1.667P STD 1.667P STD
1.667P STD 1.667P STD
1.667P STD 1.667P STD
<ESTD REC> D H M
Camera selection during alarm recording
• Setting ( default : “ALARM PLUS” )
“ALL” : Alarm recording is performed for all cameras set for
alarm recording.
“ALARM” : Alarm recording is performed for only the cameras
set for alarm recording a
nd activated
via
a
la
rm signals. When
there is input of alarm signals from multiple cameras, alarm
recording is performed for all cameras containing alarm
signals.
“ALARM PLUS” : Recording is performed in the frame speed
set in “A-PPS” for the camera inputted with alarm signals
during normal recording. All other cameras will be recording
in the normal frame intervals.
3. Display the desired item to set and turn the SHUTTLE ring
clockwise.
• The setting is confirmed and flashing stops.
4. (When setting the recording intervals and recording picture
quality for normal recording • • • )
Turn the JOG dial to select the desired camera number and
turn the SHUTTLE ring clockwise twice.
• The “PPS” setting display reverses in color when the
SHUTTLE ring is turned the first time. When the ring is turned
for the second time, the background turns red and flashes.
• Setting of “PPS” ( default : “1.667P” )
“3.333P”, “1.667P”, “1.111P”, “0.833P”, “0.667P”, “0.556P”,
“0.333P”, “0.222P”, “0.111P”, “0.056P”, “0.028P”, “0.014P”,
“- - - - - -”
“- - - - - -” : Recording cannot be performed with camera set
to this
settings
.
For details concerning normal recording settings,
see “Setting the recording interval and record-
ing picture quality for normal recording” pages 21,
22.
5. Display the desired item to set and turn the SHUTTLE ring
clockwise.
• The setting is confirmed and flashing stops.
6. Turn the JOG dial clockwise to reverse display the “GRADE”
setting and turn the SHUTTLE ring clockwise.
• The background of the “GRADE” display changes to red
and flashes.
• Setting of “GRADE” ( default : “STD” )
“SUPER”, “HIGH”, “STD”(STANDARD), “BASIC”, “LONG”
7. Display the desired item to set and turn the SHUTTLE ring
clockwise.
• The setting is confirmed and flashing stops.
8. (When setting recording intervals and recording picture
quality for alarm recording • • • )
Repeat steps 4 - 7 and select desired settings for “A-PPS”
and “A-GRADE” as well.
9. When completed with settings, turn the SHUTTLE ring
counterclockwise.
• The cursor moves to the camera number directly to the left.
10. When continuing with other camera number, turn the JOG
dial to move the cursor to the desired camera number and
repeat steps 4 - 9 for settings.
11. When completed with all settings, turn the SHUTTLE ring
counterclockwise or press the SET UP button.
Summary of Contents for DX-TL900U
Page 75: ...75 Specifications ...
Page 76: ...872C276A8 PRINTED IN MALAYSIA ...


