background image

35

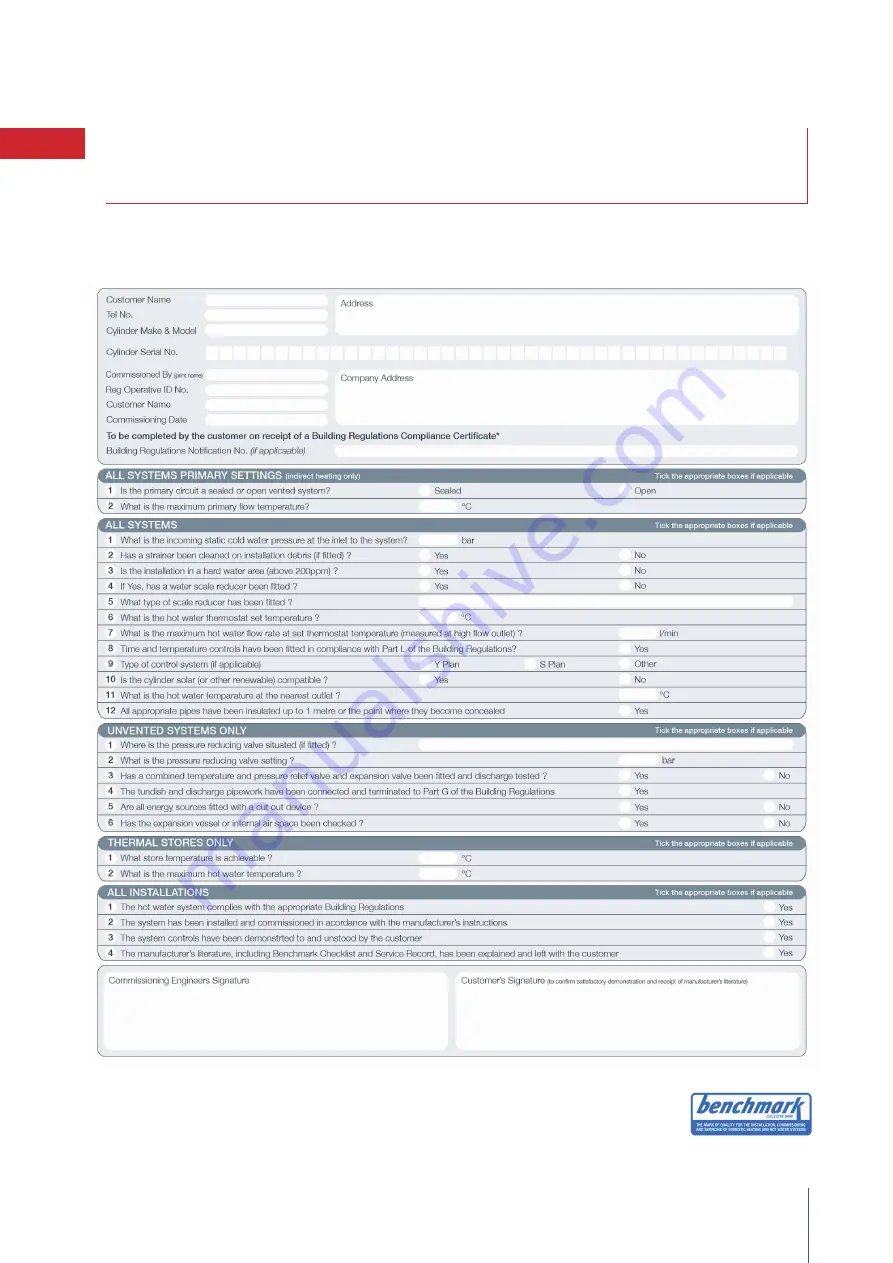
Commissioning Checklist

81

FTC4 Installation Manual

Mains Pressure Hot Water Storage System

This Commissioning Checklist is to be completed in full by the competent person who commissioned the storage system as a means of demonstrating compliance with the 
appropriate Building Regulations and then handed to the customer to keep for future reference. Failure to install and commission this equipment to the manufacturers
instructions may invalidate the warranty but does not affect your statutory rights.

* All installations in England and Wales must be notified to Local Authority Building Control (LABC) either directly or through a Competent Persons Scheme.

A Building Regulations Compliance Certificate will the be issued to the customer.

© Heating and Hotwater Industry Council (HHIC)

www. centralheating.co.uk

Summary of Contents for Ecodan HUS210FTC4ST

Page 1: ...Mitsubishi Electric Pre Plumbed Cylinder With FTC4 Control System Installation Manual IMPORTANT This manual contains commissioning and maintenance records and must be left with the equipment ...

Page 2: ......

Page 3: ...er Options Page 22 23 17 Cylinder and Hydraulic Components Install Guidance Page 24 25 18 Automatic Bypass Page 26 19 Circulation Pumps Page 27 20 Expansion Vessel Page 28 21 Ancillary Components Page 29 22 Discharge Arrangement Page 30 31 23 Ecodan Installation Page 32 36 24 Electrical Installation Page 37 50 25 General Commissioning Page 51 26 Main Controller Page 52 66 27 SD Card Function Page ...

Page 4: ...utory obligations When installing unvented hot water systems section G3 of the building regulations should be adhered to An annual inspection would also be required to ensure safe long term operation The information in this manual is provided to assist generally in the selection of equipment The responsibility for the selection and specification of the equipment must however remain with the instal...

Page 5: ...ylinder cupboard FTC4 based systems also have the ability to control multiple Ecodan units or to integrate fossil fuel boilers into a single system Further details of how to achieve these types of setup can be found later in this manual Precise control of any immersion heater fitted is now available directly from FTC4 so there is no need to add any third party relays as was the case with FTC2 syst...

Page 6: ...1 THW2 Flow and Return Thermistors THW6 7 8 and 9 Flow and Return Thermistors Factory Fitted Components 6 FTC4 Installation Manual Main Controller Flexible Connection Pipes Flow Setter Valve Expansion Vessel White Manuals Warranty Card Supplied Loose Components Fix It Foot PAC SE41TS E Wired Thermistor Fernox HP 5C Antifreeze containing biocide 10 Litre Fernox HP 5C Antifreeze containing biocide 2...

Page 7: ...aw off pipework Outlets above the cylinder will reduce the outlet pressure available by 0 1 bar for every 1m of height difference The unit should be protected from frost Particular care is needed if siting in a garage or outbuilding All exposed pipework should be insulated The cylinder must be installed vertically on a flat base capable of supporting it s weight when full Access for maintenance of...

Page 8: ...5 Pipework Configuration 8 FTC4 Installation Manual ...

Page 9: ...ng space heating There are instances whereby it is a useful feature for example when commissioning a system Option 3 is known as room compensation and is only available when using a Mitsubishi Electric thermostat In this mode the FTC4 will calculate the optimum flow temperature Each of the three Ecodan models require sufficient primary flow rate for adequate operation Due to the large resistances ...

Page 10: ... evaporator and evaporates It is at this point when some of the free heat energy in the outside air is absorbed by the refrigerant It is only the refrigerant that is being passed through this cycle the water is heated up by the plate heat exchanger The cooler water extracts energy from the hotter refrigerant i e the water is heated as it passes across the plate heat exchanger This water flows towa...

Page 11: ...m 2no 22mm 2no 22mm 2no 1 38 1 63 1 90 2 21 2 43 1 90 2 21 2 43 65 C 65 C 65 C 65 C 65 C 65 C 65 C 65 C 85 C 5 C 85 C 5 C 85 C 5 C 85 C 5 C 85 C 5 C 85 C 5 C 85 C 5 C 85 C 5 C OPTIONAL PAR WT50R E OPTIONAL PAR WR51R E Main RC Nominal domestic hot water storage volume litres Overall Cylinder Dimensions H x D mm HUS300FTC4 ST HUS250FTC4 ST HUS210FTC4 ST HU300FTC4 ST HU250FTC4 ST HU210FTC4 ST HU180FT...

Page 12: ...upply 220 240v 50Hz 220 240v 50Hz 220 240v 50Hz 380 415v 50Hz Phase Single Single Single 3 Phase Running current A Max 5 4 13 10 3 23 14 9 35 5 1 13 Fuse Rating MCB sizes BS EN 60947 2 A 16 25 40 16 Heating A2 W35 Capacity kW 5 0 8 5 14 COP 3 13 3 17 3 11 Power Input kW 1 6 2 68 4 52 Nominal Flow Rate L min 14 3 25 8 40 1 Heating A7 W35 Capacity kW 5 0 9 0 14 0 COP 4 1 4 18 4 25 Power Input kW 1 2...

Page 13: ... 5 6 15 00 10 00 5 00 0 00 5 00 10 00 Capacity at step 7 kW Ambient Temp deg C PUHZ W50 W35 W45 W55 W35 W45 W55 W35 W45 W55 0 1 2 3 4 5 6 7 8 9 10 15 00 10 00 5 00 0 00 5 00 10 00 Capacity at step 7 kW Ambient Temp deg C PUHZ W85 0 2 4 6 8 10 12 14 16 15 00 10 00 5 00 0 00 5 00 10 00 Capacity at step 7 kW Ambient Temp deg C PUHZ HW140 Fig 2 4 Fig 2 5 Fig 2 6 Table 2 4 Where W35 is a flow temperatu...

Page 14: ...s SW5 1 and SW5 2 on the outdoor unit as shown below As low noise mode reduces maximum capacity it is important that the capacity at the low noise mode selected is sufficient to overcome the building s calculated heat losses PUHZ W50VHA BS Noise Curve SW5 1 Max fan step STEP 9 STEP 9 OFF Selection of max fan step Always selection at the silent mode 2 Max frequency Middle Level Low Level OFF Select...

Page 15: ...11 Low Noise Mode continued PUHZ W85VHA2 BS Noise Curve PUHZ HW140VHA2 BS Noise Curve 15 FTC4 Installation Manual ...

Page 16: ... 1311 1176 1031 824 542 407 66 136 HU250FTC4ST 1729 1363 1311 1176 1043 824 542 407 66 136 HU300FTC4ST 2042 1688 1636 1176 1356 824 542 407 66 136 Model J I H G F E D C B A All dimensions are in millimetres A Hot Water Outlet B Cold Mains Inlet C Balanced Outlet D Heat Pump Flow E Tundish Outlet F Automatic Bypass Valve G Heating Zone Valve 1 H Heating Zone Valve 2 I Heating Return J Heat Pump Ret...

Page 17: ... 1274 892 757 366 416 492 HUS300FTC4ST 2042 1680 1628 1516 1356 1274 892 757 366 416 492 Model J I H G F E D C B A A All dimensions are in millimetres A Hot Water Outlet B Cold Mains Inlet C Balanced Outlet D Heat Pump Flow E Tundish Outlet F Automatic Bypass Valve G Heating Zone Valve 1 H Heating Zone Valve 2 I Solar Connections J Heating Return K Heat Pump Return ...

Page 18: ... Example First the room losses must be established by undertaking a heat loss calculation to the required standard in this case room losses are assumed Room losses 1200 Watts at 3 C outdoor and 21 C indoor In the case of a fossil fuel system a radiator may be selected directly from the manufacturer s brochure K2 double panel double convector 450mm x 900mm output 1268 Watts For a heat pump system w...

Page 19: ...sible Bad placement of thermostats where they are affected by external sources of heat or cold temperatures will lead to poor temperature control Under floor heating circuits can produce high pressure losses The pumps provided in our packaged systems are capable of providing the necessary flow rates on averagely sized primary circuits but with the inclusion of under floor circuits additional pumps...

Page 20: ...20 FTC4 Installation Manual 14 Ecodan Only System Schematic ...

Page 21: ...ll details on how to set the system up can be found in the controller section of the manual the following diagram shows the pipework layout required to achieve this setup 21 FTC4 Installation Manual 1 note that in the case of fossil fuel boiler connection the factory fitted thermistors THW1 and THW2 will need to be relocated to the primary side of the low loss header as shown in the above schemati...

Page 22: ...um temperature for heating room Any changes to DHW 1 must be made using main controller mounted on the FTC 4 Master The thermostat is wired to IN1 in TBI 1 on FTC 4 Master The number of thermostats that can be connected to FTC 4 Master is always one The wireless remote controller can be also used as a thermostat Outdoor unit Outdoor unit Outdoor unit Outdoor unit Wireless receiver option Main cont...

Page 23: ...TC 4 Master 20 0 C FTC 4 Master 20 0 C FTC 4 Master 20 0 C 20 0 C 20 0 C FTC 4 Master 20 0 C Room temperature thermistor option Room temperature thermostat Main controller Outdoor unit Zone1 Room temp control Auto adaptation Zone1 Zone2 Main controller remote position Room temperature thermostat Zone1 Room temp control Auto adaptation Zone2 Zone1 Outdoor unit Room temperature thermostat Wireless r...

Page 24: ...t the inlet side of pump one on the flow and the return just below the TF1 compact filter The primary circuit is positively pumped The primary circuit can be open vented or sealed with up to a maximum pressure of 3 5 bar If you seal the primary circuit an expansion vessel and pressure relief valve is required Effective thermostatic control of both the primary circuit and the cylinder is incorporat...

Page 25: ...ession and supplied complete with gland nuts and olives in the Accessory Kit box Only connect 22mm copper tube to these connections Cut the tube with a pipe cutter and ensure no sharp edges or burrs protrude Slide both the gland nut and olive onto the tube and push the tube fully home into the connection ensuring the tube end fully bottoms on the connection recess Smear the outer wall of the olive...

Page 26: ... the bypass valve not to operate correctly The bypass should be connected to the space heating return at least 300mm away from the suction side of the circulation pump where possible As the valve works on differential pressure and two circulation pumps are being utilised for an adequate pressure difference to exist the pipework routing shown ensures that on the inlet side of the bypass valve there...

Page 27: ... circuit and associated pipework This will ensure the required flow rate is maintained for each mode whilst consuming the minimum amount of energy possible The minimum flow rate for each Ecodan system can be found in the design section of this manual If minimum flow rate cannot be achieved with the pumps on speed 3 then additional pumping capacity may be required please contact Mitsubishi Electric...

Page 28: ...rcuit and associated pipework The installer will need to make this selection based upon the below sizing equation Model HU150FTC4ST HU180FTC4ST HU S 210FTC4ST HU S 250FTC4ST HU S 300FTC4ST Expansion Vessel Size 12 Litres 19 Litres 19 Litres 19 Litres 24 Litres Where V Necessary expansion vessel volume ε Water expansion co efficient G Total volume of water in the system P1 Expansion vessel setting ...

Page 29: ...imum efficiency appropriate pipework sizes need to be considered Selection of pipework will be based upon the resistance of the heating circuit including all emitters in most cases higher than the hot water circuit and Ecodan heat exchanger Typical pipe sizes are as follows these need to be confirmed by the installer as they are specific to the system in question Copper pipework should be used whe...

Page 30: ...ition where discharges from safety devices may not be apparent e g people with impaired vision or mobility consideration should be given to the installation of a suitable safety device to warn when discharge takes place e g electronically operated Note The discharge will consist of scalding water and steam Asphalt roofing felt and non metallic rainwater goods may be damaged by such discharges Note...

Page 31: ...e acceptable providing that where children play or otherwise come into contact with discharges a wire cage or similar guard is positioned to prevent contact whilst maintaining visibility Discharges at a high level e g in to metal hopper and metal down pipe with the end of the discharge pipe clearly visible or onto a roof capable of withstanding high temperature discharges of water and 3m from any ...

Page 32: ...ver panel is mounted improperly dust and moisture may enter the unit and it may cause electric shock or fire Make sure to use accessories authorized by Mitsubishi Electric and ask an installer or authorized electrician to install them If accessories are improperly installed it may cause water leakage electric shock or fire Do not remodel the unit Consult an installer for repairs If alterations or ...

Page 33: ...ection if possible NECESSARY SPACE TO INSTALL When installing a single outdoor unit When installing multiple outdoor unit Installation Procedure Be sure to install the unit on a solid level surface to prevent rattling noises during operation Make sure that the length of the foundation bolt is within 30mm from the surface of the base Secure the base of the unit firmly with 4 M10 foundation bolts in...

Page 34: ...s shown on install the hydraulic filter at the water intake Maximum allowance torque at the water piping connection is 50N m Check if water leaks after installation Inlet water gauge pressure must be between 0 0 3MPa Use the inlet water of higher than 5 C and lower than 55 C A A Foundation Specification Foundation bolt M10 3 8 Thickness of concrete 120mm Length of bolt 70mm Weight bearing capacity...

Page 35: ...m values Calcium 100mg L Chlorine 100mg L Iron Maganese 0 5mg L Note Make sure to perform the frozen prevention measure for water pipe system Water piping insulation back up pump system using of a certain ethylene glycol instead of normal water Insulate the water piping properly The performance can be poor if the insulation is insufficient WARNING A the outlet water temperature can reach 60 C at m...

Page 36: ...ation continued Location Requirements Minimum Requirements for location of Ecodan Figures stated are in mm s figures in brackets are for PUHZ HW140VHA 2 YHA 2 units 1 0 1 1 1 1 1 1 1 1 1 1 1 1 1 1 1 1 1 1 1 1 1 1 1 1 1 1 1 1 1 1 1 1 1 1 1 1 1 1 1 ...

Page 37: ...ired for FTC 4 connections final specification will always be the liability of the electrical technician and must be in accordance with national wiring regulations 1 A breaker with at least 3 0 mm contact separation in each pole shall be provided Use earth leakage breaker NV The breaker shall be provided to ensure disconnection of all active phase conductors of the supply 2 Max 120 m 3 The values ...

Page 38: ...stall an earth longer than other cables Please keep enough output capacity of power supply for each individual heater Insufficient power supply capacity might cause chattering Cable Routing Do not run the low voltage cables through a slot that the high voltage cables go through Do not run other cables through a slot that the wireless receiver s cable goes through Do not bundle power cables togethe...

Page 39: ...tions which may apply The appliance shall be supplied from a suitably rated double pole isolator with a contact separation of at least 3mm in both poles In the event of an electrical fault after installation of the appliance electrical checks must be carried out i e Earth Continuity Short Circuit Polarity and Resistance to Earth The heat pump MUST BE DISCONNECTED BEFORE these tests are carried out...

Page 40: ... 3 2 x 0 3 2 x 0 3 unit Flow temp controller non polar non polar non polar non polar Outdoor unit L N single 3 AC 230 V AC 230 V AC 230 V AC 415 V Outdoor unit L1 N L2 N L3 N 3 phase Interface unit Flow temp 3 DC 24 V DC 24 V DC 24 V DC 24 V controller outdoor unit S2 S3 Remote controller Interface 3 DC 12 V DC 12 V DC 12 V DC 12 V unit Flow temp controller PUHZ HW140YHA 2 BS PUHZ HW140VHA 2 BS PU...

Page 41: ...inder cupboard When placing as a thermostat choose a suitable location that is not likely to be influenced by heat sources or cold spots i e near radiator window Connect the main controller cable to 13 and 14 on the terminal block TBI 2 on the FTC4 Master controller When wiring to TBI 2 use ring or fork type terminals The 10m controller cable is supplied loose This can be extended to a maximum of ...

Page 42: ...e positioned and holes for the cable and securing of the back cover switch box can be drilled 2 Connecting cable to the back cover Connect the main controller cable to the terminal block on the back cover and thread the cable from behind the back cover to the FTC4 circuit board Seal the gap between the cable and the hole through which the cable is threaded ...

Page 43: ...k cover either directly to the wall or using a switch box as shown in the examples below 4 Join the front and back cover The cable connector should now be connected to the front cover jack and the front and back covers joined together using the securing tabs 43 FTC4 Installation Manual ...

Page 44: ...active Active OFF OFF SW2 5 Automatic switch to backup Inactive Active 1 OFF OFF heat source O U error SW2 6 Mixing tank 2 zone WITHOUT Mixing WITH Mixing OFF ON 4 SW2 7 2 zone control Inactive Active OFF ON 4 SW2 8 OFF OFF SW3 SW3 1 Room thermostat 2 input IN6 Zone 2 operation stop Zone 2 operation stop OFF OFF logic change at thermostat close at thermostat open SW3 2 Flow switch 2 IN3 logic chan...

Page 45: ...nd outdoor unit power supplies before changing the switch settings For multiple outdoor units control with FTC4 Slave see separate manual supplied with the FTC4 Slave circuit board Notes 1 OUT11 will be available For safety reasons this function is not available for certain errors In that case system operation must be stopped and only the water circulation pump keeps running 2 SW4 2 is available o...

Page 46: ...46 FTC4 Installation Manual 24 Electrical Installation continued FTC4 Terminals N L FTC4 MASTER ...

Page 47: ...nd control input Normal Heat source OFF Boiler operation 2 IN5 TBI 1 9 10 Outdoor thermostat input 1 Standard operation Heater operation Boiler operation 2 IN6 TBI 1 11 12 Room thermostat 2 input Refer to SW3 1 Refer to SW3 1 IN7 TBI 1 13 14 Flow switch 3 input Zone 2 Refer to SW3 3 Refer to SW3 3 Name Terminal Function OFF Open ON Short TH1 CN20 Thermistor Room temp 1 PAC SE41TS E TH2 CN21 Thermi...

Page 48: ...Stop Open 230V AC 0 1A Max OUT6 TBO 3 1 2 Boost heater 1 OFF ON 230V AC 0 5A Max relay OUT7 TBO 3 3 4 Boost heater 2 OFF ON 230V AC 0 5A Max relay OUT8 TBO 2 11 12 Boost heater 2 OFF ON 230V AC 0 5A Max relay OUT9 TBO 2 9 10 CNIH Immersion heater 230V AC 0 5A Max relay OUT11 TBO 2 1 2 Error output Normal Error 230V AC 0 5A Max relay OUT12 TBO 2 3 4 Defrost output Normal Defrost 230V AC 0 5A Max re...

Page 49: ...s be set to 3 minutes with this option turned on via the tick box It is assumed the boiler will have its own dedicated circulation pump which is interlocked with the boiler not the FTC4 Once the pump overrun period has ended the main circulation pump on the cylinder OUT1 and the dedicated Ecodan circulation pump OUT1 with relay protection will de energise meaning that the space heating circulator ...

Page 50: ... costs Therefore the hydraulic and electrical configuration on the Mitsubishi Electric pre plumbed cylinder has been tailored to suit common UK 2 zone applications with a motorised valve controlling each zone directly connected to the primary circuit All thermistors and valves are prewired from the factory all that is required to activate 2 zone control is the addition of a thermostat to control t...

Page 51: ... is then tested Safety Valve Checks During heat up there should have been no sign of water coming from either the expansion relief valve or the temperature pressure relief valve Now hold both of these safety valves fully open allowing as much water as possible to flow through the tundish Check that your discharge pipework is free from debris and is carrying the water away to waste efficiently Rele...

Page 52: ...e to its full efficiency and the end user s requirements are met Some key points when setting up the main controller for the first time are described in this section 1 when the system is switched off or the power supply is disconnected the water circuit protection functions e g freeze stat function will NOT operate This will not cause an issue for UK installations as the system will be treated wit...

Page 53: ...sed by pressing the MENU button To reduce the risk of untrained end users altering the settings accidentally there are two access levels to the main settings and the service section menu is password protected User Level Short press If the MENU button is pressed once for a short time the main settings will be displayed but without the edit function This will enable the user to view current settings...

Page 54: ...ed sensor or Room RC1 if the first wireless controller is to be used Time Zone control is a function which allows up to eight room sensors to operate on a single hydraulic circuit zone rotating which has priority at different times during the day to activate this function please go to the following screen 1 Go to room sensor settings sub menu 2 When 2 zone temperature control is active or wireless...

Page 55: ...sing the function keys and press CONFIRM Explanation of DHW operation When the DHW tank temperature drops from DHW max temp by more than the DHW max temperature drop set by installer DHW mode operates and the flow from the primary heating circuit is diverted to heat the water in the DHW tank When the temperature of the stored water reaches the DHW max temp set by the installer or if the DHW max op...

Page 56: ...eful heat from the system is diverted to heat the water in the DHW tank 2 When the temperature of the stored water exceeds the Hot Water temp set by the installer above 65 C primary circuit water is no longer diverted to heat the DHW tank 3 Whilst LP mode is in operation hot water is not directed to the space heating circuit 4 Directly after LP mode operation Duration of max temp will operate The ...

Page 57: ...bishi Electric thermostats sensors it is recommended that room compensation mode is used When using third party thermostats for example on a multi zone underfloor heating system either weather compensation mode or room compensation mode can be used Weather compensation mode must be programmed to suit the system design for the building in question Fixed flow temperature mode is a function that is u...

Page 58: ...eter when flow temp is minimum and outdoor ambient temp is maximum 6 Press F4 to add an extra point adjust Pressing F2 4 will cause the relevant edit screen to be displayed Editing Lo and Hi parameters is done in the same way please see the following for more detailed explanation of parameter editing In the parameter Lo Hi edit screen the flow temperature and outdoor ambient temperature for the co...

Page 59: ...ress button F3 A list of variables will be displayed Choose the one you wish to modify using buttons F1 F2 then press CONFIRM Adjust the temperature using buttons F3 and F2 and press CONFIRM button to save changes Schedule timer The schedule timer mode allows daily and weekly space heating and DHW patterns to be entered 1 From the main settings menu use F2 and F3 to highlight the schedule timer ic...

Page 60: ... Use F3 button to set the required time of inactivity then press CONFIRM 8 You can add up to 4 periods of inactivity within a 24 hour interval 9 Press F4 to save settings When scheduling heating button F1 changes the scheduled variable between time and temperature This enables a lower temperature to be set for a number of hours e g a lower temperature may be required at night when the occupants ar...

Page 61: ... functions 1 Manual operation 2 Function settings 3 Thermistor adjustment 4 Auxiliary settings 5 Heat source setting 6 Operation settings 7 External input settings 8 Running information 9 Thermistor reading 10 Summary of settings 11 Error history 12 Password protection 13 Manual reset 14 SD card In this Installation Manual instructions will be given only for the following functions 1 Manual operat...

Page 62: ...ny auxiliary parts used in the system From the service menu use F1 and F2 buttons to highlight Auxiliary settings then press CONFIRM Electric Heater Heating 1 From the Auxiliary settings menu highlight Electric heater heating 2 Press CONFIRM 3 The Electric heater heating screen is displayed 4 Press F1 button to switch the function ON OFF 5 Use F3 and F4 buttons to adjust the time period of heat pu...

Page 63: ...rred to as Standard operation on the menu Electrical heaters are turned on and off separately so in the case that all heaters are turned off standard will refer to heat pump only operation 1 From the service menu use F1 and F2 buttons to scroll through list until Heat Source Setting is highlighted 2 Press CONFIRM Heat source setting menu screen is displayed 3 Press F3 button until preferred heat s...

Page 64: ...rn to routine operation This will happen when the outdoor ambient temp rises above the selected temp for this specific mode of operation Cold Weather Function For extremely low outdoor ambient temperature conditions when the heat pump s capacity is restricted the heating or DHW is provided only by the electric booster heater and immersion if present This function is intended for use during extreme...

Page 65: ...M Floor Dry up Function The Floor dry up function automatically changes the target hot water temperature in stages to gradually dry concrete when this particular type of underfloor heating system is installed 1 Turn off the system using the main controller 2 From the Operation settings in the service menu use F1 and F2 buttons to scroll through the list until Floor dry up function is highlighted 3...

Page 66: ... Note The selection of OFF whilst a signal is being sent to IN4 forcefully stops all the heat source operations and the selection of Boiler stops operations of heat pump and electric heater and performs boiler operation Outdoor Thermostat IN5 From the External input settings menu highlight Outdoor thermostat IN5 Press CONFIRM 1 The Outdoor thermostat screen is displayed 2 Press F3 button to select...

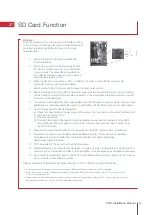
Page 67: ...hts if the read and write operations are successfully completed If the LED4 lamp continues blinking or does not light the SD memory card cannot be read or written to by the FTC4 controller 8 Make sure to follow the instruction and the requirement of the SD memory card s manufacturer 9 Format the SD memory card if determined unreadable in step 6 This could make it readable Download an SD card forma...

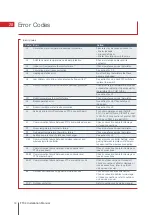
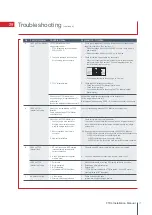
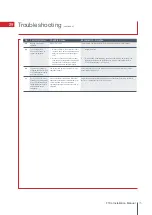
Page 68: ... to ON and DIP SW2 6 is set to ON For 2 zone control check that DIP SW2 6 and SW 2 7 are set to ON J0 Communication failure between FTC4 and wireless receiver Check connection cable for damage or loose connections P1 Room temperature thermistor failure 1 Check resistance across thermistor P2 Refrigerant temperature thermistor failure 1 Check resistance across thermistor P6 Antifreeze protection of...

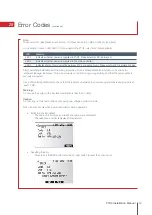
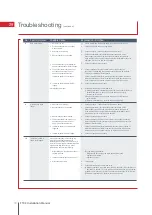
Page 69: ...ast 1 0MΩ Warning Do not use the system if the insulation resistance is less than 1 0MΩ Caution Do not carry out this test on the control wiring low voltage circuit terminals When an error occurs when power is applied or during operation Indication of error details The code unit address and telephone number are displayed The telephone number is displayed if registered Resetting the error Press the...

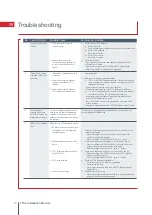
Page 70: ...yed on the main controller 2 1 Check the voltage across the terminals L and N or L3 and N on the outdoor power board When the voltage is not 220 to 240V AC check wiring of the outdoor unit and of the breaker When the voltage is at 220 to 240V AC go to 2 below 2 Check the voltage across the outdoor unit terminals S1 and S2 When the voltage is not 220 to 240V AC check the fuse on the outdoor control...

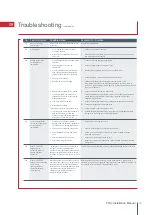
Page 71: ...mpliant memory card LED4 on FTC4 Master is off 6 1 Check and open stop cock 2 solate water supply and clean strainer 1 Cold main off 2 Strainer field supply blocked No water at hot tap 7 1 Move or delete data or replace SD memory card with a new one 2 Release the write protect switch 3 Refer to P 67 4 FTC4 is Not compatible with NTFS file system Use an SD memory card formatted in FAT file system 1...

Page 72: ...ce manual 2 Check booster heater thermostat and press reset button if safe Reset button is located on the side of booster heater covered with white rubber cap See component parts diagram Installation manual of Hydrobox section 3 to find out its position 3 Check the cause and reset if safe 4 Check resistance across the thermal cut out if open then connection is broken and the booster heater will ha...

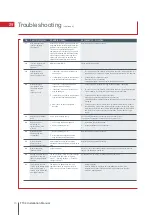
Page 73: ...ake precedence over that of the hydrobox the outdoor unit controls the frequency of the compressor according to the load of air conditioner The DHW and heating run according to that frequency When a PUHZ FRP outdoor unit is connected and is in heat recovery operation the set temperature is not reached 16 1 Check settings and change as appropriate 2 Check the battery power and replace if flat 3 Rel...

Page 74: ...ary If bladder perished replace expansion vessel with a new one 1 If continual pressure relief valve may be damaged 2 If intermittent expansion vessel charge may have reduced bladder perished Water discharges from pressure relief valve Primary circuit 19 1 Install extra pipe fastening clips 2 Normal operation no action necessary 1 Loose airing cupboard pipework 2 Heaters switching on off Noise dur...

Page 75: ...g mode does not start running The cooling system does not cool down to the set temperature 29 Adjust the preset temperature below which the freeze stat function is activated Refer to Freeze stat function on Page 49 If the preset temperature below which the freeze stat function is activated is low error L6 is more likely to occur interruption operation before the freeze stat function is activated D...

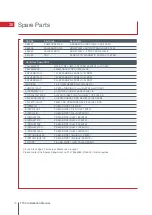
Page 76: ...2 CONTSETALT533K ALTECNIC INLET CONTROL SET TYPE 533 KS VALVEPRALT533K ALTECNIC 6BAR PRES RELIEF VALVE SPARE VALVETP1 2ALT TEMP AND PRESSURE RELIVE VALVE 7 BAR PIPEMAIN PREFAB PIPE COIL MAIN PIPECOILOUT PREFAB PIPE COIL OUTLET MITSI PIPECOILIN PREFAB PIPE COIL INLET MITSI PIPEINLET180 PREFAB PIPE INLET 180 MITSI PIPEINLET210 PREFAB PIPE INLET 210 MITSI PIPEINLET300 PREFAB PIPE INLET 300 MITSI PIPE...

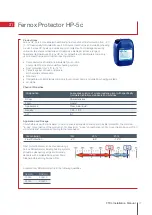
Page 77: ...ump and underfloor heating systems pH stable Physical Properties Application and Dosage Dilute before use with mains water In order to ensure adequate corrosion and biocidal protection the minimum in use concentration of the product is 10 Maximum in use concentration is 30 Upon dilution Fernox HP 5C will provide frost protection according to the table below Frost protection level can be checked us...

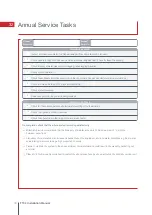
Page 78: ...ry heating systems 8 CONTROLLER TASkS Check for the correct operation and temperature setting of the thermostats 9 Check the operation of the zone valves 10 Check the operation and the timing of the immersion heater 11 On completion check that the whole system is working satisfactorily Mitsubishi Electric recommends that the frequency of maintenance visits to be a maximum of 12 months between insp...

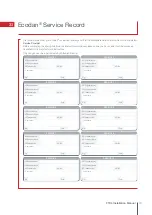
Page 79: ... AEI Telephone No Comments AEI No Sig Date SERVICE 3 AEI Engineer Name AEI Company Name AEI Telephone No Comments AEI No Sig Date SERVICE 4 AEI Engineer Name AEI Company Name AEI Telephone No Comments AEI No Sig Date SERVICE 5 AEI Engineer Name AEI Company Name AEI Telephone No Comments AEI No Sig Date SERVICE 6 AEI Engineer Name AEI Company Name AEI Telephone No Comments AEI No Sig Date SERVICE 7...

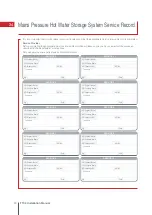
Page 80: ...AEI Company Name AEI Telephone No Comments AEI No Sig Date SERVICE 3 AEI Engineer Name AEI Company Name AEI Telephone No Comments AEI No Sig Date SERVICE 4 AEI Engineer Name AEI Company Name AEI Telephone No Comments AEI No Sig Date SERVICE 5 AEI Engineer Name AEI Company Name AEI Telephone No Comments AEI No Sig Date SERVICE 6 AEI Engineer Name AEI Company Name AEI Telephone No Comments AEI No Si...

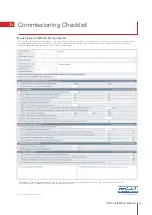
Page 81: ...anded to the customer to keep for future reference Failure to install and commission this equipment to the manufacturers instructions may invalidate the warranty but does not affect your statutory rights All installations in England and Wales must be notified to Local Authority Building Control LABC either directly or through a Competent Persons Scheme A Building Regulations Compliance Certificate...

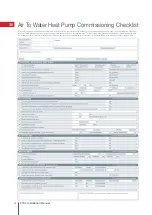
Page 82: ...tions and then handed to the customer to keep for future reference For further information please refer to Mitsubishi Electric training literature and installation manual Failure to install and commission this equipment to the manufacturers instructions may invalidate the warranty but does not affect statutory rights 82 FTC4 Installation Manual 36 Air To Water Heat Pump Commissioning Checklist ...

Page 83: ......
Page 84: ...pe 2013 Mitsubishi and Mitsubishi Electric are trademarks of Mitsubishi Electric Europe B V The company reserves the right to make any variation in technical specification to the equipment described or to withdraw or replace products without prior notification or public announcement Mitsubishi Electric is constantly developing and improving its products All descriptions illustrations drawings and ...

Page 85: ...Related Links Model Number HUS300FTC4ST Ecodan HU150 300FTC4ST HUS210 300FTC4ST Declaration of Conformity Ecodan HU150 300FTC4ST HUS210 300FTC4ST Installation Manual ...

Reviews: