


4.2 MELSEC Q Series
4 - 73
4
HOW T
O
MONIT
O
R REDUNT
ANT SYSTEM
■3.
CC-Link connection (intelligent device station) (Connection to the CC-Link module
mounted on redundant type extension base unit)
This section explains the CC-Link connection for connecting the GOT to the CC-Link module mounted on the
redundant type extension base unit.
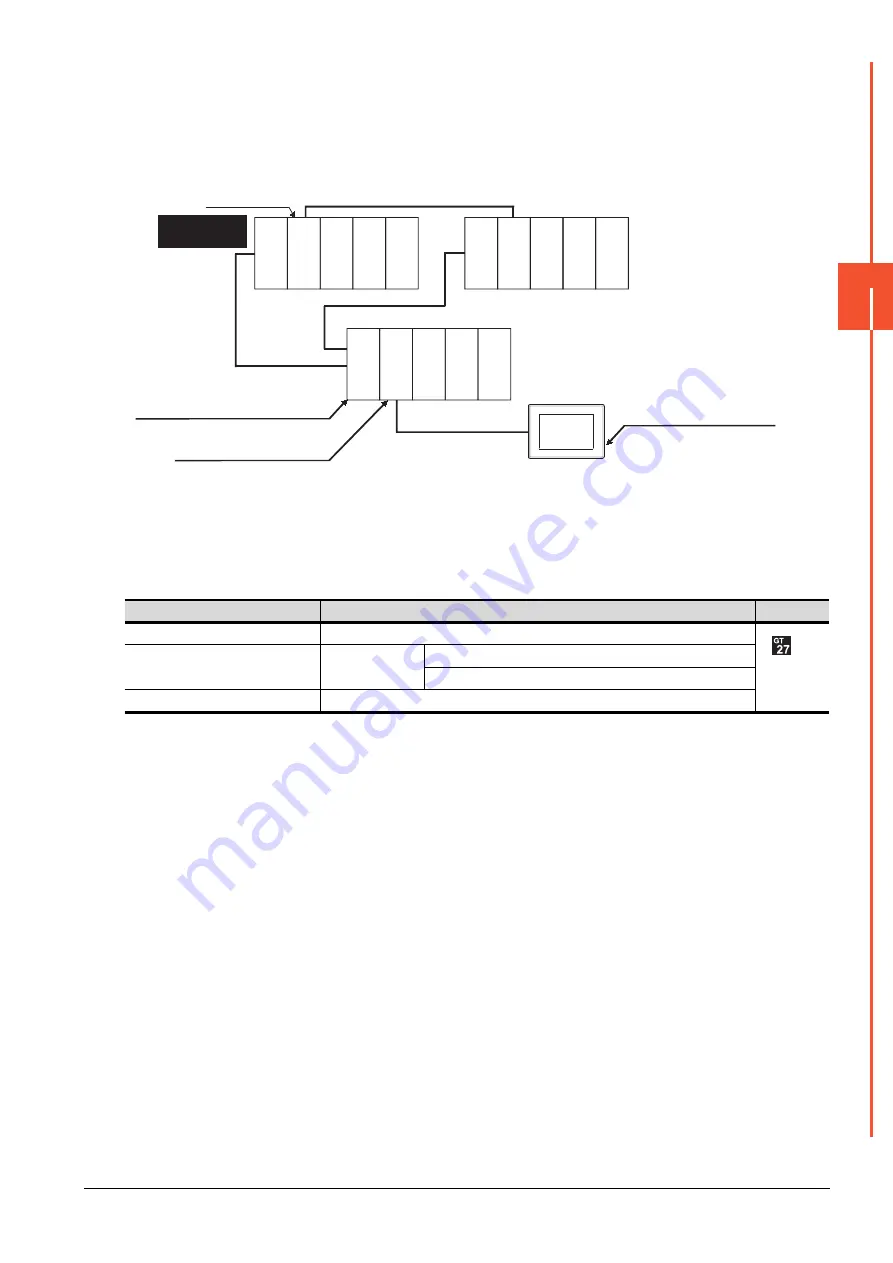
The following shows an example of connecting the GOT to the CC-Link module mounted on the redundant type
extension base unit.
(1) Connection method
Connect the GOT to the CC-Link module (QJ61BT11N) mounted on the redundant type extension base unit.
For details, refer to the following.
➠
12. CC-Link CONNECTION (INTELLIGENT DEVICE STATION)
(2) GT Designer3 setting
Set GT Designer3 as follows.
In this case, the GOT monitoring is performed by transient transmission of the CC-Link network system. Therefore, a
longer time-lag occurs for displaying objects compared with directly monitoring the PLC CPU.
For displaying objects with a shorter time-lag, set the device for RX, RY, RWw, RWr of the host station set in the CC-
Link network and execute the cyclic transmission.
For details, refer to the following.
➠
3.3 CC-Link System Access Range for Monitoring
(3) Monitoring target change when system switching occurs in a redundant system
When the system switching occurs, the GOT automatically changes the monitoring target to the PLC CPU switched
to the control system.
Setting item
Settings
Model
Controller Type
MELSEC-QnA, MELDAS C6*
Device setting (Network setting)
Other
NW No.: 0 (fixed)
Station No.: 0 (Master station)
MELSEC Redundant Setting
Do not set the item.
Monitor target
Control system
(System A)
GOT
Standby system
(System B)
Power supply
module
Power supply
module
Power supply
module
Q25PRHCPU
QJ61BT1
1N
Q25PRHCPU
QJ71BR1
1
QJ71BR1
1
Empty
Empty
Empty
Empty
Empty
Empty
Empty
CC-Link connection
Redundant type extension base unit
Network No. 0, Station No. 0
(Master station)
Network No. 0, Station No. 1
Summary of Contents for GOT2000 Series
Page 2: ......
Page 84: ......
Page 432: ...6 58 6 6 Precautions ...
Page 578: ...9 54 9 6 Precautions ...
Page 726: ...12 84 12 5 Precautions ...
Page 756: ......
Page 822: ...14 66 14 4 Device Range that Can Be Set ...
Page 918: ...15 96 15 7 Precautions ...
Page 930: ...16 12 16 6 Precautions ...
Page 964: ......
Page 1002: ...19 38 19 7 Precautions ...
Page 1022: ...20 20 20 5 Precautions ...
Page 1023: ...MULTI CHANNEL FUNCTION 21 MULTI CHANNEL FUNCTION 21 1 ...
Page 1024: ......
Page 1054: ...21 30 21 5 Multi channel Function Check Sheet ...
Page 1055: ...FA TRANSPARENT FUNCTION 22 FA TRANSPARENT FUNCTION 22 1 ...
Page 1056: ......
Page 1223: ......


