21
3
TV Connections
Auto Input Sensing
The TV’s Auto Input Sensing feature automatically rec-
ognizes most connections and prompts you to identify
the type of device connected. See page 14 for more on
Auto Input Sensing.
Connection Types
Review the connection types available on your input
devices and use connections that will give the best
video quality. For example, choose HDMI over compo-
nent video, and choose component video over S-video
or composite video.
Picture Quality
For best picture quality, route signals directly from
the input device to the TV; avoid routing video signals
through an A/V receiver, for example.
Surround Sound
For best surround sound audio quality, route audio-
signal cables or HDMI cables from the source device
directly to your A/V receiver or sound system.
IMPORTANT
Accessory items such as cables, adapters,
splitters, or combiners required for TV
connections are not supplied with the TV.
These items are available at many electronics
stores.
Before You Begin
One cable tie with a locking pin is supplied with the acces-
sories. Use the tie to keep cables properly organized and
connected.
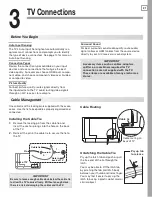
Cable Management
IMPORTANT
Be sure to leave enough cable slack below the cable tie
to allow the TV to swivel freely. Without enough slack,
there is a risk of damaging the cables and the TV.
#BDLPG57
)PMFJOCBDLPG57
)PMFJO
CBDLPG57
$BCMFUJF
1JO
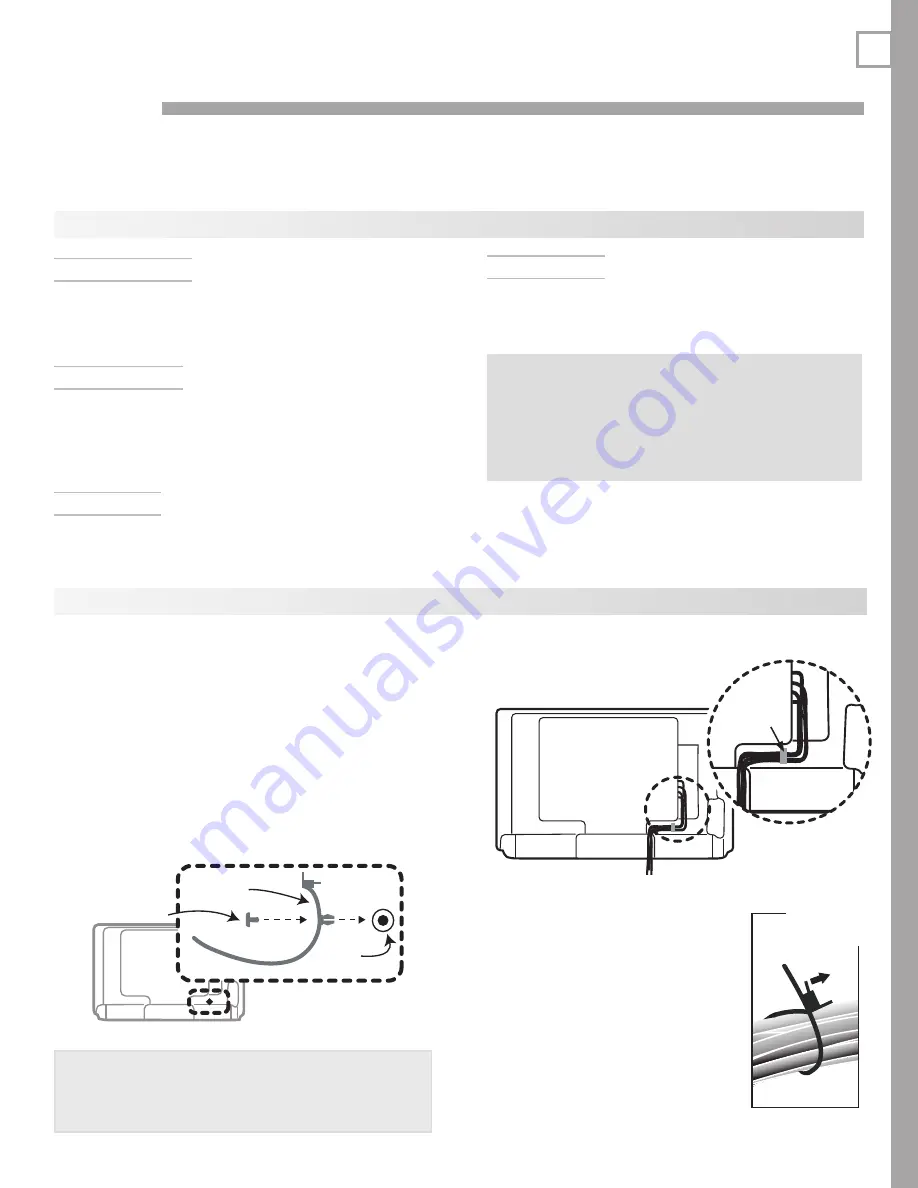
Installing the Cable Tie
Remove the locking pin from the cable tie and
1.
insert the anchor prongs into the hole on the back
of the TV.
Reinsert the pin in the cable tie to secure the tie to
2.
the TV.
Cable Routing
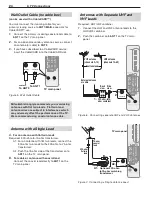
Unlatching the Cable Tie
Pry up the latch tab and push or pull
the free end of the tie through the
latch.
You may be able to lift the latch tab
by pinching the tab and latch body
between your thumb and index finger.
You may find it easier to pry up the
latch tab using a plastic wallet card or
similar object.
Cable tie
Cable routing on
back of TV
Pry up tab
to release


