-102-
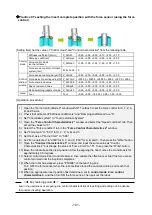
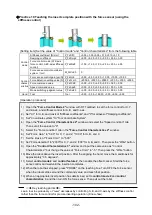
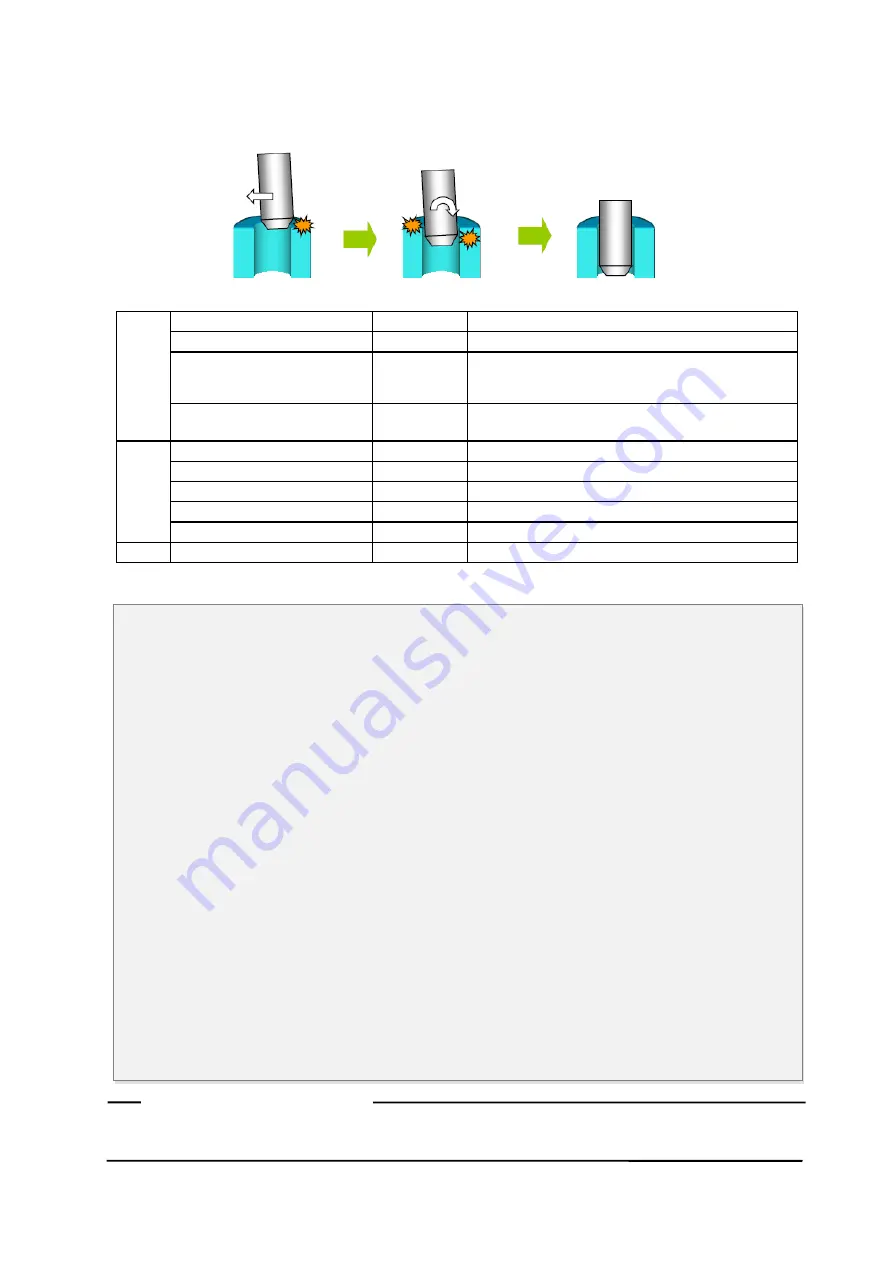
Practice 10 Teaching the insert complete position with the force sensor (using the
stiffness control)
[Setting item] Set the value of "Control mode" and "Control characteristics" from the following table.
Control
mode
Stiffness coefficient [N/mm]
P_FsStf0
+0.00,+0.00,+0.00,+0.10,+0.10,+0.10
Damping coefficient
P_FsDmp0
+0.00, +0.00, +0.00, +0.00, +0.00, +0.00
Force control mode (XYZ-axis
force control, ABC-axis stiffness
control)
P_FsMod0
+1.00, +1.00, +1.00, +2.00, +2.00, +2.00
Force sense control coordinate
system
(
tool
)
M_FsCod0
0
Control
charact
eristics
Force sense control gain [
μ
m/N]
P_FsGn0
+5.00, +5.00, +5.00, +10.00, +10.00, +10.00
Force detection setting value [N]
P_FsFLm0
+2000.0, +2000.0, +2000.0, +200.0, +200.0, +200.0
Force command value
P_FsFCd0
+0.00, +0.00, +5.00, +0.00, +0.00, +0.00
Speed command value
P_FsSpd0
+0.00, +0.00, +0.00, +0.00, +0.00, +0.00
Mode switching judgment value
P_FsSwF0
+0.00, +0.00, +0.00, +0.00, +0.00, +0.00
Hand Tool
Tool
+0.00, +0.00, +185.00, +0.00, +0.00, +0.00
[Operation procedure]
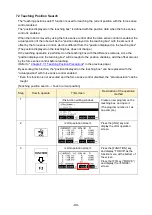
1) Open the
"Force Control Mode 2"
window with RT ToolBox3 to set the force control for X, Y,
and Z-axis, and stiffness control for A, B, and C-axis.
2) Set "0.1" for A, B, and C-axis of "Stiffness coefficients", and "0" for all axes of "Damping coefficients".
3) Set "Coordinate system" to "Tool Coordinate System".
4) Open the
"Force Control Characteristics 2"
window and select the "Speed condition" tab.
Then set all the values to "0".
5) Select the "Force condition" tab in the
"Force Control Characteristics 2"
window.
6) Set "Force Gain" to "5.00" for X, Y, and Z, "10.00" for A, B, and C.
7) Set the Z-axis of "Force Cmd." to "5.00".
8) Set "Force detection" to "2000" for X, Y, and Z, "200" for A, B, and C. Then press the "Write" button.
9) Open the
"Control Characteristics 3"
window and input the same value as "Control
Characteristics 2" but change the value of "Force Cmd." to "-5". Then press the "Write" button.
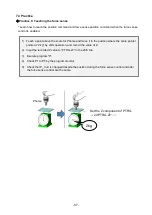
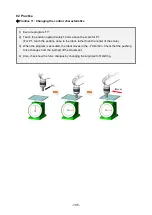
10) Move the robot above the insert position. After the aligning the hand, move the A and B-axis for
approximately "0.5 degrees".
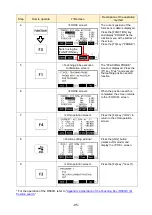
11) Select
control mode 2
and
control feature 2
, then enable the offset cancel. Start the force
sense control and wait until the insertion completes.
12) When the robot has stopped, press "PROBE" on the teaching box. Turn OFF the force sensor
when the robot settles around the command value, and teach that position.
13) When an appropriate insert position has determined, set to
control mode 2
and
control
characteristics 3
, and then turn ON the force sense. Then pull out the robot.
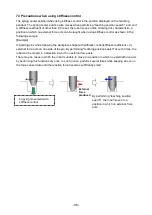
Learn that the probability of "twist" decreases by controlling A, B, and C-axis by the stiffness control
rather than the force control for precise inserting operation. (Know-how)
Key learning points
Summary of Contents for MELFA BFP-A3614
Page 1: ...Mitsubishi Industrial Robot Robot Seminar Textbook Force Sensor Application BFP A3614 ...
Page 2: ......
Page 34: ... 23 2 F series a CR750 D controller ...
Page 35: ... 24 b CR751 D controller ...
Page 36: ... 25 c CR750 Q CR751 Q controller CPU module ...
Page 75: ... 64 MEMO Please use this page for your memo ...
Page 95: ... 84 MEMO Please use this page for your memo ...
Page 103: ... 92 MEMO Please use this page for your memo ...
Page 111: ... 100 MEMO Please use this page for your memo ...
Page 119: ... 108 MEMO Please use this page for your memo ...
Page 123: ... 112 MEMO Please use this page for your memo ...
Page 129: ... 118 MEMO Please use this page for your memo ...
Page 133: ... 122 MEMO Please use this page for your memo ...
Page 137: ... 126 MEMO Please use this page for your memo ...
Page 143: ... 132 MEMO Please use this page for your memo ...
Page 149: ... 138 MEMO Please use this page for your memo ...
Page 153: ... 142 MEMO Please use this page for your memo ...
Page 159: ... 148 MEMO Please use this page for your memo ...
Page 171: ... 160 MEMO Please use this page for your memo ...
Page 183: ... 172 MEMO Please use this page for your memo ...
Page 191: ... 180 MEMO Please use this page for your memo ...
Page 211: ......

