


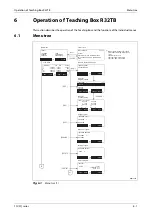

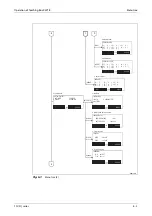


Operation of Teaching Box R32TB
Enter a character
SD-/SQ series
6 - 5
6.2
Enter a character
Every time you press the [CHARACTER] key, the write mode switches between entry of numbers and
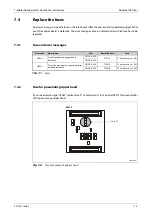
letters. The current mode is displayed at the bottom in the middle of the display.
Enter numbers
Numbers are entered in number mode using the keys on which the appropriate number as well as the
minus sign and the full stop are shown at the bottom left.
쑶
Enter letters
Letters are entered in letter mode using the keys on which the appropriate number indicated on the
bottom right. Change the character by pressing the key repeatedly. For instance, pressing the [ABC]
key repeatedly allows you to select from the following characters: "A"
...
"B"
...
"C"
...
"a"
...
"b"
...
"c".
When selecting letters assigned to the same key, you can move the cursor along a position by using
the arrow key [
].
쑶
The following characters are assigned to the keys:
●
[ ’ ( ) ] key: ’
(
)
“
^
:
¥
?
●
[ @ = ] key: @
=
+
–
얖
/
<
>
●
[ , % ] key: ,
%
#
$
!
&
_
.
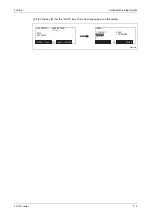
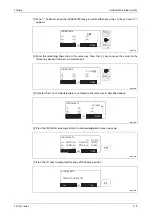
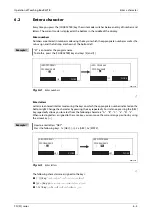
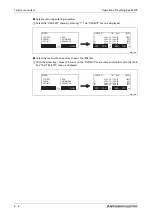
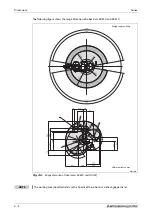
Example
쑴
"51" is entered as the program name.
To do this, press the [CHARACTER] key and keys [5] and [1].
R001489E
Fig. 6-2:
Enter numbers
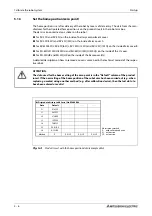
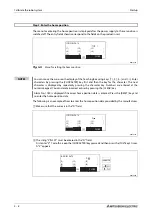
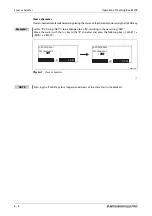
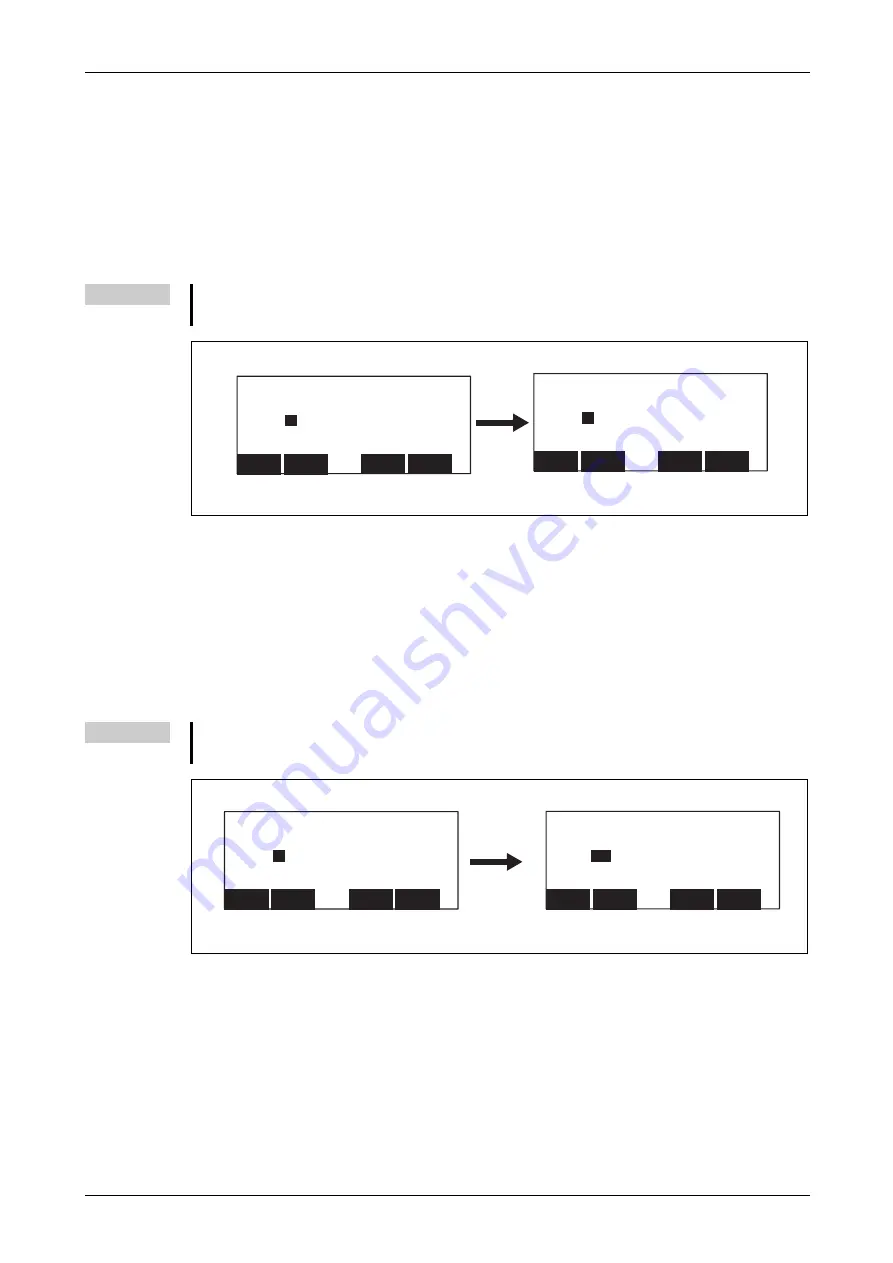
Example
쑴
How to enter letters "ABY".
Press the following keys: 1 x [ABC], [
], 2 x [ABC], 3 x [WXYZ].
R001489E
Fig. 6-3:
Enter letters
<NEW PROGRAM>
PROGRAM NAME
( )
CLOSE
123
<NEW PROGRAM>
PROGRAM NAME
(
51
)
CLOSE
123
<NEW PROGRAM>
PROGRAM NAME
(
ABY
)
CLOSE
ABC
<NEW PROGRAM>
PROGRAM NAME
(
)
CLOSE
ABC
Summary of Contents for MELFA RH-12SDH Series
Page 2: ......
Page 4: ......
Page 6: ......
Page 16: ...Contents X ...
Page 22: ...Performance Level PL compliant with EN ISO 13849 1 Introduction 1 6 ...
Page 44: ...Teaching Box System overview 2 22 ...
Page 74: ...Grounding the robot system Installation 3 30 ...
Page 88: ...Teaching Box connection Connection 4 14 ...
Page 98: ...Calibrate the robot system Startup 5 10 ...
Page 114: ...Instructions on maintenance Troubleshooting and maintenance instructions 7 6 ...
Page 134: ...Dimensions Annex A 20 ...
Page 136: ...A 22 Index Annex ...
Page 137: ......
Page 138: ......
Page 139: ......
Page 140: ......
Page 141: ......
Page 142: ......
Page 143: ......
Page 144: ......
Page 145: ......
Page 146: ......
Page 147: ......
Page 148: ......
Page 149: ......
Page 150: ......
Page 151: ......
Page 152: ......
Page 153: ......
Page 154: ......
Page 155: ......
Page 156: ......
Page 157: ......
Page 158: ......
Page 159: ......
Page 160: ......
Page 161: ......
Page 162: ......
Page 163: ......
Page 164: ......
Page 165: ......
Page 166: ......
Page 167: ......
Page 168: ......
Page 169: ......
Page 170: ......
Page 171: ......
Page 172: ......
Page 173: ......
Page 174: ......
Page 175: ......
Page 176: ......
Page 177: ......
Page 178: ......
Page 179: ......
Page 180: ......
Page 181: ......
Page 182: ......
Page 183: ......
Page 184: ......
Page 185: ......


