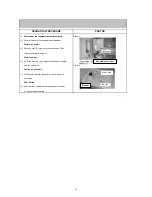
Defrost heater, Drip tray
Photo 8
(7) Peel off the tape that fixes lead wires on the side wall
of the vegetable compartment. Then take out defrost heater
together with heater roof.
Detach heater roof and Heater cover from Defrost heater.
Detach the drip tray after removing the defrost heater.
Defrost thermistor
(8) Cut the binder and disconnect the connector. (Photo 9)
Caution on assembly
[1] Loosen the lead wire at the defrost heather to prevent
water from entering the glass tube and careful the
direction for the correct assembly.
[2] Attach the drip tray securely to the lower parts.
[3] Attach the defrost thermistor in the correct place. (If
they're attached out of place, thermal characteristics
will go wrong).
[4] Attach the lead wires to the fixture.
5
Detachment the parts in Freezer compartment
(1) Detach the parts inside the Freezer room (Ice spoon,
Freezing case [upper] and Freezing case [lower] ).
(2) Pull the door of Freezer compartment by pulling toward you.
Cover (upper)
(3) Detach 3 catches and remove it. (Photo 10)
(4) Disconnect the connector.
Automatic ice-maker
(5) push a catch to upper and pull the part to the right
and detach it. (Photo 10)
OPERATING PROCEDURE
PHOTOS
Photo 9
Photo 10
Evaporator
Defrost heater
Cover (upper)
Ice corner
Catch
F-room
Rivet
Rivet
Catch
DEF thermistor
Aluminium
Heater
Defrost
heater
Tape
Drip tray
Tape
Heater roof
21
Summary of Contents for MR-C375C-OB-A
Page 2: ......
Page 9: ... SKELETON WIRING DIAGRAM MR C375C A MR C375CL A MR C405C A MR C405CL A 3 WIRING DIAGRAM 7 ...
Page 12: ...MR C375C A MR C375CL A MR C405C A MR C405CL A 5 NAMES OF PARTS 10 ...
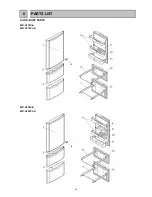
Page 26: ...DOOR BODY PARTS MR C375C A MR C375CL A MR C405C A MR C405CL A 8 PARTS LIST 24 ...
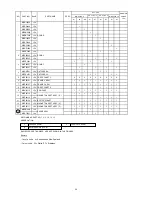
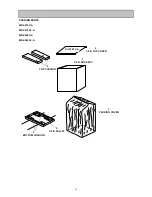
Page 28: ...BODY PARTS MR C375C A MR C375CL A MR C405C A MR C405CL A 26 ...
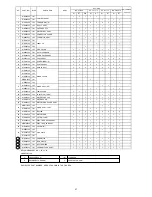
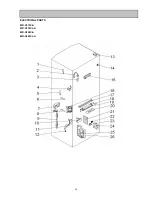
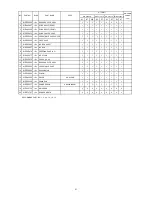
Page 30: ...ELECTRICIAL PARTS MR C375C A MR C375CL A MR C405C A MR C405CL A 28 ...
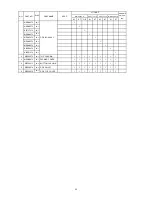
Page 32: ...ACCESSORY AND UNIT PARTS MR C375C A MR C375CL A MR C405C A MR C405CL A 30 ...


