3. SIGNALS AND WIRING
3 - 32
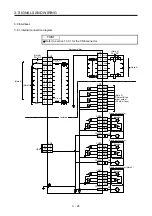
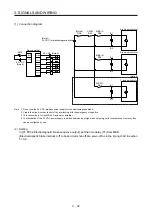
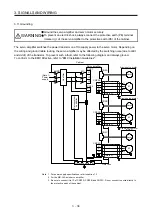
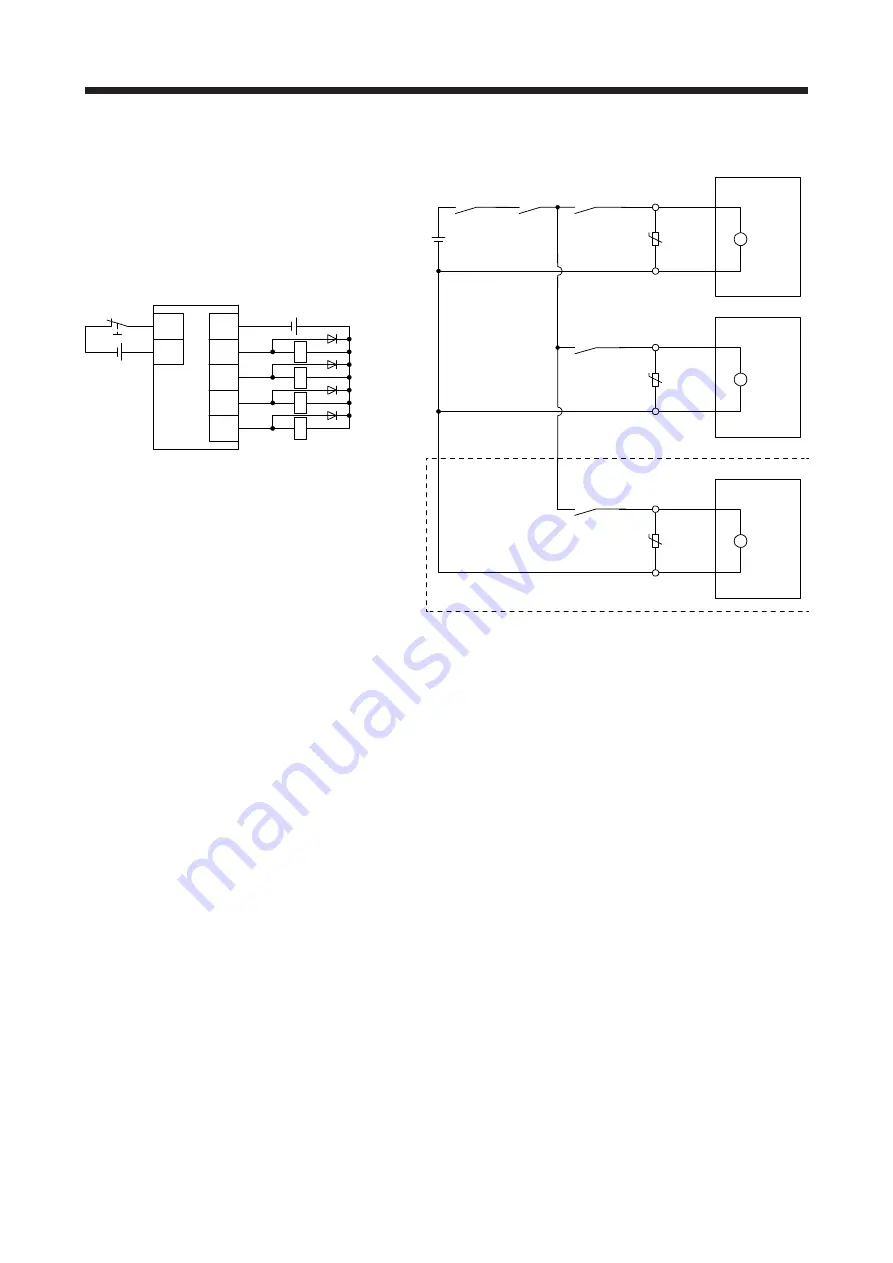
(1) Connection diagram
A-axis servo motor
B
(Note 2)
RA5
B2
U
B1
B-axis servo motor
B
B2
U
B1
CALM
RA1
MBR-A
RA2
MBR-B
RA3
(Note 1)
24 V DC for electromagnetic brake
C-axis servo motor
B
B2
U
B1
MBR-C
RA4
(Note 3)
Servo amplifier
CALM
DOCOM
24 V DC (Note 4)
24 V DC
(Note 4)
MBR-A
EM2
DICOM
RA1
RA2
EM2
RA3
RA4
MBR-B
MBR-C
Note 1. Do not use the 24 V DC interface power supply for the electromagnetic brake.
2. Create the circuit in order to shut off by interlocking with the emergency stop switch.
3. This connection is for the MR-J4 3-axis servo amplifier.
4. The illustration of the 24 V DC power supply is divided between input signal and output signal for convenience. However, they
can be configured by one.
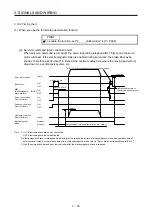
(2) Setting
In [Pr. PC02 Electromagnetic brake sequence output], set the time delay (Tb) from MBR
(Electromagnetic brake interlock) off to base circuit shut-off at a servo-off as in the timing chart in section
3.10.2.
Summary of Contents for MR-J4W2-0303B6
Page 39: ...2 INSTALLATION 2 8 MEMO ...
Page 97: ...4 STARTUP 4 20 MEMO ...
Page 181: ...6 NORMAL GAIN ADJUSTMENT 6 28 MEMO ...
Page 235: ...9 DIMENSIONS 9 6 MEMO ...
Page 245: ...10 CHARACTERISTICS 10 10 MEMO ...
Page 309: ...13 USING STO FUNCTION 13 14 MEMO ...
Page 365: ...15 USING A DIRECT DRIVE MOTOR 15 24 MEMO ...
Page 389: ...16 FULLY CLOSED LOOP SYSTEM 16 24 MEMO ...
Page 461: ...17 APPLICATION OF FUNCTIONS 17 72 MEMO ...
Page 556: ...APPENDIX App 41 ...
Page 585: ...MEMO ...


