12
Read before operating the controller
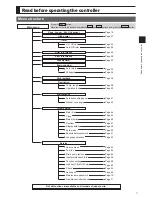
Main menu list
Setting and display items
Setting details
Reference
page
Vane ∙ Louver ∙ Vent.
(Lossnay)
Use to set the vane angle.
•
Select a desired vane setting from five different settings.
Use to turn ON / OFF the louver.
• Select a desired setting from "ON" and "OFF."
Use to set the amount of ventilation.
• Select a desired setting from "Off," "Low," and "High."
19
High power
Use to reach the comfortable room temperature quickly.
• Units can be operated in the High-power mode for up to 30 minutes.
21
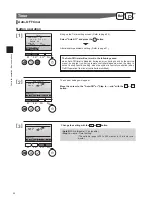
Timer
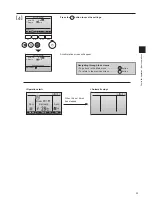
On/Off timer Use to set the operation On/Off times.
• Time can be set in 5-minute increments.
* Clock setting is required.
22
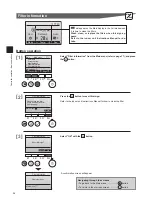
Auto-Off
timer
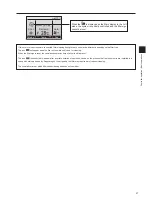
Use to set the Auto-Off time.
• Time can be set to a value from 30 to 20 in 10-minute increments.
2
Filter information
Use to check the filter status.
• The filter sign can be reset.
26
Error information
Use to check error information when an error occurs.
• Error code, error source, refrigerant address, unit model, manufacturing number,
contact information (dealer's phone number) can be displayed.
* The unit model, manufacturing number, and contact information need to be
registered in advance to be displayed.
28
Weekly timer
Use to set the weekly operation On / Off times.
• Up to eight operation patterns can be set for each day.
* Clock setting is required.
* Not valid when the On/Off timer is enabled.
30
Energy
saving
Auto return
Use to get the units to operate at the preset temperature after performing
energy-save operation for a specified time period.
• Time can be set to a value from 30 and 120 in 10-minute increments.
* This function will not be valid when the preset temperature ranges are restricted.
32
Schedule
Set the start/stop times to operate the units in the energy-save mode for each
day of the week, and set the energy-saving rate.
• Up to four energy-save operation patterns can be set for each day.
• Time can be set in 5-minute increments.
• Energy-saving rate can be set to a value from 0% and 50 to 90% in 10% increments.
* Clock setting is required.
3
Night setback
Use to make Night setback settings.
• Select "Yes" to enable the setting, and "No" to disable the setting. The temperature
range and the start/stop times can be set.
* Clock setting is required.
36
Restriction
Temp. range Use to restrict the preset temperature range.
• Different temperature ranges can be set for different operation modes.
38
Operation
lock
Use to lock selected functions.
• The locked functions cannot be operated.
0
Maintenance Auto
descending
panel
Auto descending panel (Optional parts) Up / Down you can do.
1
Manual
vane angle
Use to set the vane angle for each vane to a fixed position.
2
Initial setting Main/Sub
When connecting two remote controllers, one of them needs to be designated
as a sub controller.
Clock
Use to set the current time.
5
Main display Use to switch between "Full" and "Basic" modes for the Main display.
• The default setting is "Full."
6
Contrast
Use to adjust screen contrast.
7
Summary of Contents for Mr.Slim PAR-30MAA
Page 2: ......
Page 92: ...MEMO ...
Page 93: ...MEMO ...
Page 94: ...MEMO ...
Page 95: ...MEMO ...
Page 96: ...MEMO ...
Page 97: ...MEMO ...
Page 98: ...MEMO ...
Page 99: ......


