30
1
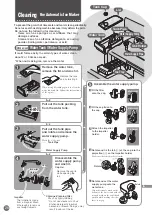
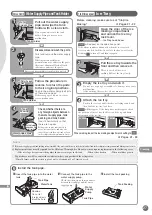
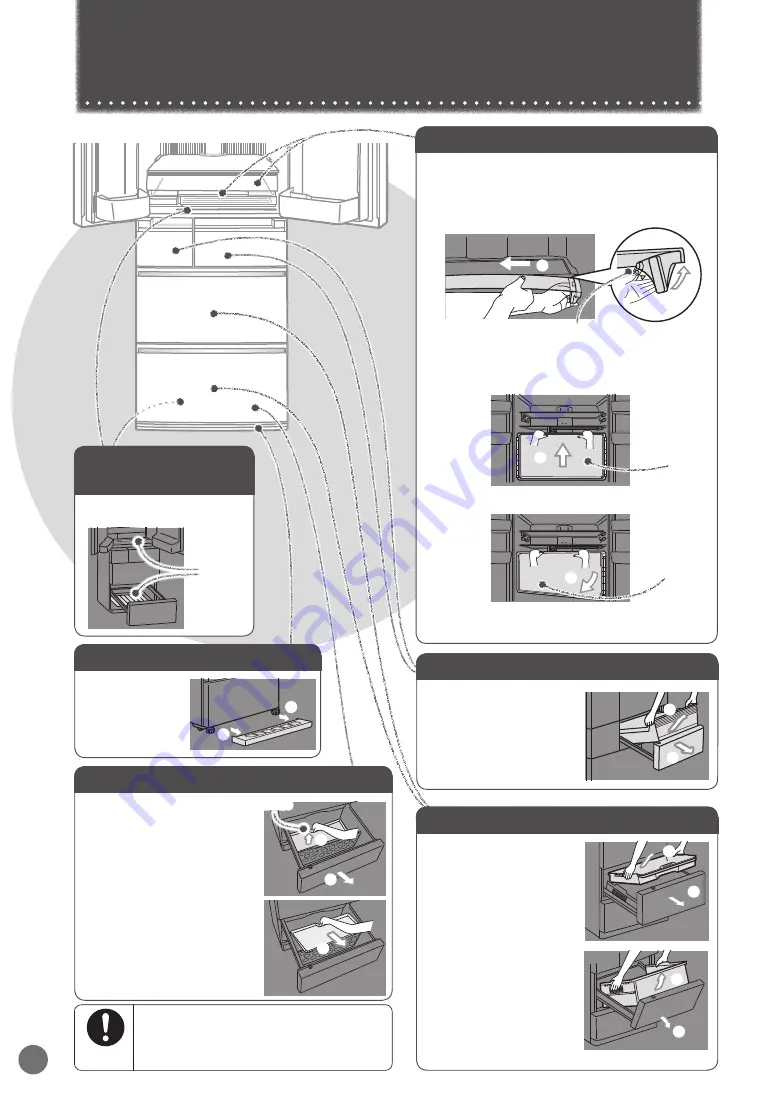
Pull the left and
right sides of the
support covers
to the front to
remove them.
Adjustable Support Cover
1
Fully pull out the door.
2
Lift the upper case out to
the front.
Freezer Compartment and Vegetable Compartment Case
* The illustration
represents the freezer
compartment.
Remove the vegetable
compartment in the
same manner.
1
Fully pull out the door.
2
Lift the case out to the front.
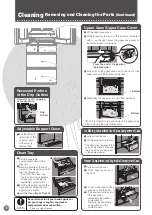
Ice Making Compartment and Versa Compartment Case
* The illustration represents the
versa compartment. Remove
the ice making compartment
in the same manner.
Wipe off any dirt, dripping
or condensation.
Recessed Portion
of the Drip Gutters
Drip
Gutters
3
Pull out while slightly lifting
up the door, and then tilt.
4
Lift the lower case out to the front.
1
Lift the upper case cover.
2
While pressing the end of the position indicated
with
on the right, press the upper case cover to
the left and warp it to remove.
Upper Case /Upper Case Cover
3
Fully pull out the upper case and lift the front of the
upper case until the bottom can be seen.
4
While tilting the upper case to your side, pull it out.
* When it is difficult to remove, remove the upper case
after removing the adjustable pocket.
Bottom
Press the end of the position
indicated with
Bottom
1
1
2
1
1
1
3
4
4
3
2
2
1
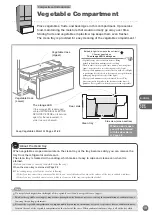
Pull the vegetable
compartment door all the
way out.
2
Hold the handle at the rear
center of the clean tray and lift
the tray straight up.
* Do not tilt the clean tray
too far. If you do, vegetable
scraps may fall inside the
vegetable compartment.
3
Pull the clean tray toward the
front without hitting the tray
against the partition.
About the clean tray
Page 19
Clean Tray
2
1
3
Handle
Be careful not to hit your hand against or
get your finger caught in the freezer
compartment door or partition.
There is a risk of injury.
Follow the
instructions
Cleaning
Removing and Cleaning the Parts
(Continued)


