background image

– 2 –

GB

Safety precautions

• Read the following safety precautions before using the controller.
• Observe these precautions carefully to ensure safety.

• After reading this manual, provide this manual to end user for future reference.
• Keep this manual for future reference and refer to it as necessary. This manual should be made 

available to those who repair or relocate the controller. Make sure that the manual is forwarded to 
future end users.


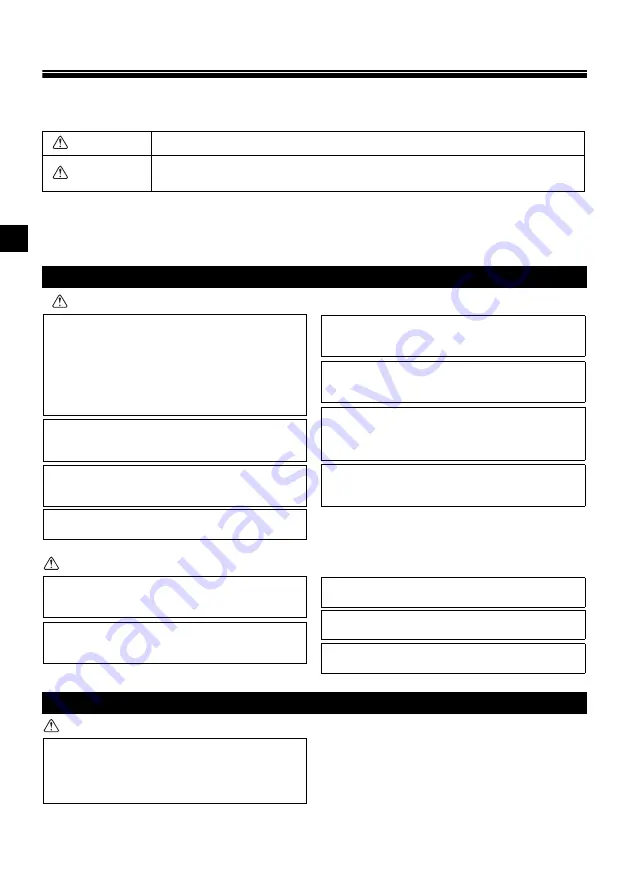
WARNING


CAUTION


WARNING

 WARNING

Indicates a risk of death or serious injury if you misuse the PAC-YT53CRAU.

 CAUTION

Indicates a risk of serious injury or structural damage if you misuse the 

PAC-YT53CRAU.

General precautions

Precautions for moving or repairing the controller

Do not install the unit in a place where large amounts of 
oil, steam, organic solvents, or corrosive gases, such 
as sulfuric gas, are present or where acidic/alkaline 
solutions or sprays are used frequently. These 
substances can compromise the performance of the 
unit or cause certain components of the unit to corrode, 
which can result in electric shock, malfunctions, 
smoke, or fire.

To reduce the risk of shorting, current leakage, electric 
shock, malfunctions, smoke, or fire, do not wash the 
controller with water or any other liquid.

To reduce the risk of electric shock, malfunctions, 
smoke or fire, do not operate the switches/buttons or 
touch other electrical parts with wet hands.

When alcohol sterilization is performed, ventilate the 
air to remove the gas.

To reduce the risk of injury or electric shock, stop the 
operation and switch off the power supply before 
cleaning, maintaining, or inspecting the controller.

To reduce the risk of injury or electric shock, before 
spraying a chemical around the controller, stop the 
operation and cover the controller.

If any abnormality (e.g., burning smell) is noticed, stop 
the operation, turn off the power switch, and consult 
your dealer. Continuing the operation may result in 
electric shock, malfunctions, or fire.

Properly install all required covers to keep moisture 
and dust out of the controller. Dust accumulation and 
water can cause electric shock, smoke, or fire.

To reduce the risk of damage to the controller, do not 
directly spray insecticide or other flammable sprays on 
the controller.

To reduce the risk of electric shock or malfunctions, do 
not touch the touch panel, switches, or buttons with a 
pointy or sharp object.

To reduce the risk of injury and electric shock, avoid 
contact with sharp edges of certain parts.

To reduce the risk of injury, wear protective gear when 
working on the controller.

Consult your dealer for the proper disposal of the 
controller.

The controller should be repaired or moved only by 
qualified personnel. 
Do not disassemble or modify the controller.
Improper installation or repair may cause injury, electric 
shock, or fire.

WT06428X01_GB.fm  Page 2  Friday, December 16, 2011  9:51 AM

Summary of Contents for PAC-YT53CRAU

Page 1: ...nits are in operation Indicates settings that can be changed only while the units are stopped Indicates functions that are not available when the buttons are locked or the system is centrally controlled Prior to use thoroughly read the instructions in this manual to use the product correctly Retain for future reference Make sure that this manual and Installation Manual are passed on to any future ...

Page 2: ...r fire do not operate the switches buttons or touch other electrical parts with wet hands When alcohol sterilization is performed ventilate the air to remove the gas To reduce the risk of injury or electric shock stop the operation and switch off the power supply before cleaning maintaining or inspecting the controller To reduce the risk of injury or electric shock before spraying a chemical aroun...

Page 3: ...ow dust to accumulate on the circuit board To avoid damage to the unit use appropriate tools to install inspect or repair the unit To avoid discoloration do not use benzene thinner or chemical rag to clean the controller To clean the controller wipe with a soft cloth soaked in water with mild detergent wipe off the detergent with a wet cloth and wipe off water with a dry cloth ...

Page 4: ...F button FAN button See Page 7 VANE button See Page 8 To set the functions that are not available on this controller PAC YT53CRAU such as Louver use MA remote controller or the centralized controller The lamp will light up in green when turned on and blink during startup and when an error occurs Pressing this button starts and stops the operation ...

Page 5: ...t to AUTO COOLHEATFAN DRYING VENTI SETBACK Error code blinks Room Set to AUTO COOLHEATFAN DRYING VENTI SETBACK Error code blinks icon appears while the unit is operated in the energy save mode All icons are displayed for explanation icon appears when Operation lock setting is effective See page 10 icon appears when indoor unit functions are set up Refer to the Installation Manual Fan speed icon Va...

Page 6: ...The preset temperatures for cooling and heating set in AUTO dual set point mode will be reflected to the temperature setting for COOL DRYING and HEAT modes SETBACK mode The SETBACK function automatically switches the operation mode between cooling and heating to maintain the room temperature within the set temperature range The preset temperatures for cooling and heating set in SETBACK mode can be...

Page 7: ...K While the preset temperature cooling heating display blinks pressing the button increases the preset temperatures for both cooling and heating and pressing the button decreases the preset temperatures for both cooling and heating When the button is pressed only the cooling preset temperature display blinks TEMP TEMP MODE Room Set to AUTO COOLHEATFAN DRYING VENTI SETBACK While the cooling preset ...

Page 8: ... settable fan speed varies depending on the indoor unit model to be connected If the unit has no fan setting function the fan speed cannot be set In this case the fan icon blinks when the button is pressed Pressing the button will switch the vane directions The settable vane direction varies depending on the indoor unit model to be connected If the unit has no vane function the vane direction cann...

Page 9: ...and SETBACK mode can be changed D Temperature range restriction for AUTO single set point mode The preset temperature range for AUTO single set point mode can be changed 4 Press the button to switch between the upper limit Hi and lower limit Lo settings Temperature range restriction OFF Room Set to AUTO COOLHEATFAN DRYING VENTI SETBACK Room Set to AUTO COOLHEATFAN DRYING VENTI SETBACK Room Set to ...

Page 10: ...ction This function can lock all buttons Locking the operations While the operation lock is disabled icon is unlit press and hold the button for three seconds or longer to enable the Operation lock A While the operation lock is enabled icon is lit B If any button is pressed while the operation lock is enabled icon will blink Unlocking the operations While the operation lock is enabled icon is lit ...

Page 11: ...s or longer to complete the setting 1 Press the button to stop the air conditioning unit 2 Press the and buttons simultaneously for three seconds or longer to change the backlight brightness The factory setting is bright Repeat step 2 above to switch the settings A B and C The setting will automatically turn off if step 2 is not performed for a certain period of time Backlight brightness setting O...

Page 12: ...t size 70 W 120 H 14 5 D mm 2 3 4 4 3 4 9 16 in not including the protruding part Net weight 0 1 kg 1 4 lb Rated power supply voltage 12 VDC supplied from indoor units Power consumption 0 3 W Usage environment Temperature 0 40ºC 32 104ºF Humidity 30 90 RH with no dew condensation Material PC ABS HEAD OFFICE TOKYO BLDG 2 7 3 MARUNOUCHI CHIYODA KU TOKYO 100 8310 JAPAN WT06428X01 ...

Page 13: ...quement lorsque les unités fonctionnent Indique des réglages modifiables uniquement lorsque les unités sont à l arrêt Indique des fonctions qui ne sont pas disponibles lorsque les boutons sont verrouillés ou le système est contrôlé de manière centrale Avant toute utilisation lire attentivement les instructions de ce manuel pour utiliser le produit correctement Conservez le pour vous y référer ulté...

Page 14: ...n de dysfonctionnement de fumée ou d incendie Lors de la réalisation d une stérilisation à l alcool aérez pour dissiper les gaz Pour éviter tout risque de blessure ou d électrocution éteignez la télécommande et coupez l alimentation électrique avant de la nettoyer de l examiner ou avant toute opération d entretien de celle ci Pour éviter tout risque de lésion ou d électrocution éteignez la télécom...

Page 15: ...essus Pour prévenir tout dommage à l unité utilisez des outils appropriés pour son installation son inspection ou sa réparation N utilisez pas de benzène de diluant ou d abrasif chimique pour nettoyer le contrôleur afin d éviter de le décolorer Pour nettoyer le contrôleur essuyez le avec un chiffon doux imbibé d un mélange d eau et d un détergent doux rincez les restes de détergent avec un chiffon...

Page 16: ...t Bouton FAN Ventilateur Voir page 7 Bouton VANE Vanne Voir page 8 Pour régler les fonctions non disponibles sur ce contrôleur PAC YT53CRAU comme la fonction Volet utilisez le contrôleur à distance MA ou le contrôleur centralisé Le voyant s allume en vert lors de la mise sous tension et clignote pendant le démarrage et lorsqu une erreur se produit Appuyer sur ce bouton démarre et arrête le fonctio...

Page 17: ... DRYING VENTI SETBACK Le code d erreur clignote Room Set to AUTO COOLHEATFAN DRYING VENTI SETBACK Le code d erreur clignote apparaît lorsque l unité fonctionne en mode d économie d énergie Toutes les icônes sont affichées pour la compréhension apparaît lorsque le réglage Commande bloquée est effectif Voir page 10 apparaît lorsque les fonctions de l unité intérieure sont réglées Veuillez vous référ...

Page 18: ...hauffage en mode AUTO deux points de réglage reflètent le réglage de la température des modes FROID DÉSHU et CHAUD Mode INVERSION La fonction de INVERSION change automatiquement le mode de fonctionnement entre refroidissement et chauffage afin de maintenir la température de la pièce dans la plage de la température programmée Les températures programmées pour le refroidissement et le chauffage en m...

Page 19: ...ature programmée refroidissement chauffage clignote appuyer sur le bouton augmente les températures programmées de refroidissement et de chauffage et appuyer sur le bouton diminue les températures programmées de refroidissement et de chauffage Lorsque vous appuyez sur le bouton seul l affichage de la température programmée de refroidissement clignote TEMP TEMP MODE Room Set to AUTO COOLHEATFAN DRY...

Page 20: ...arie en fonction du modèle d unité intérieure à connecter Si l unité ne possède pas de fonction de ventilation vous ne pouvez pas régler la vitesse du ventilateur Le cas échéant l icône du ventilateur clignote lorsque vous appuyez sur le bouton Appuyer sur le bouton modifie le sens des vannes Le sens des vannes réglable varie en fonction du modèle d unité intérieure à connecter Si l unité ne possè...

Page 21: ...AUTO deux points de réglage et INVERSION est modifiable D Limitations de la plage de température du mode AUTO un seul point de réglage La plage de températures programmées du mode AUTO un seul point de réglage est modifiable 4 Appuyez sur le bouton pour basculer entre les réglages de limite supérieure Hi et de limite inférieure Lo Limitation de la plage de température OFF Room Set to AUTO COOLHEAT...

Page 22: ...ction permet de verrouiller tous les boutons Blocage des commandes Lorsque le blocage de la commande est désactivé l icône est éteinte appuyez sur le bouton et maintenez le enfoncé pendant trois secondes minimum pour activer le blocage de la commande A Lorsque le blocage de la commande est activé l icône s allume B Si un bouton est enfoncé lorsque le blocage de la commande est activé l icône clign...

Page 23: ...les enfoncés pendant trois secondes minimum pour terminer le réglage 1 Appuyez sur le bouton pour arrêter le climatiseur 2 Appuyez sur les boutons et simultanément et maintenez les enfoncés pendant trois secondes minimum pour modifier le rétroéclairage Le réglage usine est définit sur lumineux Répétez l étape 2 ci dessus pour basculer entre les réglages A B et C Le réglage est automatiquement désa...

Page 24: ...nsions 70 L 120 H 14 5 P mm 2 3 4 4 3 4 9 16 in non compris la partie qui dépasse Poids net 0 1 kg 1 4 lb Tension d alimentation 12 V continus fourni par les appareils intérieurs Consommation 0 3 W Conditions d utilisation Température 0 à 40 ºC 32 à 104 ºF Humidité 30 à 90 sans condensation Matériau ABS PC HEAD OFFICE TOKYO BLDG 2 7 3 MARUNOUCHI CHIYODA KU TOKYO 100 8310 JAPAN WT06428X01 ...

Reviews: