background image

4

Consignes de sécurité

• 

Lisez attentivement les consignes de sécurité ci-après avant toute utilisation.

• 

Respectez scrupuleusement ces consignes pour assurer la sécurité.

AVERTISSEMENT

Signale un risque de blessure grave, voire mortelle.

ATTENTION

Signale un risque de blessure grave ou de dommage 
matériel.

• 

$SUqVDYRLUOXFHPDQXHOUHPHWWH]OHjOތXWLOLVDWHXUILQDOSRXUTXތLOSXLVVHOHFRQVXOWHUHQFDVGHEHVRLQ

• 

Conservez ce manuel pour pouvoir le consulter en cas de besoin. Ce manuel doit être fourni aux 
personnes chargées de réparer ou de déplacer la télécommande. Assurez-vous que le manuel est bien 

UHPLVjWRXWIXWXUXWLOLVDWHXU

Précautions générales

AVERTISSEMENT

1ތLQVWDOOH]SDVOތXQLWpHQXQHQGURLWRVHWURXYHQWGH

JUDQGHVTXDQWLWpVGތKXLOHGHYDSHXUGHVROYDQWV

organiques ou de gaz corrosifs tels du gaz sulfurique 

RXHQFRUHOjRVRQWIUpTXHPPHQWXWLOLVpVGHV

aérosols ou des solutions acides/alcalines. Ces 
substances peuvent affecter les performances de 

OތXQLWpRXSURYRTXHUODFRUURVLRQGHFHUWDLQVGHVHV

FRPSRVDQWVFHTXLSHXWGRQQHUOLHXjGHVGpIDXWV

de fonctionnement, des dégagements de fumée ou 
même une électrocution ou un incendie.

1HODYH]SDVODWpOpFRPPDQGHDYHFGHOތHDXRXWRXW

autre liquide afin de prévenir tout risque de court-

FLUFXLWGHIXLWHpOHFWULTXHGތpOHFWURFXWLRQGH

G\VIRQFWLRQQHPHQWGHIXPpHRXGތLQFHQGLH

1ތXWLOLVH]SDUOHVFRPPXWDWHXUVWRXFKHVRXGތDXWUHV

parties électriques avec les mains mouillées afin de 

SUpYHQLUWRXWULVTXHGތpOHFWURFXWLRQGH

G\VIRQFWLRQQHPHQWGHIXPpHRXGތLQFHQGLH

/RUVGHODGpVLQIHFWLRQGHOތDSSDUHLOjOތDLGHGތDOFRRO

aérer la pièce de manière adéquate. Les vapeurs 

GތDOFRRODXWRXUGHOތDSSDUHLOSHXYHQWSURYRTXHUXQ

LQFHQGLHRXGތH[SORVLRQORUVTXHOތDSSDUHLOHVWDOOXPp

3RXUpYLWHUWRXWULVTXHGHOpVLRQRXGތpOHFWURFXWLRQ

éteignez la télécommande et couvrez-la avant de 
pulvériser un quelconque produit chimique dans 

OތHQYLURQQHPHQWGHFHOXLFL

3RXUpYLWHUWRXWULVTXHGHEOHVVXUHRXGތpOHFWURFXWLRQ

pWHLJQH]ODWpOpFRPPDQGHHWFRXSH]OތDOLPHQWDWLRQ

pOHFWULTXHDYDQWGHODQHWWR\HUGHOތH[DPLQHURX

DYDQWWRXWHRSpUDWLRQGތHQWUHWLHQGHFHOOHFL

(QFDVGތDQRPDOLHRGHXUGHEU€OpHWFDUUrWH]OH

système, mettez-le hors tension et contactez 

LPPpGLDWHPHQWYRWUHUHYHQGHXU/ތXWLOLVDWLRQ

FRQWLQXHGXSURGXLWSHXWrWUHODFDXVHGތXQH

pOHFWURFXWLRQGތXQPDXYDLVIRQFWLRQQHPHQWRXGތXQ

incendie.

Installez correctement toutes les protections 
requises pour protéger la télécommande contre 

OތKXPLGLWpHWODSRXVVLqUH/ތDFFXPXODWLRQGH

SRXVVLqUHHWGތHDXSHXWSURYRTXHUGHV

électrocutions, de la fumée ou un incendie.

ATTENTION

3RXUSUpYHQLUWRXWULVTXHGތLQFHQGLHRXGތH[SORVLRQ

ne placez pas de matériaux inflammables et ne 
pulvérisez pas de substances inflammables dans 

OތHQYLURQQHPHQWGHODWpOpFRPPDQGH

3RXUSUpYHQLUWRXWULVTXHGތHQGRPPDJHUOD

WpOpFRPPDQGHQHSXOYpULVH]SDVGތLQVHFWLFLGHRX

tout autre aérosol inflammable directement dessus.

Pour réduire le risque de pollution, consultez une 

DJHQFHDJUppHSRXUSOXVGތLQIRUPDWLRQVVXUODPLVH

au rebut de la télécommande. 

1HWRXFKH]SDVOތpFUDQWDFWLOHOHVFRPPXWDWHXUVRX

les boutons avec un objet pointu ou tranchant afin de 

SUpYHQLUWRXWULVTXHGތpOHFWURFXWLRQRXGH

dysfonctionnement.

Summary of Contents for PAR-CT01MAU-SB

Page 1: ...e Make sure that this CD ROM and the Installation Manual are passed on to any future users To ensure safety and proper operation of the remote controller the remote controller should only be installed by qualified personnel CITY MULTI Control System and M series and P series Air Conditioners MA Touch Remote Controller PAR CT01MAU SB Instruction Book ...

Page 2: ......

Page 3: ...enu 26 Function settings 27 High power 27 Manual vane angle 28 Timer On Off timer 31 Timer Auto Off timer 34 Weekly timer 36 OU silent mode 39 Restriction 42 Energy saving 48 Clock 53 Daylight saving time 55 Main display 57 Icon explanation 58 Brightness 60 Language selection 61 Design 63 Touch panel calibration 65 Touch panel cleaning 67 Initialize remote controller 69 Remote controller informati...

Page 4: ...te the switches buttons or touch other electrical parts with wet hands When disinfecting the unit using alcohol ventilate the room adequately The fumes of the alcohol around the unit may cause a fire or explosion when the unit is turned on To reduce the risk of injury or electric shock before spraying a chemical around the controller stop the operation and cover the controller To reduce the risk o...

Page 5: ...m by Mitsubishi Electric The use of this controller for with other systems or for other purposes may cause malfunctions This appliance is not intended for use by persons including children with reduced physical sensory or mental capabilities or lack of experience and knowledge unless they have been given supervision or instruction concerning use of the appliance by a person responsible for their s...

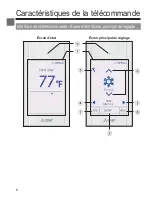
Page 6: ...6 Controller components Controller interface Status display Main display Status display Main display ...

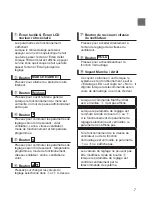
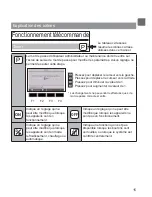
Page 7: ...on mode fan speed vane ventilation and louver button Press to change the contents of the setting selected in and above Fan speed shortcut button Press to directly access the fan speed settings screen HOLD button Press to enable disable the HOLD function ON OFF lamp This lamp lights up in green while the unit is in operation unless LED lighting is set to No It blinks while the remote controller is ...

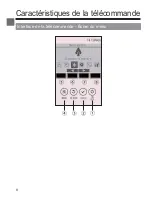
Page 8: ...8 Controller components Controller interface Menu screen ...

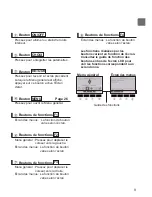
Page 9: ...ith the screen Function button F2 Main menu Press to move the cursor left Menu screen The button function varies with the screen Function button F3 Main menu Press to move the cursor right Menu screen The button function varies with the screen Function button F4 Menu screen The button function varies with the screen The functions of the function buttons change depending on the screen Refer to the ...

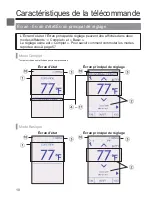
Page 10: ...us display and Main display can be displayed in two different modes Full and Basic The factory setting is Full For how to switch the mode refer to page 57 Full mode Status display Main display Basic mode Status display Main display All icons are displayed for explanation ...

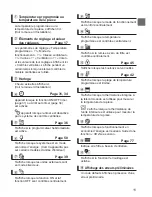
Page 11: ...save mode Will not appear on some models of indoor units Page 39 Appears while the outdoor units are operated in the silent mode Appears when the ON OFF operation is centrally controlled Appears when the operation mode is centrally controlled Appears when the preset temperature is centrally controlled Appears when the filter reset function is centrally controlled Page 45 Appears when the buttons a...

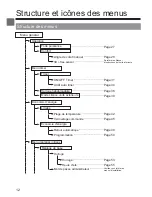
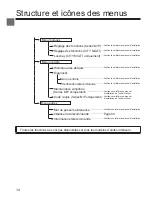
Page 12: ... On Off timer Page 31 Auto Off timer Page 34 Weekly timer Page 36 OU silent mode Page 39 Restriction Temp range Page 42 Operation locked Page 45 Energy saving Auto return Page 48 Schedule Page 50 Basic setting Clock Clock Page 53 Daylight saving time Page 55 Administrator password Refer to the Installation Manual Operation Timer menu Energy saving Initial setting menu ...

Page 13: ...Instructions Manual that came with the automatic elevating panel Descending adjustment Refer to the Instructions Manual that came with the automatic elevating panel Test run menu Test run Refer to the indoor unit Installation Manual Drain pump test run Refer to the indoor unit Installation Manual Maintenance information Refer to the indoor unit Installation Manual Model name input Refer to the ind...

Page 14: ...osis Self check Refer to the Installation Manual Remote controller check Refer to the Installation Manual Smooth maintenance M P series only Refer to the indoor unit Installation Manual Request code M P series only Refer to the indoor unit Installation Manual Other menu Maintenance password Refer to the Installation Manual Initialize remote controller Page 69 Remote controller information Refer to...

Page 15: ...ase the value by 1 Changes cannot be made unless the correct password is entered ON Indicates settings that can be changed only while the units are in operation OFF Indicates settings that can be changed only while the units are not in operation Indicates settings that can be changed only while the units are operated in the Cool Heat or Auto mode Indicates functions that are not available when the...

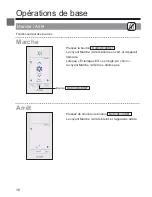
Page 16: ...s the ON OFF button The ON OFF lamp will light up in green and the operation will start When LED lighting is set to No the ON OFF lamp will not light up OFF Press the ON OFF button again The ON OFF lamp will come off and the operation will stop ON OFF button ...

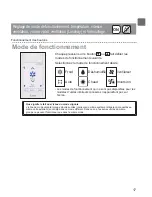
Page 17: ...ion mode Cool Drying Fan Auto Heat Setback Operation modes that are not available to the connected indoor unit models will not appear on the display What the blinking mode icon means The mode icon will blink when other indoor units in the same refrigerant system connected to the same outdoor unit are already operated in a different mode In this case the rest of the unit in the same group can only ...

Page 18: ...st and the lowest is large and both heating and cooling modes are used within the same day Setback mode Room temperature is controlled to stay within the set temperature range that is specified for the Setback mode By leaving sufficient temperature differential between the set temperature for cooling upper limit and heating lower limit it is possible to keep the room temperature within the specifi...

Page 19: ...on operation Preset temperature will be displayed either in Centigrade in 0 5 or 1 degree increments or in Fahrenheit depending on the indoor unit model and the display mode setting on the remote controller Auto dual set point or Setback mode 1 The current preset temperatures will appear Each pressing of the or button switches the preset temperatures for cooling and heating Room temperature Refer ...

Page 20: ...tures varies with the models of indoor units connected is met If preset temperatures are set in a way that does not meet the minimum temperature difference requirement both preset temperatures will automatically be changed within the allowable setting ranges Settable preset temperature range Operation mode Preset temperature range Cool Drying 19 30 ºC 67 87 ºF Heat 17 28 ºC 63 83 ºF Auto Single se...

Page 21: ...t the desired setting Auto Auto Step 1 Step 2 Step 3 Step 4 Step 5 Swing Swing Select Swing to move the vanes up and down automatically When set to Step 1 through Step 5 the vane will be fixed at the selected angle at the left of the vane setting icon This icon will appear when the vane is set to Step 2 3 4 or 5 and the fan operates at low speed during cooling or drying operation depends on the mo...

Page 22: ...setting The ventilation setting can be made even when the units are in operation Sample screen on M P series Each pressing of the or button cycles through the following ventilation settings Settable only when Lossnay unit is connected Off Low High The fan on some models of indoor units may be interlocked with certain models of ventilation units ...

Page 23: ...he HOLD button to enable disable the HOLD function If the HOLD function is enabled the following functions will be prohibited and will appear ON OFF timer Auto Off timer Weekly timer Automatic return to the preset temperature ...

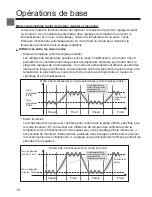
Page 24: ...control Set the Start Stop times for each day of the week Select the desired silent level from Normal Middle and Quiet Clock setting is required 39 Energy saving Restriction Temp range Use to restrict the preset temperature range Different temperature ranges can be set for different operation modes 1ºF increments 42 Operation locked Use to lock selected functions The locked functions cannot be ope...

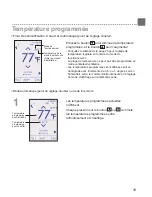
Page 25: ...or the touch panel 65 Touch panel cleaning Temporarily makes the touch panel unresponsive to touch to allow for cleaning 67 Service Initialize remote controller Use to initialize the remote controller to the factory shipment status 69 Remote controller information Use to display the remote controller model name software version and serial number 71 Maintenance Error information Use to check error ...

Page 26: ...Navigating through the Main menu Button operation Accessing the Main menu Press the Setting button on the Main display The Main menu will appear Item selection Press F2 to move the cursor left Press F3 to move the cursor right Cursor ...

Page 27: ...aches the preset temperature whichever is earlier The units will return to the normal operation when the operation mode or fan speed is changed Button operation 1 Select High power from the Operation menu during Cooling Heating or Auto operation and press the SELECT button High power function is available only on the models that support the function 2 Move the cursor to Yes with the F3 or F4 butto...

Page 28: ...Function settings Manual vane angle OFF Button operation 1 Select Comfort from the Operation menu and press the SELECT button 2 Select Manual vane angle with the F1 or F2 button and press the SELECT button ...

Page 29: ...tton and press the SELECT button Ref address Refrigerant address Unit No 1 2 3 4 Press the F4 button to confirm the unit The screen at left shows a sample display on M P series units On CITY MULTI units M NET address is displayed instead of Ref address and the Unit No will not be displayed 4 Select Vane with the F1 button Select 4 way or 2 way with the F2 or F3 button and press the F4 button ...

Page 30: ...cted outlet The screen will automatically return to the previous screen when the transmission is completed Make the settings for other outlets following the same procedures If all outlets are selected will be displayed the next time the unit goes into operation Navigating through the screens To return to the previous screen RETURN button Draft reduction The Draft reduction mode keeps the vane angl...

Page 31: ...ck in the service menu during test run during remote controller diagnosis when the clock is not set during function setting when the system is centrally controlled when On Off operation or timer operation from local remote controller is prohibited when the HOLD function is enabled 2 Move the cursor to Timer and press the SELECT button 3 The current settings will appear Move the cursor to On Off ti...

Page 32: ...r Repeat 5 Change the setting with the F3 or F4 button On Off timer No disable Yes enable On Operation start time settable in 5 minute increments Press and hold the button to rapidly advance the numbers Off Operation stop time settable in 5 minute increments Press and hold the button to rapidly advance the numbers Repeat No once Yes repeat ...

Page 33: ... go back to the Main menu MENU button To return to the previous screen RETURN button will appear on the Status display and the Main display in the Full mode when the On Off timer is enabled The icon will not appear while the HOLD function is enabled appears when the timer is disabled by the centralized control system ...

Page 34: ... during test run during remote controller diagnosis during function setting when the system is centrally controlled when On Off operation or timer operation from local controller is prohibited when the HOLD function is enabled 2 The current settings will appear Move the cursor to Auto Off or Stop in min with the F1 or F2 button 3 Change the setting with the F3 or F4 button Auto Off No disable Yes ...

Page 35: ...go back to the Main menu MENU button To return to the previous screen RETURN button will appear on the Status display and the Main display in the Full mode when the Auto Off timer is enabled The icon will not appear while the HOLD function is enabled appears when the timer is disabled by the centralized control system ...

Page 36: ...ng remote controller diagnosis when the clock is not set during function setting when the system is centrally controlled On Off operation temperature setting or timer operation from local remote controller is prohibited when the HOLD function is enabled 2 The current settings will appear Press the F1 or F2 button to see the settings for each day of the week Press the F3 button to see patterns 5 th...

Page 37: ...ents of the timer setting 1 or 2 move the cursor to Setting with the F1 or F2 button and select 1 or 2 with the F3 or F4 button 4 The weekly timer setting screen will appear and the current settings will be displayed Up to eight operation patterns can be set for each day Move the cursor to the desired day of the week with the F1 or F2 button and press the F3 button to select it Multiple days can b...

Page 38: ... is selected two preset temperatures can be set If an operation pattern with a single preset temperature setting is executed during the Auto dual set point mode its setting will be used as the cooling temperature setting in the Cool mode Press the SELECT button to save the settings A confirmation screen will appear Navigating through the screens To go back to the setting change day of the week sel...

Page 39: ...y of the week for the quiet operation Select the desired silent level from Middle and Quiet Button operation 1 Select OU silent mode from the Timer menu and press the SELECT button OU silent mode function is available only on the models that support the function 2 The current settings will appear Press the F1 or F2 button to see the settings for each day of the week Press the SELECT button to go t...

Page 40: ...move the cursor to Yes with the F3 or F4 button and press the SELECT button 4 The OU silent mode setting screen will appear To make or change the setting move the cursor to the desired day of the week with the F1 or F2 button and press the F3 button to select it Multiple days can be selected Press the SELECT button ...

Page 41: ...n to rapidly advance the numbers Silent level Normal Middle Quiet Normal Middle Quiet Press the SELECT button to save the settings A confirmation screen will appear Navigating through the screens To go back to the setting change day of the week selection screen SELECT button To go back to the Main menu MENU button To return to the previous screen RETURN button will appear on the Status display and...

Page 42: ... P Setting the temperature range restriction Button operation 1 Select Energy saving from the Main menu refer to page 26 and press the SELECT button 2 Move the cursor to Restriction with the F1 or F2 button and press the SELECT button ...

Page 43: ...ear Move the cursor to Temp range with the F1 or F2 button and press the SELECT button 4 The screen to set the temperature range will appear Move the cursor to the desired item with the F1 EXWWRQ RXW RI 7HPS UDQJH RRO U LQJ HDW RU Auto ...

Page 44: ...t point modes can be set 2 Temperature ranges for the Heat and Auto dual set point modes can be set 3 Temperature ranges for the Heat Cool and Drying modes must meet the conditions below 8SSHU OLPLW IRU FRROLQJ XSSHU OLPLW IRU KHDWLQJ 0LQLPXP temperature difference varies with indoor unit model RZHU OLPLW IRU FRROLQJ ORZHU OLPLW IRU KHDWLQJ 0LQLPXP temperature difference varies with indoor unit mo...

Page 45: ...lock function Button operation 1 Bring up the Restriction setting screen Refer to page 42 Move the cursor to Operation locked and press the SELECT button To enable the operation lock function set the item Operation locked to Yes ...

Page 46: ...ion Individual or Hotel On Off On Off operation Mode Operation mode setting Locked Set temp Preset temp setting Vane Vane setting Menu Menu setting Fan Fan speed setting Louver Louver setting HOLD HOLD setting When Hotel is selected for the Location setting the following operations will be locked automatically Mode Vane Menu and Louver Press the SELECT button to save the settings A confirmation sc...

Page 47: ... lock function setting is enabled Operation guide that corresponds to the locked function will be suppressed To display the main menu while the menu setting is being locked press and hold the Setting button for ten or more seconds Enter the administrator s password on the password input screen ...

Page 48: ... operation is performed from this remote controller the set temperature automatically returns to the required temperature regardless of the set time Button operation 1 Select Energy saving from the Energy saving menu and press the SELECT button 2 The current settings will appear Move the cursor to Auto return with the F1 or F2 button and press the SELECT button ...

Page 49: ...to 28ºC 63 to 83ºF 1ºC increments Press the SELECT button to save the settings Cool includes Drying and Auto Cool modes and Heat includes Auto Heat mode The screen to set the selected item will appear Navigating through the screens To go back to the Main menu MENU button To return to the previous screen RETURN button Timer or preset temperature settings will not be effective when the temperature r...

Page 50: ...SELECT button 2 The screen to see the schedule will appear Press the F1 or F2 button to see the settings for each day of the week Press the SELECT button to go to the setting screen 3 The screen to enable Yes disable No the energy saving operation schedule will appear Select No or Yes with the F3 or F4 button Press the SELECT button to go to the setting change day of the week selection screen ...

Page 51: ...s the F1 button to move the cursor to the desired pattern number Move the cursor to the desired item with the F2 button out of the start time stop time and energy saving rate arranged in this order from the left Change the settings with the F3 or F4 button Start Stop time settable in 5 minute increments Press and hold the button to rapidly advance the numbers Energy saving rate The setting range i...

Page 52: ...splay in the Full mode when the unit is operated in the energy saving mode Navigating through the screens To go back to the setting change day of the week selection screen SELECT button To go back to the Main menu MENU button To return to the previous screen RETURN button ...

Page 53: ...wing settings On Off timer OU silent mode Weekly timer Energy saving If a given system has no system controllers the clock time will not automatically be corrected In this case periodically correct the clock time 2 Move the cursor to Basic setting with the F1 or F2 button and press the SELECT button 3 Select Clock with the F1 or F2 button and press the SELECT button ...

Page 54: ...ired item with the F1 or F2 button out of year month date hour or minute Increase or decrease the value for the selected item with the F3 or F4 button and press the SELECT button A confirmation screen will appear Navigating through the screens To go back to the Main menu MENU button To return to the previous screen RETURN button ...

Page 55: ...a system controller disable this setting to keep the correct time At the beginning and the end of daylight saving time the timer may go into action twice or not at all This function will not work unless the clock has been set Button operation 1 Select Clock from the Basic setting menu and press the SELECT button 2 Move the cursor to Daylight saving time with the F1 or F2 button and press the SELEC...

Page 56: ...r F4 button Date End 1 2nd page Set the day of the week week number and month with the F3 or F4 button The default setting is Sun 5th Oct End time 2nd page Set the end time for daylight saving time with the F3 or F4 button Backward to 2nd page Set the time when the clock is to be set backward to at the end time above with the F3 or F4 button 1 If 5th is selected for the week number and the 5th wee...

Page 57: ... the cursor to Main display with the F1 or F2 button and press the SELECT button 3 Select Full or Basic refer to page 10 with the F3 or F4 button and press the SELECT button A confirmation screen will appear Navigating through the screens To go back to the Main menu MENU button To return to the previous screen RETURN button ...

Page 58: ...rsor to Main display with the F1 or F2 button and press the SELECT button 3 Select Icon explan with the F1 or F2 button select the desired setting Yes or No with the F3 or F4 button and press the SELECT button The default setting is Yes Navigating through the screens To go back to the Main menu MENU button To return to the previous screen RETURN button ...

Page 59: ...59 4 When Yes is selected the explanation of the icon of the setting item will appear as shown at left ...

Page 60: ...1 or F2 button and press the SELECT button 3 Adjust the brightness with the F1 or F2 button ON or OFF can be selected for the Stay lit setting with the F4 button When ON is selected the backlight will remain lit dimly even after the specified time has elapsed Navigating through the screens To go back to the Main menu MENU button To return to the previous screen RETURN button ...

Page 61: ...guage can be set The language options are English French and Spanish Button operation 1 Select Display setting from the Initial setting menu and press the SELECT button 2 Move the cursor to Language selection with the F1 or F2 button and press the SELECT button ...

Page 62: ...en the power is on for the first time the Language selection screen will be displayed Select a desired language The system will not start up without language selection A screen will appear that indicates the setting has been saved Navigating through the screens To go back to the Main menu MENU button To return to the previous screen RETURN button ...

Page 63: ...he F1 or F2 button and press the SELECT button 3 Select Color with the F4 button Color The display color can be selected Refer to the next page White Monochrome display white basis Black Monochrome display black basis When White or Black is selected press the SELECT button When Color is selected select the desired color referring to the next page ...

Page 64: ... to 89 Pattern Set the color with the F4 button Color set to Select Character or BG Background as a target to which the color is applied with the F4 button The sample color below the function buttons will change according to the setting Set the desired color and press the SELECT button Navigating through the screens To go back to the Main menu MENU button To return to the previous screen RETURN bu...

Page 65: ...l from the Initial setting menu and press the SELECT button 2 Move the cursor to Touch panel calibration with the F1 or F2 button and press the SELECT button 3 A confirmation screen will appear Select Cancel or OK with the F3 or F4 button and press the SELECT button ...

Page 66: ...lete and the display will return to the touch panel menu If the touch panel is left untouched for one minute the calibration will be canceled and the display will automatically return to the previous screen To properly calibrate the touch panel use a pointy but not sharp object to touch the dots A sharp object may damage or scratch the touch panel ...

Page 67: ...l from the Initial setting menu and press the SELECT button 2 Move the cursor to Touch panel cleaning with the F1 or F2 button and press the SELECT button 3 A confirmation screen will appear Select Cancel or OK with the F3 or F4 button and press the SELECT button ...

Page 68: ...for 30 seconds without accidentally changing the settings The display will return to the touch panel menu after the 30 seconds Wipe with a soft dry cloth a cloth soaked in water with mild detergent or a cloth dampened with ethanol Do not use acidic alkaline or organic solvents ...

Page 69: ...tting Energy saving setting Energy saving option setting Clock setting Daylight saving time setting Main display setting Brightness setting Display details setting Design setting Auto mode setting Model name setting Serial No setting Dealer information setting Error information Administrator password Maintenance password Button operation 1 Select Others from the Service menu and press the SELECT b...

Page 70: ...70 Function settings 3 Select OK with the F4 button The remote controller will automatically be started up after being initialized ...

Page 71: ...ion The information of the remote controller in use can be checked Button operation 1 Select Others from the Service menu and press the SELECT button 2 Move the cursor to Remote controller information with the F1 or F2 button and press the SELECT button ...

Page 72: ...72 Function settings 3 The model name software version and serial number of the remote controller in use can be checked ...

Page 73: ...ealer Button operation 1 Error code error unit refrigerant address unit model name date and time on which an error occurred and serial number will appear The model name and serial number will appear only if the information have been registered Press the F1 or F2 button to go to the next page Contact information dealer s phone number will appear if the information have been registered ...

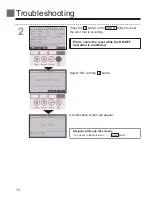
Page 74: ... ON OFF button to reset the error that is occurring Errors cannot be reset while the ON OFF operation is prohibited Select OK with the F4 button A confirmation screen will appear Navigating through the screens To go back to the Main menu MENU button ...

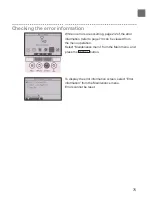
Page 75: ... 2 2 of the error information refer to page 73 can be viewed from the menu operation Select Maintenance menu from the Main menu and press the SELECT button To display the error information screen select Error information from the Maintenance menu Errors cannot be reset ...

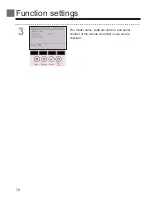
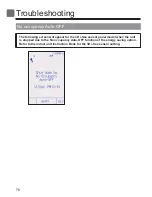
Page 76: ...FF The following screen will appear for the 3D i See sensor panel model when the unit is stopped due to the No occupancy Auto OFF function of the energy saving option Refer to the indoor unit Instruction Book for the 3D i See sensor setting ...

Page 77: ...filters Wash clean or replace the filters when this sign appears Refer to the indoor unit Instructions Manual for details Button operation 1 Select Filter information from the Maintenance menu and press the SELECT button 2 Press the F4 button to reset filter sign Refer to the indoor unit Instructions Manual for how to clean the filter ...

Page 78: ...units are connected filter cleaning timing for each unit may be different depending on the filter type The icon will appear when the filter on the main unit is due for cleaning When the filter sign is reset the cumulative operation time of all units will be reset The icon is scheduled to appear after a certain duration of operation based on the premise that the indoor units are installed in a spac...

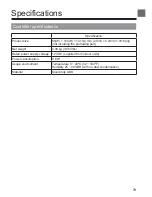
Page 79: ... D mm 2 9 16 4 23 32 9 16 in not including the protruding part Net weight 0 09 kg 13 64 lbs Rated power supply voltage 12 VDC supplied from indoor units Power consumption 0 6 W Usage environment Temperature 0 40ºC 32 104ºF Humidity 25 90 RH with no dew condensation Material Main body ABS ...

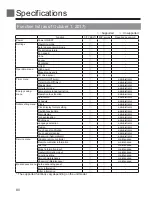
Page 80: ...strator Initial setting menu Clock administrator Clock display format setting administrator Daylight saving time administrator Main display administrator Icon explanation administrator Brightness administrator Language selection administrator Design administrator Touch panel calibration administrator Touch panel cleaning administrator Password Administrator administrator Service menu Initialize re...

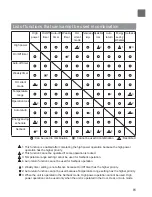
Page 81: ...e high power operation because the high power operation has the higher priority 2 This function cannot be operated if some operation is locked 3 Temperature range setting cannot be used for Setback operation 4 Auto return function cannot be used for Setback operation 1 Weekly timer setting is not effective because On Off timer has the higher priority 2 Auto return function cannot be used because T...

Page 82: ......

Page 83: ... vous y référer ultérieurement VVXUH YRXV TXH FH 520 HW OH PDQXHO G ތ LQVWDOODWLRQ VRQW ELHQ UHPLV j WRXW IXWXU XWLOLVDWHXU Pour assurer la sécurité et le bon fonctionnement de la télécommande elle doit être installée uniquement par du personnel qualifié Système de contrôle CITY MULTI et climatiseurs des séries M et P Télécommande tactile MA PAR CT01MAU SB Manuel d utilisation ...

Page 84: ......

Page 85: ...lages des fonctions 27 Forte puissance 27 Angle de volet manuel 28 Timer ON OFF timer 31 Timer Arrêt auto timer 34 Horloge hebdomadaire 36 Mode silence unité extérieure 39 Limites 42 eFRQRPLH G ތ pQHUJLH 48 Horloge 53 HXUH G ތ pWp 55 Écran principal de réglage 57 Explication des icônes 58 Luminosité 60 Sélection de la langue 61 Design 63 DOLEUDJH GH O ތ pFUDQ WDFWLOH 65 1HWWR DJH GH O ތ pFUDQ WDFW...

Page 86: ...pH RX G ތ LQFHQGLH RUV GH OD GpVLQIHFWLRQ GH O ތ DSSDUHLO j O ތ DLGH G ތ DOFRRO aérer la pièce de manière adéquate Les vapeurs G ތ DOFRRO DXWRXU GH O ތ DSSDUHLO SHXYHQW SURYRTXHU XQ LQFHQGLH RX G ތ H SORVLRQ ORUVTXH O ތ DSSDUHLO HVW DOOXPp 3RXU pYLWHU WRXW ULVTXH GH OpVLRQ RX G ތ pOHFWURFXWLRQ éteignez la télécommande et couvrez la avant de pulvériser un quelconque produit chimique dans O ތ HQYLUR...

Page 87: ... G ތ LPPHXEOH 0LWVXELVKL OHFWULF ތ XWLOLVDWLRQ GH FHWWH WpOpFRPPDQGH DYHF G ތ DXWUHV V VWqPHV RX j G ތ DXWUHV fins peut entraîner des dysfonctionnements HW DSSDUHLO Q ތ HVW SDV GHVWLQp j rWUH XWLOLVp SDU GHV personnes enfants inclus dont les capacités mentales sensorielles ou physiques sont réduite ou TXL QH GLVSRVHQW SDV GH O ތ H SpULHQFH HW GHV connaissances requises sauf si une personne respons...

Page 88: ...6 Caractéristiques de la télécommande QWHUIDFH GH OD WpOpFRPPDQGH eFUDQ G ތ pWDW eFUDQ SULQFLSDO GH UpJODJH eFUDQ G ތ pWDW Écran principal de réglage ...

Page 89: ... vitesse ventilateur vanne ventilation e volet Bouton Pressez pour changer les valeurs du réglage sélectionné dans et ci dessus Bouton de raccourci vitesse du ventilateur 3UHVVH SRXU DFFpGHU GLUHFWHPHQW j O ތ pFUDQ GH UpJODJH GH OD YLWHVVH GX ventilateur Bouton HOLD Pressez pour activer désactiver la fonction Verrouillage Voyant Marche Arrêt H YR DQW V ތ DOOXPH HQ YHUW ORUVTXH OH système est en fo...

Page 90: ...8 Caractéristiques de la télécommande Interface de la télécommande Écran du menu ...

Page 91: ...ns de fonctions F2 Menu général Pressez pour déplacer le curseur vers la gauche Écran des menus La fonction du bouton YDULH VHORQ O ތ pFUDQ Boutons de fonctions F3 Menu général Pressez pour déplacer le curseur vers la droite Écran des menus La fonction du bouton YDULH VHORQ O ތ pFUDQ Boutons de fonctions F4 Écran des menus La fonction du bouton YDULH VHORQ O ތ pFUDQ Les fonctions réalisées par les...

Page 92: ... GH UpJODJH SHXYHQW rWUH DIILFKpV GDQV GHX modes différents Complet et Basic Le réglage usine est Complet Pour savoir comment commuter les modes UHSRUWH YRXV j SDJH Mode Complet eFUDQ G ތ pWDW Écran principal de réglage Mode Basique eFUDQ G ތ pWDW Écran principal de réglage 7RXWHV OHV LF QHV VRQW DI FKpHV SRXU OD FRPSUpKHQVLRQ ...

Page 93: ... SDV VXU FHUWDLQV PRGqOHV G ތ XQLWpV G ތ LQWpULHXU Page 39 6 ތ DIILFKH ORUVTXH OHV XQLWpV H WpULHXUV VRQW en mode silencieux 6 ތ DIILFKH ORUVTXH OD IRQFWLRQ 21 HW ODI fonction OFF sont contrôlés centralement 6 ތ DIILFKH ORUVTXH OH PRGH GH IRQFWLRQQHPHQW est contrôlé centralement 6 ތ DIILFKH ORUVTXH OD WHPSpUDWXUH programmée est contrôlée centralement 6 ތ DIILFKH VL OD UHPLVH j pUR GX ILOWUH HVW co...

Page 94: ...1 Arrêt auto timer Page 34 Horloge hebdomadaire Page 36 Mode silence unité extérieure Page 39 Limites Plage de température Page 42 Verrouillage commande Page 45 eFRQRPLH G ތ pQHUJLH Retour automatique Page 48 Programmation Page 50 Réglage de base Horloge Horloge Page 53 HXUH G ތ pWp Page 55 Mot de passe administrateur Veuillez vous référer au PDQXHO G ތ LQVWDOODWLRQ Opération Menu timer eFRQRPLH G...

Page 95: ...tée Réglage de descente 9HXLOOH YRXV UpIpUHU DX PDQXHO G ތ LQVWUXFWLRQV fourni avec le système automatique de montée Menu Test fonctions Test fonctions Veuillez vous référer au manuel G ތ LQVWDOODWLRQ GH O ތ XQLWp LQWpULHXUH Test pompe des condensats Veuillez vous référer au manuel G ތ LQVWDOODWLRQ GH O ތ XQLWp LQWpULHXUH Informations de maintenance Veuillez vous référer au manuel G ތ LQVWDOODWLRQ...

Page 96: ...pIpUHU DX PDQXHO G ތ LQVWDOODWLRQ Vérification télécommande 9HXLOOH YRXV UpIpUHU DX PDQXHO G ތ LQVWDOODWLRQ Maintenance simplifiée Séries M P uniquement Veuillez vous référer au manuel G ތ LQVWDOODWLRQ GH O ތ XQLWp LQWpULHXU Code requis Séries M P uniquement Veuillez vous référer au manuel G ތ LQVWDOODWLRQ GH O ތ XQLWp LQWpULHXU Menu autres Mot de passe maintenance 9HXLOOH YRXV UpIpUHU DX PDQXHO G...

Page 97: ...ur de 1 Les changements ne peuvent être effectués que si le mot de passe correct est entré ON Indique un réglage qui ne peut être modifié que lorsque les appareils sont en fonctionnement OFF Indique un réglage qui ne peut être modifié que lorsque les appareils ne sont pas en fonctionnement Indique un réglage qui ne peut être modifié que lorsque les appareils sont en mode refroidissement chauffage ...

Page 98: ...on MARCHE ARRÊT H YR DQW 0DUFKH UUrW V ތ DOOXPH HQ YHUW HW O ތ DSSDUHLO démarre Lorsque Éclairage LED est réglé sur Non OH YR DQW 0DUFKH UUrW QH V ތ DOOXPH SDV Arrêt Pressez de nouveau le bouton MARCHE ARRÊT H YR DQW 0DUFKH UUrW V ތ pWHLQW HW O ތ DSSDUHLO V ތ DUUrWH Bouton MARCHE ARRÊT ...

Page 99: ...ésiré Froid Déshumidifié Ventilateur Auto Chaud Inversion Les modes de fonctionnement qui ne sont pas disponibles pour les PRGqOHV G ތ XQLWpV LQWpULHXUV FRQQHFWpV Q ތ DSSDUDvWURQW SDV VXU O ތ pFUDQ 4XH VLJQLILH OH IDLW TXH O ތ LF QH GX PRGH FOLJQRWH ތ LF QH GH PRGH FOLJQRWH ORUVTXH G ތ DXWUHV XQLWpV LQWpULHXUV GX PrPH V VWqPH UpIULJpUDQW FRQQHFWpV DX PrPH XQLWp H WpULHXU VRQW GpMj GDQV XQ PRGH GLI...

Page 100: ...et la température la plus faible au cours de la même journée est importante en modes de chauffage et de refroidissement Mode Inversion La température de la pièce est contrôlée pour rester dans la plage définie spécifiée pour le mode Inversion En conservant une différence de température suffisante entre la température de refroidissement limite supérieure et de chauffage limite inférieure il est pos...

Page 101: ...ratures programmées sont affichées soit en Centigrade avec incréments de 0 5 ou 1 degrés soit en DKUHQKHLW VHORQ OH PRGqOH G ތ XQLWp LQWpULHXUH HW OH UpJODJH GX PRGH G ތ DIILFKDJH VXU OD WpOpFRPPDQGH Mode Automatique point de réglage double ou mode Inversion 1 Les températures programmées actuelles V ތ DIILFKHQW Chaque pression sur le bouton ou commute les températures programmées entre refroidiss...

Page 102: ...varie selon les modèles G ތ XQLWpV LQWpULHXUHV FRQQHFWpHV HVW DWWHLQWH 6L OHV WHPSpUDWXUHV SURJUDPPpHV VRQW UpJOpHV GH WHOOH PDQLqUH TX ތ HOOHV Q ތ DWWHLJQHQW SDV OD GLIIpUHQFH GH WHPSpUDWXUH PLQLPDOH UHTXLVH FHV températures programmées seront toutes deux automatiquement changées selon les plages de réglages possibles Plage de réglage de la température Mode de fonctionnement Plage de réglage de l...

Page 103: ...o Auto Étape 1 Étape 2 Étape 3 Étape 4 Étape 5 Balayage Balayage Sélectionnez Balayage pour faire basculer automatiquement vers le haut le bas les vannes RUVTX ތ LO HVW UpJOp VXU eWDSH ª j eWDSH ª OHV YDQQHV VH SRVLWLRQQHQW j O ތ DQJOH VpOHFWLRQQp j JDXFKH GH O ތ LF QH GH UpJODJH GHV YDQQHV Cette icône apparaît lorsque les vannes sont réglées sur Étape 2 RX HW TXH OH YHQWLODWHXU IRQFWLRQQH j EDVVH...

Page 104: ...ge de la ventilation peut se faire même lorsque les unités fonctionnent HPSOH G ތ pFUDQ VXU VpULHV 0 3 Chaque pression sur le bouton ou fait défiler les réglages de ventilation suivants 5pJODEOH VHXOHPHQW ORUVTXH O ތ XQLWp RVVQD HVW FRQQHFWpH OFF Basse Haute H YHQWLODWHXU GH FHUWDLQV PRGqOHV G ތ XQLWpV LQWpULHXUHV SHXW rWUH V QFKURQLVp DYHF FHUWDLQV PRGqOHV G ތ XQLWpV GH YHQWLODWLRQ ...

Page 105: ...HOLD pour activer ou désactiver la fonction Verrouillage Si la fonction Verrouillage est activée les fonctions suivantes sont interdites et s affiche ON OFF Timer Arrêt Auto Timer Horloge hebdomadaire 5HWRXU DXWRPDWLTXH j OD WHPSpUDWXUH SURJUDPPpH ...

Page 106: ...e fonctionne pas lorsque le ON OFF timer est activé Incréments de 1 F 36 Mode silence unité extérieure Sert à définir les périodes pour lesquelles la priorité est donnée à un fonctionnement silencieux des unités extérieures SOXW W TX ތ j OD UpJXODWLRQ GH OD WHPSpUDWXUH 5pJOHU OHV KHXUHV GH GpPDUUDJH HW G ތ DUUrW SRXU FKDTXH MRXU GH OD VHPDLQH Sélectionnez le niveau de silence souhaité parmi Normal...

Page 107: ...isir la langue 61 Design 6HUW j FKDQJHU OHV FRXOHXUV GH O ތ eFUDQ G ތ pWDW HW GH O ތ eFUDQ principal de réglage 63 Écran tactile Calibrage GH O ތ pFUDQ tactile 6HUW j UpJOHU OHV SDUDPqWUHV GH FDOLEUDJH GH O ތ pFUDQ tactile 65 Nettoyage GH O ތ pFUDQ tactile 5HQG O ތ pFUDQ WDFWLOH WHPSRUDLUHPHQW LQVHQVLEOH DX toucher pour permettre de le nettoyer 67 Service Initialiser la télécommande 6HUW j LQLWLDO...

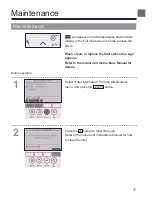
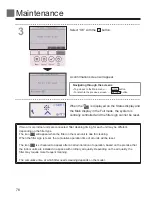
Page 108: ...onnement des boutons Accéder au Menu général Pressez le bouton Réglage VXU O ތ eFUDQ SULQFLSDO GH UpJODJH Le Menu général apparaît Sélection du paramètre Pressez F2 pour déplacer le curseur vers la gauche Pressez F3 pour déplacer le curseur vers la droite Curseur ...

Page 109: ...programmée Les unités reviennent en mode de fonctionnement normal lorsque le mode de fonctionnement ou la vitesse du ventilateur est modifié Fonctionnement des boutons 1 Sélectionnez Forte puissance dans le Menu de opération en mode refroidissement chauffage ou automatique et pressez le bouton CHOIX H PRGH RUWH SXLVVDQFH ª Q ތ HVW GLVSRQLEOH TXH VXU les modèles qui prennent en charge la fonction 2...

Page 110: ...tions Angle de volet manuel OFF Fonctionnement des boutons 1 Sélectionnez Confort dans le Menu de opération et pressez le bouton CHOIX 2 Sélectionnez Angle de volet manuel avec le bouton F1 ou F2 et pressez le bouton CHOIX ...

Page 111: ... le bouton CHOIX Adresse réf Adresse du réfrigérant N Unité 1 2 3 4 Pressez le bouton F4 SRXU FRQILUPHU O ތ XQLWp L écran affiche sur la gauche un exemple des unités des séries M P Sur les unités CITY MULTI le SDUDPqWUH GUHVVH 0 1 7 ª V ތ DIILFKp DX OLHX GH GUHVVH UpI ª HW OH SDUDPqWUH 1 8QLWp ª Q ތ HVW SDV affiché 4 Sélectionnez Vanne avec le bouton F1 Sélectionnez 4 dir ou 2 dir avec le bouton F...

Page 112: ...ionnée ތ pFUDQ UHWRXUQHUD DXWRPDWLTXHPHQW j O ތ pFUDQ précédent lorsque la transmission est terminée Effectuez les réglages pour les autres sorties selon la même procédure Si toutes les sorties sont sélectionnées sera DIILFKp j OD SURFKDLQH PLVH HQ URXWH GH O ތ DSSDUHLO Naviguer dans les écrans 3RXU UHYHQLU j O ތ pFUDQ SUpFpGHQW ERXWRQ RETOUR 5pGXFWLRQ GHV FRXUDQWV G ތ DLU H PRGH 5pGXFWLRQ GHV FRX...

Page 113: ...9 ORUV GX test des fonctions lors du diagnostic de la WpOpFRPPDQGH ORUVTXH O ތ KRUORJH Q ތ HVW SDV UpJOpH ORUV du réglage des fonctions lorsque le système est contrôlé centralement lorsque la fonction Marche UUrW RX OD IRQFWLRQ WLPHU j SDUWLU GH OD WpOpFRPPDQGH locale sont interdites lorsque la fonction Verrouillage est activée 2 Placez le curseur sur Timer et pressez le bouton CHOIX 3 HV UpJODJHV...

Page 114: ...ec le bouton F3 ou F4 ON OFF timer Non désactivé Oui activé Marche Heure début fonctionnement réglable par incréments de 5 minutes Pressez et maintenez le bouton enfoncé pour faire défiler rapidement les chiffres Arrêt Heure arrêt fonctionnement réglable par incréments de 5 minutes Pressez et maintenez le bouton enfoncé pour faire défiler rapidement les chiffres Répéter Non une fois Oui en boucle ...

Page 115: ...u Menu général bouton MENU 3RXU UHYHQLU j O ތ pFUDQ SUpFpGHQW bouton RETOUR DSSDUDvW VXU O ތ eFUDQ G ތ pWDW HW O ތ eFUDQ SULQFLSDO GH UpJODJH HQ PRGH RPSOHW ORUVTXH O ތ 21 2 WLPHU HVW activé L icône n apparaît pas lorsque la fonction Verrouillage est activée apparaît lorsque le timer est désactivé par le système de contrôle centralisé ...

Page 116: ...9 ORUV GX test des fonctions lors du diagnostic de la télécommande lors du réglage des fonctions lorsque le système est contrôlé centralement lorsque la IRQFWLRQ 21 2 RX OD IRQFWLRQ WLPHU j SDUWLU GH OD télécommande locale sont interdites lorsque la fonction Verrouillage est activée 2 HV UpJODJHV DFWXHOV V ތ DIILFKHQW Placez le curseur sur Arrêt Auto ou Arrêt dans min avec le bouton F1 ou F2 3 Mod...

Page 117: ...Menu général bouton MENU 3RXU UHYHQLU j O ތ pFUDQ SUpFpGHQW bouton RETOUR DSSDUDvW VXU O ތ eFUDQ G ތ pWDW HW O ތ eFUDQ SULQFLSDO GH UpJODJH HQ PRGH RPSOHW ORUVTXH O ތ UUrW DXWR WLPHU est activé L icône n apparaît pas lorsque la fonction Verrouillage est activée apparaît lorsque le timer est désactivé par le système de contrôle centralisé ...

Page 118: ...de la télécommande ORUVTXH O ތ KRUORJH Q ތ HVW SDV UpJOpH ORUV GX UpJODJH GHV fonctions lorsque le système est contrôlé centralement Lorsque la fonction ON OFF la fonction de réglage de OD WHPSpUDWXUH RX OD IRQFWLRQ WLPHU j SDUWLU GH OD télécommande locale sont interdites lorsque la fonction Verrouillage est activée 2 HV UpJODJHV DFWXHOV V ތ DIILFKHQW Pressez le bouton F1 ou F2 pour afficher les r...

Page 119: ... 1 ou 2 du timer GpSODFH OH FXUVHXU VXU 5pJODJH ª j O ތ DLGH GX bouton F1 ou F2 et sélectionnez 1 ou 2 avec le bouton F3 ou F4 4 ތ pFUDQ GH UpJODJH GH O ތ KRUORJH KHEGRPDGDLUH V ތ DIILFKH DYHF OHV UpJODJHV DFWXHOV XVTX ތ j KXLW VFKpPDV GH IRQFWLRQQHPHQW SHXYHQW être définis pour chaque jour 3ODFH OH FXUVHXU VXU OH MRXU GH OD VHPDLQH VRXKDLWp j O ތ DLGH GX ERXWRQ F1 ou F2 puis pressez le bouton F3 ...

Page 120: ...e double est sélectionné il est possible de programmer deux températures Si un schéma de fonctionnement avec un réglage de température simple est exécuté lors du mode Automatique point de réglage double son réglage est utilisé comme réglage de température pour rafraîchir en mode Froid Pressez le bouton CHOIX pour enregistrer les réglages 8Q pFUDQ GH FRQILUPDWLRQ V ތ DIILFKH Naviguer dans les écran...

Page 121: ...rW GX PRGH VLOHQFH SRXU FKDTXH MRXU GH OD VHPDLQH Sélectionnez le niveau de silence souhaité entre Moyen et Silencieux Fonctionnement des boutons 1 Sélectionnez OU mode silence dans le Menu timer et pressez le bouton CHOIX D IRQFWLRQ 28 PRGH VLOHQFH ª Q ތ HVW GLVSRQLEOH TXH sur les modèles qui prennent en charge la fonction 2 HV UpJODJHV DFWXHOV V ތ DIILFKHQW Pressez le bouton F1 ou F2 pour affich...

Page 122: ...seur sur Oui avec le bouton F3 ou F4 et pressez le bouton CHOIX 4 ތ pFUDQ GH UpJODJH G ތ 0RGH VLOHQFH XQLWp H WpULHXUH V ތ DIILFKH Pour créer ou modifier le réglage placez le curseur sur le jour de la semaine désiré avec le bouton F1 ou F2 puis pressez le bouton F3 pour le sélectionner Plusieurs jours peuvent être sélectionnés Pressez le bouton CHOIX ...

Page 123: ...r rapidement les chiffres Niveau de silence Normal Moyen Silencieux Normal Moyen Silencieux Pressez le bouton CHOIX pour enregistrer les UpJODJHV 8Q pFUDQ GH FRQILUPDWLRQ V ތ DIILFKH Naviguer dans les écrans 3RXU UHYHQLU j O ތ pFUDQ GH VpOHFWLRQ GX UpJODJH FKDQJHPHQW jour de la semaine bouton CHOIX Pour revenir au Menu général bouton MENU 3RXU UHYHQLU j O ތ pFUDQ SUpFpGHQW bouton RETOUR DSSDUDvW V...

Page 124: ...es limites de la plage de température Fonctionnement des boutons 1 6pOHFWLRQQH eFRQRPLH G ތ pQHUJLH ª GDQV OH 0HQX général voir page 26 et pressez le bouton CHOIX 2 Placez le curseur sur Limites avec les boutons F1 ou F2 et pressez le bouton CHOIX ...

Page 125: ...e curseur sur Temp consigne avec les boutons F1 ou F2 et pressez le bouton CHOIX 4 ތ pFUDQ SHUPHWWDQW GH UpJOHU OD SODJH GH WHPSpUDWXUH V ތ DIILFKH Placez le curseur avec le bouton F1 sur le paramètre souhaité Temp consigne FroidDéshu Chaud ou Auto ...

Page 126: ...ique point de réglage double peuvent être réglées 3 Les plages de température pour les modes Chaud Froid et Déshumidification doivent satisfaire aux conditions ci dessous Limite supérieure pour rafraîchir limite supérieure pour FKDXIIHU LIIpUHQFH GH WHPSpUDWXUH PLQLPDOH YDULH VHORQ OH PRGqOH G ތ XQLWp LQWpULHXUH Limite inférieure pour rafraîchir limite inférieure pour chauffer LIIpUHQFH GH WHPSpUD...

Page 127: ...tionnement des boutons 1 IILFKH O ތ pFUDQ GH UpJODJH GHV OLPLWHV 9HXLOOH YRXV UpIpUHU j OD SDJH Placez le curseur sur Commande bloquée et pressez le bouton CHOIX Pour activer la fonction verrouillage réglez le paramètre Commande bloquée sur Oui ...

Page 128: ...Réglage du mode de fonctionnement verrouillé Consigne Programmation de la température Vanne Réglage des vannes Menu Réglage du menu Ventil Réglage de la vitesse du ventilateur Volet Réglage du volet HOLD Réglage du Verrouillage Lorsque Hôtel a été sélectionné pour le réglage Emplacement les fonctionnements suivants sont automatiquement verrouillés Mode Vanne Menu et Volet Pressez le bouton CHOIX p...

Page 129: ...lage est activée H JXLGH GH IRQFWLRQ FRUUHVSRQGDQW j OD IRQFWLRQ verrouillée sera supprimé Pour afficher le menu général lorsque le réglage du menu est verrouillé pressez et maintenez enfoncé le bouton Réglage pour dix ou plus secondes Entrez le PRW GH SDVVH DGPLQLVWUDWHXU GDQV O ތ pFUDQ GH VDLVLH du mot de passe ...

Page 130: ...21 2 HVW FRPPDQGpH j O ތ DLGH GH FHWWH WpOpFRPPDQGH OD WHPSpUDWXUH UpJOpH UHWRXUQH DXWRPDWLTXHPHQW j OD WHPSpUDWXUH UHTXLVH VDQV WHQLU FRPSWH GH O ތ KHXUH GH UpJODJH Fonctionnement des boutons 1 6pOHFWLRQQH eFRQRPLH G ތ pQHUJLH ª GDQV OH 0HQX G ތ pFRQRPLH G ތ pQHUJLH HW SUHVVH OH ERXWRQ CHOIX 2 HV UpJODJHV DFWXHOV V ތ DIILFKHQW Placez le curseur sur Retour auto avec le bouton F1 ou F2 et pressez l...

Page 131: ...HOIX pour enregistrer les réglages Le mode Froid comprend les modes Déshu et Auto Froid le mode Chaud comprend le mode Auto Chaud ތ pFUDQ FRUUHVSRQGDQW V ތ DIILFKH Naviguer dans les écrans Pour revenir au Menu général bouton MENU 3RXU UHYHQLU j O ތ pFUDQ SUpFpGHQW bouton RETOUR Les réglages pour le Timer ou la température prédéfinie ne fonctionnent pas quand la plage de température est limitée lor...

Page 132: ...OIX 2 ތ pFUDQ G ތ DIILFKDJH GX SURJUDPPH DSSDUDvW Pressez le bouton F1 ou F2 pour afficher les réglages pour chaque jour de la semaine Pressez le bouton CHOIX SRXU SDVVHU j O ތ pFUDQ GHV réglages 3 ތ pFUDQ SHUPHWWDQW G ތ DXWRULVHU 2XL RX G ތ LQWHUGLUH 1RQ OH SURJUDPPH G ތ pFRQRPLH G ތ pQHUJLH V ތ DIILFKH Sélectionnez Non ou Oui avec le bouton F3 ou F4 Pressez le bouton CHOIX SRXU DFFpGHU j O ތ pFU...

Page 133: ...le curseur sur le numéro de schéma désiré Placez le curseur avec le bouton F2 sur le paramètre VRXKDLWp KHXUH GH GpPDUUDJH KHXUH G ތ DUUrW WDX G ތ pFRQRPLH G ތ pQHUJLH GDQV FHW RUGUH j SDUWLU GH OD gauche Modifiez le réglage avec le bouton F3 ou F4 Heure de démarrage arrêt réglable par incréments de 5 minutes Pressez et maintenez le bouton enfoncé pour faire défiler rapidement les chiffres 7DX G ތ...

Page 134: ...GH UpJODJH HQ PRGH RPSOHW TXDQG O ތ XQLWp HVW XWLOLVpH HQ PRGH pFRQRPLH G ތ pQHUJLH Naviguer dans les écrans 3RXU UHYHQLU j O ތ pFUDQ GH VpOHFWLRQ GX UpJODJH FKDQJHPHQW jour de la semaine bouton CHOIX Pour revenir au Menu général bouton MENU 3RXU UHYHQLU j O ތ pFUDQ SUpFpGHQW bouton RETOUR ...

Page 135: ...ode silence unité extérieure Horloge hebdomadaire eFRQRPLH G ތ pQHUJLH Si un système donné ne possède aucune WpOpFRPPDQGH GH V VWqPH O ތ KHXUH GH O ތ KRUORJH Q ތ HVW pas corrigée automatiquement Dans ce cas FRUULJH O ތ KHXUH GH O ތ KRUORJH UpJXOLqUHPHQW 2 Placez le curseur sur Réglage de base avec le bouton F1 ou F2 et pressez le bouton CHOIX 3 Sélectionnez Horloge avec le bouton F1 ou F2 et press...

Page 136: ...le paramètre souhaité avec le bouton F1 ou F2 année mois date heure ou minute Augmentez ou diminuez la valeur du paramètre sélectionné avec le bouton F3 ou F4 et pressez le bouton CHOIX 8Q pFUDQ GH FRQILUPDWLRQ V ތ DIILFKH Naviguer dans les écrans Pour revenir au Menu général bouton MENU 3RXU UHYHQLU j O ތ pFUDQ SUpFpGHQW bouton RETOUR ...

Page 137: ...stème désactivez ce réglage pour FRQVHUYHU O ތ KHXUH FRUUHFWH X GpEXW HW j OD ILQ GH O ތ KHXUH G ތ pWp OH WLPHU SHXW VH GpFOHQFKHU GHX IRLV RX SDV GX WRXW HWWH IRQFWLRQ Q ތ HVW SDV RSpUDWLRQQHOOH VL O ތ KRUORJH Q ތ D SDV pWp UpJOpH Fonctionnement des boutons 1 Sélectionnez Horloge dans le Menu réglage de base et pressez le bouton CHOIX 2 3ODFH OH FXUVHXU VXU HXUH G ތ pWp ª DYHF OH ERXWRQ F1 ou F2 ...

Page 138: ...ތ DLGH GX ERXWRQ F3 ou F4 Date fin 1 2e page Réglez le jour de la semaine le numéro de la semaine et le PRLV j O ތ DLGH GX ERXWRQ F3 ou F4 Le réglage par défaut est Dim 5ème Oct Heure de fin 2e page 5pJOH O ތ KHXUH GH ILQ GH O ތ KHXUH G ތ pWp j O ތ DLGH GX ERXWRQ F3 ou F4 5HFXOHU j 5pJOH O ތ KHXUH D ODTXHOOH O ތ KRUORJH GRLW rWUH UHFXOpH j O ތ DLGH du bouton F3 ou F4 1 6L qPH ª HVW VpOHFWLRQQp FRP...

Page 139: ...HOIX 2 Placez le curseur sur Écran principal de réglage avec le bouton F1 ou F2 et pressez le bouton CHOIX 3 Sélectionnez Complet ou Basic voir page 10 avec le bouton F3 ou F4 et pressez le bouton CHOIX 8Q pFUDQ GH FRQILUPDWLRQ V ތ DIILFKH Naviguer dans les écrans Pour revenir au Menu général bouton MENU 3RXU UHYHQLU j O ތ pFUDQ SUpFpGHQW bouton RETOUR ...

Page 140: ...le curseur sur Écran principal de réglage avec le bouton F1 ou F2 et pressez le bouton CHOIX 3 Sélectionnez Explic icônes avec le bouton F1 ou F2 sélectionnez le réglage souhaité Oui ou Non avec le bouton F3 or F4 puis pressez le bouton CHOIX Le réglage par défaut est Oui Naviguer dans les écrans Pour revenir au Menu général bouton MENU 3RXU UHYHQLU j O ތ pFUDQ SUpFpGHQW bouton RETOUR ...

Page 141: ...59 4 RUVTXH 2XL ª D pWp VpOHFWLRQQp O ތ H SOLFDWLRQ GH O ތ LF QH GX SDUDPqWUH GH UpJODJH V ތ DIILFKHUD j JDXFKH comme indiqué ...

Page 142: ...vec les boutons F1 ou F2 et pressez le bouton CHOIX 3 Réglez la luminosité avec le bouton F1 ou F2 ON ou OFF peuvent être sélectionnes pour le réglage Toujours allumé avec le bouton F4 En cas de sélection de ON le rétro éclairage UHVWH WDPLVp PrPH DSUqV O ތ H SLUDWLRQ GX WHPSV programmé Naviguer dans les écrans Pour revenir au Menu général bouton MENU 3RXU UHYHQLU j O ތ pFUDQ SUpFpGHQW bouton RETO...

Page 143: ...hoisie Les langues disponibles sont anglais français et espagnol Fonctionnement des boutons 1 6pOHFWLRQQH 5pJODJH GH O ތ pFUDQ ª GDQV OH 0HQX des réglages initiaux et pressez le bouton CHOIX 2 Placez le curseur sur Sélection du langage avec le bouton F1 ou F2 et pressez le bouton CHOIX ...

Page 144: ...O ތ XQLWp HVW DOOXPpH SRXU OD SUHPLqUH IRLV O ތ pFUDQ GH VpOHFWLRQ GH ODQJXH HVW DIILFKp 6pOHFWLRQQH la langue désirée Le système ne démarrera pas avant TX ތ XQH ODQJXH QH VRLW FKRLVLH 8Q pFUDQ V ތ DIILFKH SRXU YRXV LQIRUPHU TXH OH UpJODJH a été enregistré Naviguer dans les écrans Pour revenir au Menu général bouton MENU 3RXU UHYHQLU j O ތ pFUDQ SUpFpGHQW bouton RETOUR ...

Page 145: ...2 et pressez le bouton CHOIX 3 Sélectionnez Couleur avec le bouton F4 RXOHXU D FRXOHXU GH O ތ pFUDQ SHXW rWUH VpOHFWLRQQpH 9HXLOOH YRXV UpIpUHU j OD SDJH VXLYDQWH Blanc Écran monochrome fond blanc Noir Écran monochrome fond noir Après avoir sélectionné Blanc ou Noir pressez le bouton CHOIX Après avoir sélectionné Couleur sélectionnez la couleur désirée en IDLVDQW UpIpUHQFH j OD SDJH VXLYDQWH ...

Page 146: ...e réglage HVW GH j Motif Réglez la couleur avec le bouton F4 Rég couleur Sélectionnez Caractère ou UULqUH SODQ ª FRPPH FLEOH j ODTXHOOH appliquer la couleur avec le bouton F4 La couleur échantillon sous le boutons des fonctions changera en fonction du réglage Sélectionnez la couleur désirée et pressez le bouton CHOIX Naviguer dans les écrans Pour revenir au Menu général bouton MENU 3RXU UHYHQLU j ...

Page 147: ...actile dans le Menu des réglages initiaux et pressez le bouton CHOIX 2 Placez le curseur sur Calibrage du clavier tactile avec le bouton F1 ou F2 et pressez le bouton CHOIX 3 8Q pFUDQ GH FRQILUPDWLRQ V ތ DIILFKH Sélectionnez Annule ou OK avec le bouton F3 ou F4 et pressez le bouton CHOIX ...

Page 148: ...Qp HW O ތ pFUDQ UHYLHQW DX PHQX G ތ pFUDQ WDFWLOH 6L YRXV QH WRXFKH SDV O ތ pFUDQ WDFWLOH SRXU XQH PLQXWH OH FDOLEUDJH VHUD VXSSULPp HW O ތ pFUDQ UHWRXUQHUD DXWRPDWLTXHPHQW j O ތ pFUDQ SUpFpGHQW 3RXU FDOLEUHU DGpTXDWHPHQW O ތ pFUDQ WDFWLOH XWLOLVH XQ REMHW SRLQWX PDLV QRQ WUDQFKDQW SRXU WRXFKHU OHV SRLQWV 8Q REMHW WUDQFKDQW SHXW HQGRPPDJHU RX UD HU O ތ pFUDQ WDFWLOH ...

Page 149: ...actile dans le Menu des réglages initiaux et pressez le bouton CHOIX 2 Placez le curseur sur Nettoyage du clavier tactile avec le bouton F1 ou F2 et pressez le bouton CHOIX 3 8Q pFUDQ GH FRQILUPDWLRQ V ތ DIILFKH Sélectionnez Annule ou OK avec le bouton F3 ou F4 et pressez le bouton CHOIX ...

Page 150: ...0 seconde pour éviter toute modification accidentelle des réglages ތ pFUDQ UHWRXUQHUD DX PHQX pFUDQ WDFWLOH DSUqV 30 secondes 1HWWR H DYHF XQ FKLIIRQ GRX VHF RX XQ WLVVX LPELEp G ތ HDX HW G ތ XQ GpWHUJHQW GRX RX XQ FKLIIRQ LPSUpJQp G ތ pWKDQRO 1 ތ XWLOLVH SDV GHV VROYDQWV DFLGHV DOFDOLQV RX RUJDQLTXHV ...

Page 151: ...H O ތ RSWLRQ G ތ pFRQRPLH G ތ pQHUJLH UpJODJH GH O ތ KRUORJH UpJODJH GH O ތ KHXUH G ތ pWp UpJODJH GH O ތ pFUDQ SULQFLSDO GH UpJODJH UpJODJH GH OD OXPLQRVLWp UpJODJH GH O ތ DIILFKDJH GHV GpWDLOV UpJODJH GX GHVLJQ UpJODJH GX PRGH DXWRPDWLTXH UpJODJH GX QRP GX PRGqOH réglage du numéro de série réglage des informations du revendeur informations défaut mot de passe administrateur mot de passe maintenan...

Page 152: ...70 Réglages des fonctions 3 Sélectionnez OK avec le bouton F4 La télécommande démarrera automatiquement après O ތ LQLWLDOLVDWLRQ ...

Page 153: ...s Les informations sur la télécommande utilisée peuvent être vérifiées Fonctionnement des boutons 1 Sélectionnez Autres dans le Menu SAV et pressez le bouton CHOIX 2 Placez le curseur sur Informations télécommande avec le bouton F1 ou F2 et pressez le bouton CHOIX ...

Page 154: ...72 Réglages des fonctions 3 Le type la version du logiciel e le numéro de série de la télécommande utilisée peuvent être vérifiés ...

Page 155: ...DPqWUHV FRGH GpIDXW GpIDXW XQLWp O ތ DGUHVVH GX UpIULJpUDQW OH QRP GH PRGqOH GH O ތ XQLWp OD GDWH HW O ތ KHXUH j ODTXHOOH OH GpIDXW V ތ HVW SURGXLW HW OH QXPpUR GH VpULH V ތ DIILFKHQW Le nom du modèle et le numéro de série ne V ތ DIILFKHQW TXH VL FHV LQIRUPDWLRQV RQW pWp enregistrées Pressez le F1 ou F2 SRXU DFFpGHU j OD SDJH VXLYDQWH Les informations de contact numéro de téléphone du UHYHQGHXU V ...

Page 156: ...H j pUR OH GpIDXW TXL V ތ HVW SURGXLW Les défauts ne peuvent pas être remis à zéro WDQW TXH OD PLVH HQ PDUFKH RX O ތ DUUrW VRQW interdits Sélectionnez OK avec le bouton F4 8Q pFUDQ GH FRQILUPDWLRQ V ތ DIILFKH Naviguer dans les écrans Pour revenir au Menu général bouton MENU ...

Page 157: ...voir page 73 peut être consultée en sélectionnant dans le menu de fonctionnement Sélectionnez Menu maintenance dans le Menu général et pressez le bouton CHOIX 3RXU DIILFKHU O ތ pFUDQ G ތ LQIRUPDWLRQV GpIDXW sélectionnez Information défaut dans le Menu maintenance HV GpIDXWV QH SHXYHQW SDV rWUH UHPLV j pUR ...

Page 158: ...YDQW V ތ DIILFKHUD SRXU OH PRGqOH GX SDQQHDX GX L 6HH VHQVRU ORUVTXH O ތ XQLWp HVW DUUrWpH j FDXVH GH OD IRQFWLRQ UUrW DXWRPDWLTXH HQ QRQ RFFXSDWLRQ GH O ތ RSWLRQ G ތ pFRQRPLH G ތ pQHUJLH 6H UpIpUHU DX 0DQXHO G XWLOLVDWLRQ GH O ތ XQLWp LQWpULHXUH SRXU OH SDUDPqWUH L 6HH sensor ...

Page 159: ...res lorsque FHWWH LF QH DSSDUDvW 9HXLOOH YRXV UpIpUHU DX 0DQXHO G ތ LQVWUXFWLRQV GH O ތ XQLWp LQWpULHXUH SRXU SOXV GH GpWDLOV Fonctionnement des boutons 1 Sélectionnez Information filtre dans le Menu maintenance et pressez le bouton CHOIX 2 Pressez le bouton F4 pour réinitialiser le témoin G ތ pWDW GX ILOWUH 5HSRUWH YRXV DX 0DQXHO G ތ LQVWUXFWLRQV GH O ތ XQLWp intérieure pour le nettoyage du filtr...

Page 160: ...nce de nettoyage du filtre de chaque unité peut être différent en fonction du type de filtre ތ LF QH V ތ DIILFKH ORUVTXH OH ILOWUH GH O ތ XQLWp SULQFLSDOH GRLW rWUH QHWWR p RUVTXH OH WpPRLQ G ތ pWDW GX ILOWUH HVW UHPLV j pUR OH WHPSV GH IRQFWLRQQHPHQW FXPXOp GH WRXWHV OHV unités est réinitialisé ތ LF QH est programmée pour apparaître après une certaine durée de fonctionnement en IRQFWLRQ GH O ތ K ...

Page 161: ...14 1 P mm 2 9 16 4 23 32 9 16 in non compris la partie qui dépasse Poids net 0 09 kg 13 64 lbs 7HQVLRQ G ތ DOLPHQWDWLRQ 12 Vcc fournie par les unités intérieures Consommation 0 6 W RQGLWLRQV G ތ XWLOLVDWLRQ Température 0 40 C 32 104 F XPLGLWp 5 GH j VDQV FRQGHQVDWLRQ Matériau Corps principal ABS ...

Page 162: ...églages initiaux Horloge administrateur 5pJODJH GX IRUPDW G ތ DIILFKDJH GH O ތ KHXUH administrateur HXUH G ތ pWp administrateur Écran principal de réglage administrateur Explication des icônes administrateur Luminosité administrateur Sélection de la langue administrateur Design administrateur DOLEUDJH GH O ތ pFUDQ WDFWLOH administrateur 1HWWR DJH GH O ތ pFUDQ WDFWLOH administrateur Mot de passe ad...

Page 163: ...e priorité 2 Cette fonction ne peut pas fonctionner si certaines fonctions sont verrouillées 3 Le réglage de la plage de température ne peut pas être utilisé pour le fonctionnement en Inversion 4 La fonction de retour automatique ne peut pas être utilisée pour le fonctionnement en Inversion ތ KRUORJH KHEGRPDGDLUH Q ތ HVW SDV DFWLI SDUFH TXH OH 21 2 WLPHU D OD SOXV JUDQGH SULRULWp 2 La fonction de ...

Page 164: ......

Page 165: ...turas consultas Asegúrese de entregar este CD ROM y el Manual de instalación a cualquier usuario futuro Para asegurar un funcionamiento seguro y correcto del controlador remoto éste debe ser instalado solamente por personal técnico cualificado Sistema de control CITY MULTI y aparatos de aire acondicionado de las series M y P Controlador remoto táctil MA PAR CT01MAU SB Libro de instrucciones ...

Page 166: ......

Page 167: ...es de configuración de las funciones 27 Super 27 Ángulo lama manual 28 Programador Programador On Off 31 Programador Programador Auto Off 34 Programador semanal 36 Unidad exterior modo silencioso 39 Restricción 42 Ahorro energía 48 Hora 53 Horario de verano 55 Pantalla principal 57 Explicación de los iconos 58 Brillo 60 Seleccione el idioma 61 Diseño 63 Calibración de la pantalla táctil 65 Limpiez...

Page 168: ...r la unidad con alcohol ventile la habitación adecuadamente Los humos del alcohol alrededor de la unidad pueden provocar un incendio o explosión al encender la unidad Para reducir el riesgo de lesiones o de descargas eléctricas pare el funcionamiento del controlador y cúbralo antes de pulverizar cualquier producto químico a su alrededor Para reducir el riesgo de lesiones o de descargas eléctricas ...

Page 169: ...so exclusivo con el sistema de gestión de edificios de Mitsubishi Electric El uso de este controlador con otros sistemas o para otras finalidades podría provocar anomalías No está previsto el uso de este equipo por personas incluidos los niños con capacidad física sensorial o mental disminuida o carentes de conocimientos y experiencia a menos que lo hagan siguiendo las instrucciones de uso bajo la...

Page 170: ...6 Componentes del controlador Interfaz del controlador Pantalla de estado Pantalla principal Pantalla de estado Pantalla principal ...

Page 171: ...or Botón Presione para cambiar el contenido de la configuración seleccionada en los pasos y anteriores Botón de acceso rápido a la velocidad del ventilador Presione para acceder directamente a la pantalla de configuración de la velocidad del ventilador Botón HOLD Presione para habilitar inhabilitar la función Bloqueo Lámpara de ENCENDIDO APAGADO Esta lámpara se ilumina en verde mientras la unidad ...

Page 172: ...8 Componentes del controlador Interfaz del controlador Pantalla Menú ...

Page 173: ...n F2 Menú principal Presione para mover el cursor hacia la izquierda Pantalla Menú El botón de función varía según la pantalla Botón de función F3 Menú principal Presione para mover el cursor hacia la derecha Pantalla Menú El botón de función varía según la pantalla Botón de función F4 Pantalla Menú El botón de función varía según la pantalla Las funciones de los botones de función cambian dependi...

Page 174: ...pueden visualizar en dos modos diferentes Completo y Básico De forma predeterminada se visualiza el modo Completo Consulte la página 57 para saber cómo cambiar el modo Modo completo Pantalla de estado Pantalla principal Modo básico Pantalla de estado Pantalla principal 7RGRV ORV LFRQRV VH PXHVWUDQ SDUD H SOLFDU VX VLJQL FDGR ...

Page 175: ...n modo ahorro energía No aparecerá en algunos modelos de unidades interiores Página 39 Aparece mientras las unidades exteriores están funcionando en modo silencioso Aparece cuando el ENCENDIDO APAGADO se controla a nivel central Aparece cuando el modo de funcionamiento se opera a nivel central Aparece cuando la temperatura preestablecida se controla a nivel central Aparece cuando la función de res...

Page 176: ...ogramador Auto Off Página 34 Programador semanal Página 36 Unidad exterior modo silencioso Página 39 Restricción Rango de temperaturas Página 42 Operación bloqueada Página 45 Ahorro energía Auto recuperación Página 48 Calendario Página 50 Configuración básica Hora Hora Página 53 Horario de verano Página 55 Contraseña de administrador Consulte el Manual de instalación Operación Menú de programador ...

Page 177: ...ón automática Ajuste descendente Consulte el libro de instrucciones incluido con el panel de elevación automática Menú de modo de prueba Modo prueba Consulte el Manual de instalación de la unidad para interiores Modo prueba de bomba de drenaje Consulte el Manual de instalación de la unidad para interiores Información de mantenimiento Consulte el Manual de instalación de la unidad interior Introduc...

Page 178: ...onsulte el Manual de instalación Revisión de controles remotos Consulte el Manual de instalación Mantenimiento adecuado Series M P únicamente Consulte el Manual de instalación de la unidad interior Código de petición Series M P únicamente Consulte el Manual de instalación de la unidad interior Menú de otros Contraseña de mantenimiento Consulte el Manual de instalación Inicializar controlador remot...

Page 179: ...en 1 F4 Presione para aumentar el valor en 1 Los cambios no se podrán realizar si no se ha introducido la contraseña correcta ON Indica configuraciones que solamente se pueden cambiar con las unidades en funcionamiento OFF Indica configuraciones que solamente se pueden cambiar con las unidades desconectadas Indica configuraciones que solamente se pueden cambiar con las unidades funcionando en modo...

Page 180: ...mpara de ENCENDIDO APAGADO se iluminará en verde y comenzará a funcionar la unidad Si Ilumin LED está establecido en No la lámpara de ENCENDIDO APAGADO no se encenderá APAGAR Presione de nuevo el botón ENCENDIDO APAGADO La lámpara de ENCENDIDO APAGADO se apagará y la unidad dejará de funcionar Botón ENCENDIDO APAGADO ...

Page 181: ...o deseado Frío Secar Ventilador Auto Calor Estabilizar Los modos de funcionamiento que no estén disponibles para el modelo de unidad interior conectado no aparecerán en la pantalla Qué significa que parpadee el icono de modo El icono de modo parpadeará cuando las otras unidades interiores en el mismo sistema de refrigeración conectado a la misma unidad exterior están funcionando ya en un modo dife...

Page 182: ...tanto el modo de calefacción como el de refrigeración se utilizan el mismo día Modo Estabilizar La temperatura de la sala se controla para permanecer dentro del rango de temperatura de consigna que se especifica para el modo Estabilizar Si se deja la suficiente diferencia entre la temperatura de consigna para la refrigeración límite superior y la calefacción límite inferior es posible mantener la ...

Page 183: ...lación La temperatura preestablecida será visualizada en grados Centígrados en incrementos de 0 5 o 1 grado o en grados Fahrenheit en función del modelo de unidad interior y del ajuste del modo de pantalla del controlador remoto Modo Auto punto de ajuste doble o modo Estabilizar 1 Aparecerán las temperaturas preestablecidas actuales Cada vez que se presiona el botón o se pasa de a las temperaturas...

Page 184: ... interiores conectadas se ha cumplido Si las temperaturas preestablecidas se ajustan de tal modo que no cumplen con el requisito mínimo de diferencia de temperatura ambas temperaturas preestablecidas se modificarán automáticamente dentro de los rangos de ajuste permisibles Rango de temperatura preestablecida configurable Modo de funcionamiento Rango de temperatura preestablecida Frío Secar 19 30 C...

Page 185: ...n deseada Auto Auto Posición 1 Posición 2 Posición 3 Posición 4 Posición 5 Oscilación Oscilación Seleccione Oscilación para que las lamas se muevan hacia arriba y hacia abajo automáticamente Cuando configure de Posición 1 a Posición 5 la lama estará fija en el ángulo seleccionado a la izquierda del icono de configuración de la lama Este icono aparece cuando el deflector está configurado a Posición...

Page 186: ...entilación se puede configurar aun cuando las unidades estén en funcionamiento Ejemplo de pantalla en series M P Cada vez que se presiona el botón o se pasa por las siguientes configuraciones de ventilación Solamente se puede configurar cuando la unidad Lossnay está conectada Apagada Baja Alta En algunos modelos de unidades interiores es posible que el ventilador se bloquee con ciertos modelos de ...

Page 187: ... para habilitar deshabilitar la función Bloqueo Si se habilita la función Bloqueo no será posible operar las siguientes funciones y aparecerá Programador On Off Programador Auto Off Programador semanal Retorno automático a la temperatura predeterminada ...

Page 188: ... es válido con el Programador On Off activado Incrementos de 1 F 36 Unidad exterior modo silencioso Utilizar para establecer los periodos de tiempo durante los cuales se le da prioridad al funcionamiento silencioso de las unidades exteriores sobre el control de la temperatura Configure las horas de Inicio Parada para cada día de la semana Seleccione el nivel de silencio deseado entre Norml Medio y...

Page 189: ...oma Utilizar para seleccionar el idioma deseado 61 Diseño Utilizar para cambiar el color de la pantalla de estado y de la pantalla principal 63 Pantalla táctil Calibración de la pantalla táctil Establece la configuración de calibración para la pantalla táctil 65 Limpieza de la pantalla táctil Desactiva temporalmente la sensibilidad táctil de la pantalla para poder limpiarla 67 Revisión Inicializar...

Page 190: ... Funcionamiento del botón Acceso al menú principal Presione el botón Ajuste de la pantalla principal Aparecerá el Menú principal Selección del elemento Presione F2 para mover el cursor hacia la izquierda Presione F3 para mover el cursor hacia la derecha Cursor ...

Page 191: ...ratura de la habitación haya alcanzado la temperatura preestablecida lo que suceda antes La unidad volverá al modo de funcionamiento normal cuando se cambie el modo de funcionamiento o la velocidad del ventilador Funcionamiento del botón 1 Seleccione Super en el menú de operación en funcionamiento en modo Frío Calor o Auto y presione el botón ACEPTAR La función Super solamente está disponible en l...

Page 192: ...uración de las funciones Ángulo lama manual OFF Funcionamiento del botón 1 Seleccione Confort en el menú Operación y presione el botón ACEPTAR 2 Seleccione Ángulo lama manual con el botón F1 o F2 y presione el botón ACEPTAR ...

Page 193: ...one el botón ACEPTAR Codificación Dirección refrigerante Número de unidad 1 2 3 4 Presione el botón F4 para confirmar la unidad La pantalla de la izquierda muestra un ejemplo de pantalla de las unidades de las series M P En las unidades CITY MULTI se muestra Direcc M NET en lugar de Codific Ref y no se muestra Nº Unid 4 Seleccione Lama con el botón F1 Seleccione 4 vías o 2 vías con el botón F2 o F...

Page 194: ...salida seleccionada La pantalla volverá automáticamente a la pantalla anterior cuando finalice la transmisión Realice las configuraciones para las otras salidas siguiendo los mismos procedimientos Si se seleccionan todas las salidas se mostrará la próxima vez que la unidad entre en funcionamiento Navegación por las pantallas Para volver a la pantalla anterior Botón VOLVER Reducción de corriente El...

Page 195: ... de revisión durante la ejecución de una prueba durante el diagnóstico del controlador remoto cuando el reloj no está configurado durante la configuración de función cuando el sistema está controlado de forma centralizada la operación On Off o la operación de programador desde el controlador remoto local están prohibidas cuando esté habilitada la función Bloqueo 2 Mueva el cursor a Programador y p...

Page 196: ...e la configuración con el botón F3 o F4 Program On Off No deshabilitar Sí habilitar On Hora de inicio de la operación se puede ajustar en incrementos de 5 minutos Mantenga presionado el botón para avanzar rápido por los números Off Hora de parada de la operación se puede ajustar en incrementos de 5 minutos Mantenga presionado el botón para avanzar rápido por los números Repetir No una vez Sí repet...

Page 197: ...principal Botón MENÚ Para volver a la pantalla anterior Botón VOLVER aparecerá en la pantalla de estado y en la pantalla principal en el modo Completo cuando el programador On Off esté activado El icono no se mostrará mientras la función Bloqueo esté habilitada aparece al deshabilitar el programador mediante el sistema de control centralizado ...

Page 198: ...rante la ejecución de una prueba durante el diagnóstico del controlador remoto durante la configuración de función cuando el sistema está controlado de forma centralizada la operación On Off o la operación de programador desde el control local están prohibidas cuando esté habilitada la función Bloqueo 2 Aparecerán los ajustes actuales Mueva el cursor a Auto Off o Parar en minutos con el botón F1 o...

Page 199: ...rincipal Botón MENÚ Para volver a la pantalla anterior Botón VOLVER aparecerá en la pantalla de estado y en la pantalla principal en el modo Completo cuando el programador Auto Off esté activado El icono no se mostrará mientras la función Bloqueo esté habilitada aparece al deshabilitar el programador mediante el sistema de control centralizado ...

Page 200: ...ba durante el diagnóstico del controlador remoto cuando el reloj no está configurado durante la configuración de función y cuando el sistema está controlado a nivel central la operación On Off el ajuste de temperatura o la operación de programador desde el controlador remoto local están prohibidos cuando esté habilitada la función Bloqueo 2 Aparecerán los ajustes actuales Presione el botón F1 o F2...

Page 201: ...obar el contenido de la configuración de la opción 1 o 2 mueva el cursor a Configurando con el botón F1 o F2 y seleccione 1 o 2 con el botón F3 o F4 4 Aparecerá la pantalla del programador semanal y se mostrarán los ajustes actuales Se pueden configurar hasta ocho patrones de funcionamiento para cada día Mueva el cursor al día deseado de la semana con el botón F1 o F2 y presione el botón F3 para s...

Page 202: ...s seleccionado se pueden ajustar dos temperaturas preestablecidas Si un patrón de operación con un ajuste simple de temperatura preestablecida es ejecutado durante el modo Auto punto de ajuste doble su ajuste será utilizado como el ajuste de temperatura de enfriamiento en el modo Frío Presione el botón ACEPTAR para guardar los ajustes Aparecerá una ventana de confirmación Navegación por las pantal...

Page 203: ... silencio de cada uno de los días de la semana Seleccione el nivel de silencio deseado entre Medio y Silencioso Funcionamiento del botón 1 Seleccione Ud exterior modo silencioso en el menú Programador y presione el botón ACEPTAR La función Ud exterior modo silencioso solamente está disponible en los modelos que la admiten 2 Aparecerán los ajustes actuales Presione el botón F1 o F2 para ver la conf...

Page 204: ...ación mueva el cursor a Sí con el botón F3 o F4 y presione el botón ACEPTAR 4 Aparecerá la pantalla de modo silencioso de la unidad exterior Para realizar o cambiar la configuración mueva el cursor al día deseado de la semana con el botón F1 o F2 y presione el botón F3 para seleccionarlo Se pueden seleccionar varios días Presione el botón ACEPTAR ...

Page 205: ...los números Nivel de silencio Normal Medio Silencioso Normal Medio Silencioso Presione el botón ACEPTAR para guardar los ajustes Aparecerá una ventana de confirmación Navegación por las pantallas Para regresar a la pantalla de selección del cambio de configuración día de la semana Botón ACEPTAR Para volver al Menú principal Botón MENÚ Para volver a la pantalla anterior Botón VOLVER aparecerá en la...

Page 206: ... P Configurar la restricción del rango de temperatura Funcionamiento del botón 1 Seleccione Ahorro energía en el Menú principal consulte la página 26 y presione el botón ACEPTAR 2 Mueva el cursor a Restricción con el botón F1 o F2 y presione el botón ACEPTAR ...

Page 207: ...s Mueva el cursor a Rango de temp con el botón F1 o F2 y presione el botón ACEPTAR 4 Aparecerá la pantalla para configurar el rango de temperatura Mueva el cursor al elemento deseado con el botón F1 de Rango temp Frío Secar Calor o Auto ...

Page 208: ... 2 Los rangos de temperaturas para los modos Calor y Auto punto de ajuste doble pueden ajustarse 3 Los rangos de temperatura para los modos Calor Frío y Secar deben cumplir las siguientes condiciones Límite superior de enfriamiento límite superior de FDOHQWDPLHQWR GLIHUHQFLD GH WHPSHUDWXUD PtQLPD YDUtD HQ función del modelo de unidad interior Límite inferior de enfriamiento límite inferior de FDOH...

Page 209: ...peración Funcionamiento del botón 1 Ver la pantalla de configuración de Restricción Consulte la página 42 Mueva el cursor a Op Bloqueada y presione el botón ACEPTAR Para habilitar la función de bloqueo configure el elemento Op Bloqueada a Sí ...

Page 210: ...do Configuración del modo de funcionamiento Bloqueado Tª Consigna Configuración temperatura preestablecida Lama Configuración de la lama Menú Configuración de menú Vent Configuración de la velocidad del ventilador Deflector Configuración del deflector HOLD Configuración de Bloqueo Si se selecciona Hotel para la opción Ubicación las siguientes funciones se bloquearán automáticamente Modo Lama Menú ...

Page 211: ...o esté activada Se suprimirá la guía de funcionamiento correspondiente a la función bloqueada Para mostrar el menú principal cuando la configuración de menú está bloqueada mantenga presionado el botón Ajuste durante diez segundos como mínimo Introduzca la contraseña del administrador en la pantalla de introducción de la contraseña ...

Page 212: ...amiento o la operación ON OFF encendido apagado con este controlador remoto la temperatura establecida vuelve automáticamente a la temperatura solicitada independientemente del tiempo establecido Funcionamiento del botón 1 Seleccione Ahorro energía en el menú Ahorro energía y presione el botón ACEPTAR 2 Aparecerán los ajustes actuales Mueva el cursor a Auto recuperac con el botón F1 o F2 y presion...

Page 213: ...incrementos de 1 C Presione el botón ACEPTAR para guardar los ajustes Frío incluye los modos Secar y Auto Frío y Calor incluye el modo de Auto Calor Aparecerá la pantalla para configurar el elemento seleccionado Navegación por las pantallas Para volver al Menú principal Botón MENÚ Para volver a la pantalla anterior Botón VOLVER Los ajustes del programador o de la temperatura preestablecida no será...

Page 214: ...l botón ACEPTAR 2 Aparecerá la pantalla para configurar la programación Presione el botón F1 o F2 para ver la configuración para cada día de la semana Presione el botón ACEPTAR para ir a la pantalla de configuración 3 Aparecerá la pantalla para activar Sí y desactivar No la programación del modo ahorro energía Seleccione No o Sí con el botón F3 o F4 Presione el botón ACEPTAR para ir a la pantalla ...

Page 215: ...botón F1 para mover el cursor al número de patrón seleccionado Mueva el cursor al elemento deseado con el botón F2 tiempo de inicio tiempo de parada e índice de ahorro energía en este orden desde la izquierda Cambie la configuración con el botón F3 o F4 Hora de inicio parada configurable en incrementos de 5 minutos Mantenga presionado el botón para avanzar rápido por los números Índice de ahorro e...

Page 216: ...rincipal en modo Completo cuando la unidad esté funcionando en modo ahorro energía Navegación por las pantallas Para regresar a la pantalla de selección del cambio de configuración día de la semana Botón ACEPTAR Para volver al Menú principal Botón MENÚ Para volver a la pantalla anterior Botón VOLVER ...

Page 217: ...tes configuraciones Programador On Off Unidad exterior modo silencioso Programador semanal Ahorro energía Si un sistema determinado no tiene controladores de sistema la hora no se corregirá automáticamente En tal caso corrija la hora periódicamente 2 Mueva el cursor a Configuración básica con el botón F1 o F2 y presione el botón ACEPTAR 3 Seleccione Hora con el botón F1 o F2 y presione el botón AC...

Page 218: ...al elemento deseado con los botones F1 o F2 para año mes fecha hora o minuto Aumente o disminuya el valor para el elemento seleccionado con el botón F3 o F4 y presione el botón ACEPTAR Aparecerá una ventana de confirmación Navegación por las pantallas Para volver al Menú principal Botón MENÚ Para volver a la pantalla anterior Botón VOLVER ...

Page 219: ...ontrolador de sistema desactive este ajuste para conservar la hora correcta Al principio y al final del horario de verano el programador puede ponerse en acción dos veces o ninguna Esta función no funcionará si no se ha ajustado la hora Funcionamiento del botón 1 Seleccione Hora en el menú de configuración básica y presione el botón ACEPTAR 2 Mueva el cursor a Horario de verano con el botón F1 o F...

Page 220: ...con el botón F3 o F4 Fecha fin 1 segunda página Configure el día de la semana el número de semana y el mes con el botón F3 o F4 El ajuste predeterminado es Dom 5 ª Oct Hora fin segunda página Ajuste la hora de fin del horario de verano con el botón F3 o F4 Volver a segunda página Ajuste la hora a la que se tiene que retrasar el reloj a la hora de fin de arriba con el botón F3 o F4 1 Si se seleccio...

Page 221: ...R 2 Mueva el cursor a Ajuste el Menú pantalla con el botón F1 o F2 y presione el botón ACEPTAR 3 Seleccione Completo o Básico consulte la página 10 con el botón F3 o F4 y presione el botón ACEPTAR Aparecerá una ventana de confirmación Navegación por las pantallas Para volver al Menú principal Botón MENÚ Para volver a la pantalla anterior Botón VOLVER ...

Page 222: ... el botón ACEPTAR 2 Mueva el cursor a Ajuste el Menú pantalla con el botón F1 o F2 y presione el botón ACEPTAR 3 Seleccione Explic iconos con el botón F1 o F2 seleccione la opción Sí o No con el botón F3 o F4 y presione el botón ACEPTAR El ajuste predeterminado es Sí Navegación por las pantallas Para volver al Menú principal Botón MENÚ Para volver a la pantalla anterior Botón VOLVER ...

Page 223: ...59 4 Cuando se selecciona Sí la explicación del icono del elemento de configuración aparecerá como se muestra a la izquierda ...

Page 224: ...llo con el botón F1 o F2 y presione el botón ACEPTAR 3 Ajuste el brillo con el botón F1 o F2 Puede seleccionar ON u OFF para la opción Enc perm con el botón F4 Al seleccionar ON la retroiluminación permanecerá encendida de forma atenuada incluso una vez transcurrido el tiempo especificado Navegación por las pantallas Para volver al Menú principal Botón MENÚ Para volver a la pantalla anterior Botón...

Page 225: ...dioma deseado Las opciones de idioma son inglés francés y español Funcionamiento del botón 1 Seleccione Configuración de pantalla en el menú de configuración inicial y presione el botón ACEPTAR 2 Mueva el cursor a Seleccione el idioma con el botón F1 o F2 y presione el botón ACEPTAR ...

Page 226: ...uando se conecta la alimentación por primera vez se muestra la pantalla de seleccione el idioma Seleccione el idioma deseado El sistema no arrancará si no se selecciona ningún idioma Aparecerá una pantalla indicando que se ha guardado la configuración Navegación por las pantallas Para volver al Menú principal Botón MENÚ Para volver a la pantalla anterior Botón VOLVER ...

Page 227: ...tón F1 o F2 y presione el botón ACEPTAR 3 Seleccione Color con el botón F4 Color Es posible seleccionar el color de la pantalla Consulte la página siguiente Blanco Pantalla monocromo basada en blanco Negro Pantalla monocromo basada en negro Si selecciona Blanco o Negro presione el botón ACEPTAR Si selecciona Color seleccione el color que desee consultando la página siguiente ...

Page 228: ...ango configurable es de 90 a 89 Estampado Configure el color con el botón F4 Color aj a Seleccione Carácter o Fondo como destino en el que se aplica el color con el botón F4 El color de ejemplo debajo de los botones de función cambiará según el ajuste seleccionado Seleccione el color que desee y presione el botón ACEPTAR Navegación por las pantallas Para volver al Menú principal Botón MENÚ Para vo...

Page 229: ...lla táctil en el menú de configuración inicial y presione el botón ACEPTAR 2 Mueva el cursor a Calibración pantalla táctil con el botón F1 o F2 y presione el botón ACEPTAR 3 Aparecerá una ventana de confirmación Seleccione Anular o OK con el botón F3 o F4 y presione el botón ACEPTAR ...

Page 230: ...nalizado y la pantalla regresará al menú de pantalla táctil Si la pantalla táctil no se toca durante un minuto la calibración se cancelará y la visualización regresará automáticamente a la pantalla anterior Para calibrar correctamente la pantalla táctil utilice un objeto puntiagudo pero no afilado para tocar los puntos Un objeto afilado podría dañar o rallar la pantalla táctil ...

Page 231: ...la táctil en el menú de configuración inicial y presione el botón ACEPTAR 2 Mueva el cursor a Limpieza de pantalla táctil con el botón F1 o F2 y presione el botón ACEPTAR 3 Aparecerá una ventana de confirmación Seleccione Anular o OK con el botón F3 o F4 y presione el botón ACEPTAR ...

Page 232: ...dos sin cambiar de forma accidental ningún ajuste La pantalla regresará al menú de pantalla táctil una vez transcurridos los 30 segundos Limpie la pantalla con un paño suave y seco con un trapo humedecido con agua y detergente neutro o con un paño humedecido con etanol No utilice ningún disolvente ácido alcalino ni orgánico ...

Page 233: ...ación de la opción de ahorro energía configuración de la hora configuración del horario de verano configuración de la pantalla principal configuración del brillo configuración de los detalles de pantalla configuración del diseño configuración del modo automático configuración del nombre del modelo configuración del número de serie configuración del información de contacto información de error cont...

Page 234: ...70 Opciones de configuración de las funciones 3 Seleccione OK con el botón F4 El controlador remoto se iniciará automáticamente una vez inicializado ...

Page 235: ...amiento Puede comprobarse la información del controlador remoto en uso Funcionamiento del botón 1 Seleccione Otros en el menú de revisión y presione el botón ACEPTAR 2 Mueva el cursor a Información de control remoto con el botón F1 o F2 y presione el botón ACEPTAR ...

Page 236: ...72 Opciones de configuración de las funciones 3 Puede comprobarse el nombre de modelo la versión del software y el número de serie del controlador remoto en uso ...

Page 237: ...l botón 1 Se mostrará el código de error la unidad de error la dirección de refrigerante el nombre de modelo de la unidad la fecha y hora del error y el número de serie El nombre de modelo y el número de serie solamente aparecerán si se ha registrado la información Presione el botón F1 o F2 para ir a la página siguiente La información de contacto número de teléfono del distribuidor aparecerá solam...

Page 238: ...botón ON OFF para restaurar el error No se pueden restaurar los errores con la operación de ENCENDIDO APAGADO prohibida Seleccione OK con el botón F4 Aparecerá una ventana de confirmación Navegación por las pantallas Para volver al Menú principal Botón MENÚ ...

Page 239: ...mación del error consulte la página 73 desde el menú de operaciones Seleccione Menú mantenimiento en el menú principal y presione el botón ACEPTAR Para visualizar la pantalla de información de errores seleccione Información de Errores en el menú de mantenimiento Los errores no se pueden restablecer ...

Page 240: ... siguiente aparecerá para el modo de panel 3D i See sensor cuando la unidad se pare debido a la función Auto OFF no ocupación de la opción de ahorro energía Consulte el libro de instrucciones de la unidad para interiores para la configuración del 3D i See sensor ...

Page 241: ...e los filtros cuando aparezca esta señal Consulte el Manual de instalación de la unidad interior para obtener más detalles Funcionamiento del botón 1 Seleccione Información Filtros en el menú de mantenimiento y presione el botón ACEPTAR 2 Presione el botón F4 para restaurar la señal de filtro Consulte el libro de Instrucciones de la unidad interior para ver cómo se limpia el filtro ...

Page 242: ...o de cambiar el filtro para cada unidad puede ser diferente dependiendo del tipo de filtro Aparecerá el icono cuando haya que limpiar el filtro en la unidad principal Cuando se restaura la señal del filtro se restaurará el tiempo de funcionamiento acumulativo de todas las unidades El icono está programado para aparecer tras un determinado periodo de funcionamiento partiendo de la base que las unid...

Page 243: ...1 pr mm 2 9 16 4 23 32 9 16 in sin incluir la parte sobresaliente Peso neto 0 09 kg 13 64 libras Voltaje de alimentación 12 VCC proporcionada desde las unidades interiores Consumo de corriente 0 6 W Entorno operativo Temperatura 0 40 C 32 104 F Humedad 25 90 HR sin condensación Material Cuerpo principal ABS ...

Page 244: ...o administrador Menú de configuración inicial Hora administrador Configuración del formato de configuración hora administrador Horario de verano administrador Pantalla principal administrador Explicación de los iconos administrador Brillo administrador Seleccione el idioma administrador Diseño administrador Calibración de la pantalla táctil administrador Limpieza de la pantalla táctil administrado...

Page 245: ...tencia porque el funcionamiento a alta potencia tiene mayor prioridad 2 Esta función no se puede operar con alguna operación bloqueada 3 La función de configuración de rango de temperatura no se puede utilizar en el funcionamiento del modo Estabilizar 4 La función de Auto recuperación no se puede utilizar en el funcionamiento del modo Estabilizar 1 La configuración del Programador semanal no es ef...

Page 246: ......

Page 247: ......
Page 248: ... HEAD OFFICE TOKYO BLDG 2 7 3 MARUNOUCHI CHIYODA KU TOKYO 100 8310 JAPAN MANUFACTURER MITSUBISHI ELECTRIC CORPORATION Air conditioning Refrigeration Systems Works 5 66 Tebira 6 Chome Wakayama city 640 8686 Japan ...

Reviews: