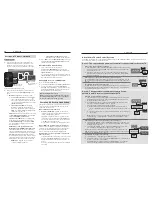
background image

DLP 

®

 HIGH-DEFINITION TELEVISION

MODELS

C Series

WD-73C8

735 Series

WD-60735, WD-65735, WD-73735

736 Series

WD-65736, WD-73736

835 Series

WD-65835, WD-73835

OWNER’S GUIDE

For questions:

• 

Visit our website at www.mitsubishi-tv.com.


-

E-mail us at MDEAservice@mdea.com.


-

Call Consumer Relations at 


-

800-332-2119.

For information on 

• 

System Reset

, please see the back cover.

To order replacement or additional remote controls, lamp cartridges, or Owner’s Guides, 

• 

visit our website at www.mitsuparts.com or call 800-553-7278.
Guidelines for setting up and using your new widescreen TV start on page 11.

• 

Summary of Contents for WD-60735

Page 1: ...r website at www mitsubishi tv com E mail us at MDEAservice mdea com Call Consumer Relations at 800 332 2119 For information on System Reset please see the back cover To order replacement or additional remote controls lamp cartridges or Owner s Guides visit our website at www mitsuparts com or call 800 553 7278 Guidelines for setting up and using your new widescreen TV start on page 11 ...

Page 2: ...move the TV with a minimum of two adults To prevent damage to the TV avoid jarring or moving it while it is turned on Always power off your TV unplug the power cord and discon nect all cables before moving it WARNING To reduce the risk of fire or electric shock do not expose this apparatus to rain or moisture WARNING This product contains chemicals known to the State of California to cause cancer ...

Page 3: ... radiators heat registers stoves or other apparatus including amplifiers that produce heat 9 Do not defeat the safety purpose of the polarized or grounding type plug A polarized plug has two blades with one wider than the other A grounding type plug has two blades and a third grounding prong The wide blade or the third prong are provided for your safety If the provided plug does not fit into your ...

Page 4: ...o 7 Ended IR Emitter 835 Series Cleaning Cloth 8 for Glossy Surfaces see instructions under Cleaning Recommendations page 4 8 AA AA 2 7 1 TV Front Panel A V Reset If you wish to reset the A V Audio Video settings back to the factory defaults To reset all settings at once press GUIDE and FORMAT on the control panel at the same time To reset the defaults for individual inputs use the Reset selection...

Page 5: ...ote that the INPUT 3 composite video jack is automatically disabled when you connect to S VIDEO item 6 5 Component Video INPUT 1 INPUT 2 Y Pb Pr Component Video 480i 480p 720p 1080i Use these jacks to connect devices with component video outputs such as DVD players external HDTV receivers or compatible video game systems Use the adjacent AUDIO R and L jacks for INPUT 1 or INPUT 2 if you wish to se...

Page 6: ...mp life Avoid locations where light may reflect off the screen See the stand requirements under Important Information About Your TV Install the batteries in the remote control See the 3 next page for instructions See page 26 For more on use of the remote control Plug your TV into a power outlet The green LED on 4 the front of the TV will start blinking rapidly After the green LED stops blinking pr...

Page 7: ... direct cable no cable box Press 3 to highlight the on screen START button Press 4 ENTER to start automatic channel memoriza tion To stop channel memorization before completion press CANCEL When memorization is complete you can 5 Press MENU once to return to the top row of icons Press MENU again to return to the Main menu Press EXIT to watch TV After channels have been memorized To tune to memoriz...

Page 8: ...Input Sensing screen Power on the TV if not already on When the TV 2 detects a connection the Auto Input Sensing screen opens Most Device Types Specify the device type a In the Auto Input Sensing screen press to move through the device list to select the device type connected to the input The device type you select here will appear as an icon in the Input Selection menu b 736 and 835 Series Models...

Page 9: ...External Controller Input R INPUT 3 INPUT 2 INPUT 1 S VIDEO INPUT 3 ANT 2 AUX ANT 1 MAIN 1 2 HDMI 6 0 3 PNQVUFS XJUI BVEJP WJEFP PVUQVU 57 CBDL QBOFM An HDMI to HDMI connection carries all video and audio on a single cable Note If your computer provides digital audio output coaxial or digital you can connect it directly to a digital A V receiver and bypass the TV Using the TV with a Personal Compu...

Page 10: ...lite Receiver DVD Player or Other Device Required HDMI to HDMI cable Connect an HDMI cable from the TV back panel to the HDMI device output HDMI devices provide video and audio through the single cable Mitsubishi recommends you use category 2 high speed HDMI cables to connect HDMI 1 3 source devices High speed category 2 cables bring you the full benefits of Deep Color and x v Color See HDMI Cable...

Page 11: ... ANT 1 MAIN ANT 1 MAIN PIN nBU UXJO MFBE PIN DPBYJBM MFBE 0QUJPOBM PIN UP PIN NBUDIJOH USBOTGPSNFS 57 CBDL QBOFM Figure 5 Connecting a Single Antenna Lead Figure 8 Connecting a VCR to an Antenna or Wall Outlet Cable VCR to an Antenna or Wall Outlet Cable Required Two way RF splitter two coaxial cables right and left analog audio cables either S video or compos ite video cable Connect the incoming ...

Page 12: ...e TV s Audio Output Most setups require either a digital audio cable or analog stereo audio cables To send audio from TV channels received on ANT 1 ANT 2 or devices con nected directly to the TV you must use one of the con nections shown below The TV makes all audio available in digital and analog formats Analog audio coming into the TV is available as output in digital stereo format on the DIGITA...

Page 13: ...t Selection menu Choose a viewing source from the Input Selection menu The current TV input appears as a full color icon in this menu Press 1 INPUT to display the Input Selection menu If there are only two inputs to the TV INPUT switches between them without displaying the menu Highlight an input icon using 2 Press 3 ENTER to switch to the input and close the menu More About the Input Selection Me...

Page 14: ... sub menu is open backs up one menu level 22 EXIT Closes TV on screen menus displays 23 F1 F4 For devices under NetCommand control Perform NetCommand Learning to assign your choice of functions to the F1 F4 keys For devices operating independently of NetCommand The F1 F4 keys work like the A B C D buttons on some cable boxes satellite receivers and DVD players Program the remote control for your e...

Page 15: ...your local cable service provider and may be incomplete No program information is displayed for analog channels An analog channel name is displayed only if you assigned a name in the Setup Edit menu page 43 To receive ChannelView updates Keep the Energy Mode set to Fast Power On Set the TV clock Leave the TV powered off for a while each day to receive updates Note Whenever you watch a digital chan...

Page 16: ...o cycle through the available display formats The TV remembers the format you last used for each input DVD Image Definitions Image information may be stated on the DVD case Some DVDs support both of the formats described below Anamorphic or Enhanced for WideScreen TV Indicates DVDs recorded to show widescreen images prop erly on 16 9 TV sets using the TV s Standard format mode recommended Non Anam...

Page 17: ...u select here is the minimum time between slides actual time may be longer for larger files For automatic advance select the number of times frequency to play the complete slide show Once Twice or Continuous Press EXIT to close the Media Setup menu and return to the USB Photo menu USB Photo Menu Compatible Picture Files Still images recorded on digital cameras using the Exchangeable Image File For...

Page 18: ...ode menu Set 4 3D Mode to On The On setting will be memo rized for the current input when you exit this menu Press 5 EXIT to close the menu To Watch Regular non 3D Video The 3D Mode setting is memorized for each input When you want to watch non 3D video on the input selected above Select the input in the 1 Input Selection menu Open the 2 Setup 3D menu and set 3D Mode to Off 3D Video Use the Setup ...

Page 19: ...nu AV Menu Options Global Video Mute On Off On Displays a solid purple background when there is no video signal from the current input Use the On setting to let the colored screen remind you that the TV is powered on at times when there is no picture The TV will power off after five minutes if it detects no video signal Off The screen appears black if there is no video signal from the current non ...

Page 20: ...gh contrast is good for brightly lit environments Brightness Adjusts overall picture brightness Settings are stored independently for each Picture Mode Color Adjusts overall color intensity from no color to fully saturated Tint Adjusts the red to green ratio Sharpness Adjusts picture detail and clarity Color Temp Adjusts the white balance Settings are stored independently for each Picture Mode Hig...

Page 21: ...EO composite and S VIDEO jacks Broadcasters can send either standard closed captions or text service Stan dard closed captions follow the dialogue of the program and display in a small section of the screen Text service closed captions often contain information such as weather or news and cover a large portion of the screen IMPORTANT Analog text service options display a large black or gray box on...

Page 22: ...av1 Fav6 Use the six Fav channel banks to store groups of your favorite channels For example you can set up a Fav channel bank for each of your favorite program types e g sports news children s programs or set up a bank for each TV user Use to move the highlight through the Fav area of the screen Press ENTER to insert a check mark to add the highlighted channel to one of the Fav banks The same cha...

Page 23: ...Time Zone Eastern Central Mountain Pacific etc Required for both the Manual and Auto methods Daylight Savings Time Applies Ignore Required for both the Manual and Auto methods Select the option for your area Setup menu Clock options Setup Menu continued Timer Use the Timer to set a time for the TV to turn on auto matically Use this menu to set a day time input and channel for the Timer If the TV i...

Page 24: ...e icon remains in the Input Selection menu until you remove it To remove an unwanted HDMI icon select Off for the HDMI input Disabling TV s use of CEC CEC enabled devices appear in the Inputs Name menu with an option to turn off the TV s CEC signals to the device You may want to disable the TV s CEC signals if control conflicts occur The default setting is Control Enable Press to highlight Control...

Page 25: ... lets you set parental controls using V Chip technology Lock Menu Important Notes on Rating Locks Parent menu rating locks apply only to channels and signals received on ANT 1 ANT 2 and the VIDEO composite and S VIDEO jacks Other menu rating locks apply only to digital chan nels received on ANT 1 or ANT 2 When viewing a cable box satellite receiver or other device connected to the component Y Pb P...

Page 26: ...e the Control Panel Lock Press and hold the MENU button for over eight seconds You can do this to release the lock even if the TV is powered off To reactivate the lock you must return to this menu and change the setting to On 6 NetCommand IR Control About NetCommand IR Control Note To learn about NetCommand for HDMI devices available on all TV models see NetCommand for HDMI Devices on page 28 NetC...

Page 27: ...tters so the signal can be seen by the IR sensor on each device IMPORTANT Position IR emitters so that each device s sensor sees the signal from only one emitter Otherwise a device receiving signals from multiple sources remote controls IR emitters may not respond at all To perform this procedure you need The remote controls for both the TV and the device you want to control The IR emitter cable s...

Page 28: ...use the Power Off learn ing position use only the Manual Power ON OFF method described above In the NetCommand Learn screen a Learn the Power On command in the Power On learning position b Learn the Power Off command in the Power Off learning position To Power On the Device Press 1 INPUT to display the Input Selection menu Press 2 to highlight the icon for the device to be powered on or off Press ...

Page 29: ...d Several varieties of A V receiver control are described here using the Inputs AV Receiver menu shown on this page Controlling power and volume is described on this page For most equipment setups see A V Receiver Control Automatic Audio Switching on the next page If your A V receiver has an HDMI output you have the option of sending both audio and video through the A V receiver over a single HDMI...

Page 30: ...earn the POWER OFF key When finished learning the power and volume 6 keys either press EXIT to watch TV or leave the AV Receiver screen open to continue with NetCom mand setup to control switching of A V receiver inputs IMPORTANT To hear audio sent from the TV to the A V receiver you must have physically connected the TV to the A V receiver selected the A V receiver as the audio source Press AUDIO...

Page 31: ...des a list of possible device types Use this list to assign the name of the device type connected to the associ ated A V receiver input The assigned device name will appear in the Input Selection menu Setup to Control Automatic Video and Audio Switching via HDMI Follow these steps if you wish NetCommand to control switching of A V receiver video as well as audio inputs When this setup is complete ...

Page 32: ...ards for standard extended and high definition video digital audio and HDCP copy protec tion PC digital signals only VGA 640 x 480 60 Hz W VGA 848 x 480 60 Hz SVGA 800 x 600 60 Hz W SVGA 1064 x 600 60 Hz XGA 1024 x 768 60 Hz 1280 x 720 60 Hz SXGA 1280 x 1024 60 Hz 1920 x 1080 24 Hz 30 Hz 60 Hz WXGA 1360 x 768 60 Hz WD 73C8 WD 60735 WD 65735 WD 73735 3 WD 65736 WD 73736 WD 65835 WD 73835 4 Composit...

Page 33: ...trol s slide switch to the type of device you wish to program for or control VCRs and DVRs CH POWER SLEEP FAST Forward Pause Play Record Reverse Stop GUIDE DVR only MENU DVR only 0 9 Number Buttons Mitsubishi VCRs are compatible with some additional buttons Cable Boxes and Satellite Receivers AUDIO PAGE UP Cancel on some models CH ENTER on some models GUIDE on some models LIST POWER on some models...

Page 34: ...ing the Remote Control continued Programming Codes Audio Amplifiers Make Code Acurus 30765 Adcom 31100 30577 Altec Lansing 31742 Aragon 30765 Bel Canto Design 31583 Bose 30674 Carver 30892 Cary Audio Design 31879 Classe 31461 Curtis Mathes 30300 Durabrand 31561 Flextronics 31879 GE 30078 Halcro 31934 Harman Kardon 30892 JVC 30331 Klipsch 30765 Krell 31837 Left Coast 30892 Lenoxx 31561 Lexicon 3180...

Page 35: ...ramming Codes continued Satellite Receivers Make Code Philips 11749 11442 11142 11076 10819 10775 10749 10724 10722 10099 Pioneer 11442 11142 Proscan 10566 10392 RadioShack 10775 10566 RCA 11442 11392 11142 10855 10775 10566 10392 10143 Samsung 11609 11442 11377 11276 11142 11109 11108 Sanyo 11219 SKY 10856 10099 Sony 11640 11639 10639 Star Trak 10772 Thomson 10566 10392 Tivo 11444 11443 11442 111...

Page 36: ...93 Profitronic 20240 Proscan 20060 Protec 20072 20000 Protech 20072 Pulsar 20278 20240 20039 Appendix C Programming the Remote Control continued Programming Codes continued DVD Players Make Code 3D LAB 20539 20503 Acoustic Solu tions 20730 Accurian 21416 21072 20675 Adcom 21094 Afreey 20698 Aiwa 20641 Akai 21089 20770 20705 20695 Alba 20717 20672 Alco 20790 Allegro 20869 Amphion Media Works 20872 ...

Page 37: ...RMAT to change the shape of the picture Press the FORMAT key to cycle through the available formats to find the best format for the current picture The last used format for a signal type is memorized for each input The next time the same input and the same signal type is viewed the last used format will be recalled PerfectColor and PerfecTint Reset for the single input currently being watched When...

Page 38: ...cognize 6 digit channel numbers 2 You cannot access a channel Use number keys instead of CH Be sure the channel you want to view is in memory See Setup Scan on page 42 Check that the TV is switched to the correct device or antenna for that channel by pressing the INPUT key Make sure Channel Lock is off Make sure the Lock Parent menu lock is set to off If you cannot tune to a virtual digital channe...

Page 39: ...bleshooting for additional help with A V receiver concerns Symptom Remarks 1 There is no sound even when the volume is turned up Check if the MUTE button is on The TV s Listen to setting may be set to SAP Check that the Speakers option is set to TV to hear sound from the TV speakers If using an A V receiver check that the Speakers option is set to AV Receiver to hear sound from the A V receiver sp...

Page 40: ...rce but there is no sound A V Receiver Set Up for Audio Only Switching Check to see if the A V Receiver power is turned on With A V receiver power turned on redisplay the Input Selection menu and press ENTER to allow NetCommand to correctly select the A V Receiver input Incorrect setup in the Inputs AV Receiver menu Check the device connection assigned in the AV Receiver menu A V Receiver Set Up f...

Page 41: ...e Old Lamp Cartridge Turn off TV power and allow the lamp to cool for at 1 least one hour before proceeding After the lamp has cooled remove the cover of the 2 lamp compartment located on the back of the TV Refer to figures 1 and 2 Use a 2 large Phillips screwdriver to loosen the screw securing the cover Keep the screw and cover for re installation Wi 3 th a large Phillips screwdriver loosen the t...

Page 42: ...d and will terminate immediately without notice from MDEA or judicial resolution if you fail to comply with any provision of this License 4 COPYRIGHT All title and intellectual property rights in and to the Software including but not limited to any images photographs animations video audio music text and applets incorporated into the Software and any accompanying printed materials are owned by or ...

Page 43: ...e 1 TO OBTAIN WARRANTY SERVICE a Contact your nearest authorized MITSUBISHI service center whose name and address can be obtained from your MITSUBISHI dealer by writing at the address provided below calling MDEA at the 800 332 2119 or by using the support feature of our website at www Mitsubishi tv com b Warranty service will be provided in your home or if required at an authorized service shop pr...

Page 44: ...e Replacement 80 LAMP Indicator 8 Lamp Mode 46 Language in Digital Programs 40 SAP Second Audio Program 40 Language Menu 42 Learn 47 See also NetCommand IR Control Learn Menu 47 LED Indicator Lights 8 Troubleshooting 78 Letter Box Image Display 31 Level Sound 40 Light Decorative 37 Listen To 40 Listings 28 Lock Menu See Lock TV Lock TV Bypassing the Lock 63 Lock by Channel 43 Lock by Ratings 49 Lo...

Page 45: ...8 SYSTEM RESET If the TV does not respond to the remote control control panel buttons or will not power on off press the SYSTEM RESET button on the control panel The green LED will flash quickly for about one minute When the green LED stops flashing you may turn on the TV Settings changes you made most recently before using SYSTEM RESET may be lost 2008 Mitsubishi Digital Electronics America Inc W...

Reviews: