background image

EN – 12

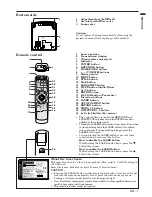
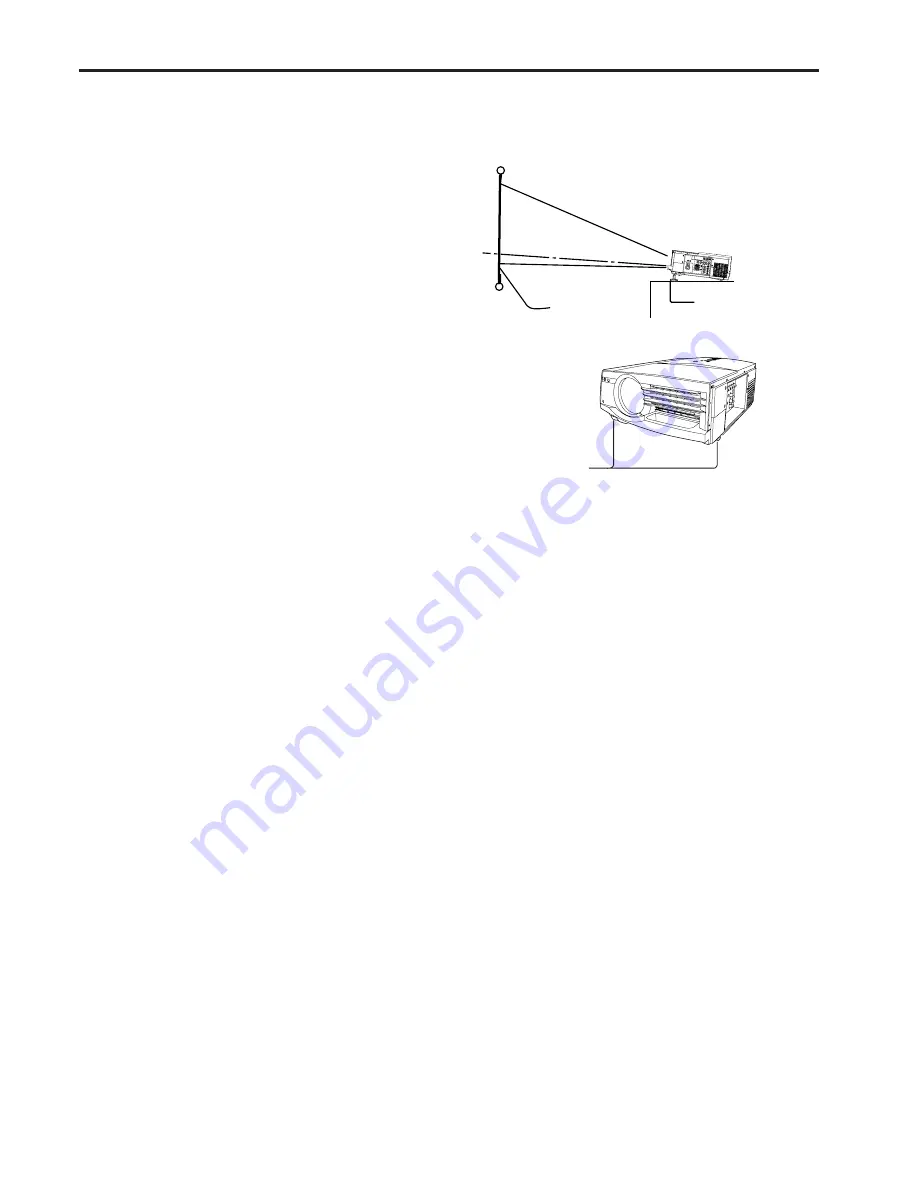
Adjustment foot

screen

Preparing the projector for operation

Getting ready for projection

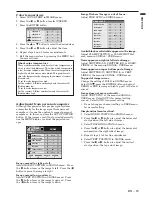
1. Attach the provided power cord to the projector.
2. Plug the power cord in the wall outlet.
3. Remove the lens cap.

Warning:

• Do not look into the lens directly when the projec-

tor is “ON.”

• The lens cap is for protecting the lens. If you leave

the lens cap on the lens with the projector turned
on, it may be deformed. Remove the lens cap when
you turn on the projector.

• The power cords for use in the U.S. and Europe

are included with this projector. Use the appropri-
ate one for your country.

• This projector uses the power plug of three-pin

grounding type. Do not take away the grounding
pin from the power plug. If the power plug doesn’t
fit your wall outlet, ask an electrician to change
the wall outlet.

• The provided power cord for the U.S. is rated at

120 V. Never connect this cord to any outlet or
power supply using other voltages or frequencies
than rated. If you use a power supply using other
voltage than rated, prepare an appropriate power
cord separately.

• Use 100-240 V AC 50/60 Hz to prevent fire or

electric shock.

• Do not place any objects on the power cord and

keep the projector away from heat sources to
prevent damage to the power cord. If the power
cord gets damaged, contact your dealer for re-
placement because it may cause fire or electric
shock.

• Do not modify or alter the power cord. If the

power cord is modified or altered, it may cause fire
or electric shock.

Caution:

• Plug in the power cord firmly, and unplug it by

holding and pulling out the power plug, not by
pulling the power cord.

• Do not plug in or out the power cord with your

hand wet. It may cause electric shock.

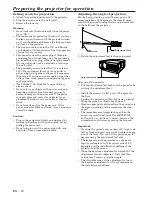
Adjusting the angle of projection

For the best projection, project the image on a flat
screen installed at 90 degrees to the floor. If neces-
sary, tilt the projector using the two adjustment feet
on the bottom of the projector.

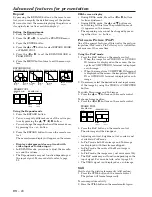
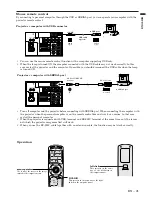
1. Rotate the adjustment feet for fine adjustment.

After using the projector
2. Put the adjustment feet back into the projector by

rotating the adjustment feet.

• Install the screen on a flat wall at 90 degrees to

the floor.

• Position the projector so that it projects an image

filling the screen as illustrated on page 9.

• Keep an appropriate distance from the projector to

the screen according to the screen size chart on
page 9.

• The image becomes trapezoid shape when the

screen or project is not level. Use KEYSTONE
button and + or - buttons to adjust, however, the
circumference of the image may not be focused.

Important:

• Slanting the projector more than 

±

15˚ (right and

left  or front and rear) may cause trouble or explo-
sion of the lamp. You can tilt the projector up to 7
degrees using the adjustment feet only.

• The image may not be projected in a shape of a

regular rectangle or with its aspect ratio of 4:3,
depending on the installation conditions of the
projector and the screen.

• When the keystone adjustment is carried out, the

adjustment value is indicated.  Note that this
value doesn’t mean a projection angle.

• The allowable range of the adjustment value in

the keystone adjustment will vary depending on
the installation conditions.

Adjustment foot

Summary of Contents for XL5980LU

Page 1: ...EN 1 ENGLISH X L5980 LCD PROJECTOR MODEL XL5980U XL5980LU User Manual This User Manual is important to you Please read it before using your projector ...

Page 2: ...and television reception Use the attached RGB cable RS 232C cable with this equipment so as to keep interference within the limit of a FCC Class A device This apparatus must be grounded DO NOT LOOK DIRECTLY INTO THE LENS WHEN PROJECTOR IS IN THE POWER ON MODE CAUTION Not for use in a computer room as defined in the Standard for the Protection of Electronic Computer Data Processing Equipment ANSI N...

Page 3: ...ames are trademarks or registered trademarks of their respective holders Note This symbol mark is for EU countries only This symbol mark is according to the directive 2002 96 EC Article 10 Information for users and Annex IV Your MITSUBISHI ELECTRIC product is designed and manufactured with high quality materials and compo nents which can be recycled and reused This symbol means that electrical and...

Page 4: ...quids Never push objects of any kind through open ings of this projector as they may touch danger ous voltage points or short out parts that could result in a fire or electric shock Never spill liq uid of any kind on the projector 14 Servicing Do not attempt to service this projector your self Refer all servicing to qualified service per sonnel 15 Damage requiring service Unplug this projector fro...

Page 5: ...heprojector Do not block the air inlet and outlet grilles If they are blocked heat may be generated inside the projector causing deterioration in the projector quality and fire Place of installation For safety s sake refrain from setting the projector at any place subjected to high temperature and high humidity Please maintain an operating temperature humidity and altitude as specified below Opera...

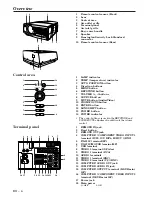
Page 6: ...ION button 4 Direction buttons 5 MENU button 6 KEYSTONE button 7 VOLUME buttons 8 SOURCE button 9 MUTE button Audio Video 10 ZOOM FOCUS button 11 ENTER button 12 LENS SHIFT button 13 POWER button 14 POWER indicator The and buttons are used in the KEYSTONE and ZOOM FOCUS adjustment in addition to the volume control 1 REMOTE IN jack 2 Reset button 3 REMOTE OUT jack 4 COMPUTER COMPONENT VIDEO INPUT 1...

Page 7: ...ow to disable the LASER button While holding the LASER button down press the button three times How to enable the LASER button While holding the LASER button down press the button three times About the laser beam This remote control is a Class 2 laser product Max output 1 mW Wavelength 640 660 nm Beam Divergence 6m distance about 10 0mm x 10 0mm 6 0mm CAUTION Pressing the LASER button on the remot...

Page 8: ...hen the remote control points to the projector The dis tance to the screen back to the projector must be less than 7 m about 23 feet Depending on the type of the screen the distance will be different Important Avoid the direct sunlight or fluorescent light to the remote control sensor Also keep the distance of more than 2 m 6 5 feet between the remote control sensor and fluorescent lamp on the rem...

Page 9: ...owing circumstances which may cause fire or electric shock in a dusty or humid place while the projector is lying sideways or upside down near a heater in a kitchen or oily smoky or damp place in direct sunlight with high temperature such as a closed car where the temperature is lower than 41 F 5 C or higher than 104 F 40 C Important Do not put stress on the lens as this may cause damage L L I W W...

Page 10: ...onnector for its S video output connect it to the VIDEO 2 Y C BNC terminal When both the VIDEO 2 Y C BNC terminal and the S VIDEO 2 terminal are engaged at the same time the image supplied to the S VIDEO 2 terminal takes priority B G R PR G Y B PB R CB PB Y CR PR DVD player or HDTV decoder BNC RCAconnector option BNC BNC cable option AUDIO cable option COMPUTER AUDIO IN to AUDIO OUT Projector DVD ...

Page 11: ...r analog RGB output adapters to be connected with this projector Contact your dealer for further information This projector uses a stereo pin jack for its audio input Check the type of the audio output terminal of the connected computer and prepare a proper cable for connection Some computers may not have the audio output terminal For Macintosh If your Macintosh has no video port a monitor output ...

Page 12: ...ion Plug in the power cord firmly and unplug it by holding and pulling out the power plug not by pulling the power cord Do not plug in or out the power cord with your hand wet It may cause electric shock Adjusting the angle of projection For the best projection project the image on a flat screen installed at 90 degrees to the floor If neces sary tilt the projector using the two adjustment feet on ...

Page 13: ...projector on by pressing the POWER but ton The light source lamp starts warming up even tually turning completely on The lamp may take about a minute to light up The lamp occasionally fails to light up Try to light up the lamp again after a few minutes If the projector has not cooled down completely since the last turning off the fan may start rotating when the main power switch is turned on and t...

Page 14: ... volume control bar will disappear about 4 seconds after releasing the volume buttons The volume buttons don t work while the MENU selection bar or the MENU is being displayed When a high level audio signal such as a DVD audio signal is supplied to the COMPUTER AUDIO IN terminal the output from the speaker may be dis torted AV mute The image and audio signals are temporarily muted by pressing the ...

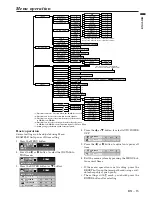
Page 15: ...INVERT MIRROR INVERT AUTO POWER ON ON OFF RESET ALL OK AUTO POWER OFF ON OFF FEATURE MENU POSITION 1 Upper left 2 Lower right LENS SHIFT USER SPLASH SCREEN BLACK LOGO MUTE MODE BLUE LOGO BLACK BACK COLOR STANDARD LOW LAMP MODE OFF CENTER UPPER LOWER ANAMORPHIC ON OFF 3D CineView ON OFF SCART INPUT VIDEO SIGNAL AUTO NTSC PAL SECAM 4 43NTSC PAL M PAL N PAL 60 LANGUAGE English Español Deutsch Françai...

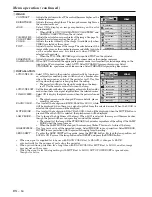
Page 16: ...e lamp AUTO POWER OFF Set the time elapsed before the projector enters into the stand by mode when there is no signal inputted from the selected source SPLASH SCREEN Select ON to display the splash screen when the power is turned ON The splash screen can be changed For more details please consult your dealer BACK COLOR Use to select the background BLUE BLACK or LOGO which will be displayed when th...

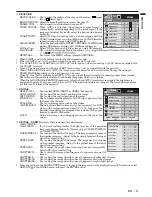
Page 17: ...to adjust the horizontal position of the image VERT POSITION Use to adjust the vertical position of the image FINE SYNC Use to synchronize the projector with PC input signals so that the image is not blurred TRACKING Use to avoid image noise such as wide stripes COMPUTER INPUT The unit adjusts itself automatically when connected to a DVD player with a component video output Y CB CR In the case the...

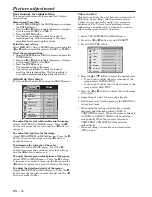
Page 18: ...he red green color balance of the image Adjust TINT in IMAGE menu Press the button to increase the amount of green in the image and the button to increase the amount of red in the image To adjust the detail and clarity of the image Adjust SHARPNESS in IMAGE menu Press the button to make the picture seem sharper and the button to make it softer Picture adjustment CONTRAST IMAGE 0 BRIGHTNESS 0 STAND...

Page 19: ...ast R Red number low To set the color temperature low Set the contrast B Blue number low and the contrast R Red number high R G B R G B A U MEMORY CALL SIGNAL AUTO HORIZ POSITION 0 VERT POSITION 0 TRACKING 0 COMPUTER INPUT RGB FINE SYNC 0 HOLD AUTO USER MEMORIZE DELETE DEFAULT XGA60 opt CLAMP POSITION SIGNAL USER 0 CLAMP WIDTH 1 HORIZ PIXELS 0 SHUTTER RS 0 VERT LINES 0 VERT SYNC AUTO SHUTTER LS 0 ...

Page 20: ...ss the or buttons on the remote control To change frame position 4 Press the or buttons on the remote control 5 Press the PinP button on the remote control The sub image will be disappear Adjusting contrast brightness tint or color is not available in PinP mode In PinP mode both Main image and Sub image are displayed with their frames skipped In PinP mode the audio of the Main image is outputted I...

Page 21: ...uter connected with the USB cable may not work correctly In this case restart the projector and the computer If possible you should disconnect the USB cable when the lamp is turned ON Projector computer with SERIAL port COMPUTER VIDEO KEYSTONE VOLUME LASER EXPAND MENU R CLICK ENTER P in P STILL MUTE LENS SHIFT 16 9 1 2 1 2 ZOOM FOCUS AUTOPOSITION R CLICK This operates in the same way as the right ...

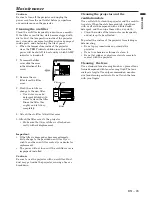
Page 22: ... cord switch on the projector and reset lamp time by pressing the and POWER buttons on the contro panel simultaneously Important If the 3 buttons was not pressed at the same time the lamp time may not be reset Please confirm the TEMP indicator illuminates about 2 seconds and the lamp time has been reset The projector will not turn on if you do not secure the lamp lid You must reset the operation t...

Page 23: ...ached cor rectly without displacement Important If the filter is damaged or becomes extremely dirty change to the provided new filter If you wish to another new filter contact your dealer for replacement The power will not turn on if the air filter cover is improperly installed Caution Be sure to use the projector with an air filter If not dust may get inside the projector causing a fire or a brea...

Page 24: ...ws that the Anti Theft Alarm device is active Visible placement of this sticker is recommended To temporarily halt the Anti Theft Alarm device insert the safety pin Vibrations will not cause the alarm to sound for several seconds after the power switch is turned ON Vibrations will not cause the alarm to sound for several seconds after the safety pin is removed Vibrations and shocks from earthquake...

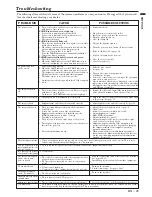
Page 25: ...e connected equipment Confirm the hookup Select the correct source according to the equipment connected to this projector Check whether the image is displayed correctly by replaceing it with the supplied cable When the image is displayed correctly use the extension cord along with an RGB signal amplifier Remove the object and turn off the main power switch After about 10 minutes Turn the projector...

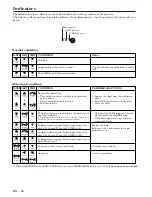
Page 26: ... duration total about 1000 hours When the POWER is OFF Steady red Lamp duration warning Lightning duration total about 1500 hours The lamp or filter cover is not closed The protection circuit is working or the lamp is in an abnormal condition The indicators operate as shown on the left at the time of power off too In this case they are nt indicating an abnormal condition Close the cover correctly ...

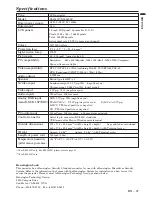
Page 27: ...kg 2 Approx 9 0kg 2 with Terminal cover 118 inch 3 0m 41 F 5 C 104 F 40 C 30 90 Type Model Rated power supply Rated input LCD panels Colors Projection lens Light source lamp Picture size PC compatibility Video compatibility Audio output Speaker S video input Video input Audio inputs Analog RGB input mini D SUB 15P BNC PC audio input Control connector Outside dimensions Weight Length of power cord ...

Page 28: ...381 10 1 RGB cable for PC 246C448 10 2 RS 232C cable 246C447 10 1 Terminal cover with Anti Theft Alarm device 955B288 01 2 Safety pin 450D057 10 PIN No SPEC 1 R RED CR 2 G GREEN Y 3 B BLUE CB 4 GND 5 GND 6 GND 7 GND 8 GND 9 10 GND 11 GND 12 DDC Data 13 HD CS 14 VD 15 DDC Clock COMPUTER IN OUT Mini D SUB 15P PIN No NAME I O 1 TXD IN 2 3 DTR IN 4 GND 5 CTS 5V IN OUT 6 DCD CLOCK OUT 7 RXD OUT 8 RI DA...

Page 29: ...0 x 480 VGA85 640 x 480 43 27 85 01 1024 x 768 640 x 480 VGA120 640 x 480 61 89 120 17 1024 x 768 640 x 480 SVGA56 800 x 600 35 16 56 25 1024 x 768 800 x 600 SVGA60 800 x 600 37 88 60 32 1024 x 768 800 x 600 SVGA72 800 x 600 48 08 72 19 1024 x 768 800 x 600 SVGA75 800 x 600 46 88 75 00 1024 x 768 800 x 600 SVGA85 800 x 600 53 67 85 06 1024 x 768 800 x 600 SVGA95 800 x 600 59 97 94 89 1024 x 768 80...

Page 30: ...0 300 inch 32 48 64 80 120 160 200 240 m 1 1 1 6 2 2 2 7 4 1 5 5 6 9 8 3 m 1 3 2 0 2 6 3 3 5 0 6 7 8 4 inch 42 64 86 108 163 218 272 327 inch 51 77 104 130 196 263 329 cm 61 91 122 152 229 305 381 457 cm 102 152 203 254 381 508 635 762 Screen Distance from the screen L Maximum zoom WIDE Minimum zoom TELE Diagonal size Width Height cm 3 5 6 8 11 15 19 23 cm 28 42 56 69 104 138 172 207 inch 1 2 1 8 ...

Page 31: ...51 60 90 120 cm 102 142 173 203 305 406 inch 50 70 85 100 150 200 inch 40 56 68 80 120 160 m 0 8 1 1 1 4 1 7 2 5 3 4 inch 31 45 55 65 100 134 cm 76 107 130 152 229 305 cm 127 178 216 254 381 508 Screen Distance from the screen L Diagonal size Width Height Width Height L Projection not recommended in size will increase distortion and reduce the resolution The adjustable angle in the keystone adjust...

Page 32: ...info meuk mee com Asia CHINA Mitsubishi Electric Air Conditioning Visual Information Systems Shanghai Ltd 26 F Oriental Center 699 Nanjing Rd W Shanghai 200041 China Sales Inquiries Phone 86 21 5211 0882 3010 Fax 86 21 5211 0576 Technical Inquiries Phone 86 21 5211 0882 3018 Fax 86 21 5211 0576 HONG KONG Mitsubishi Electric Ryoden Air Conditioning Visual Information Systems HongKong Ltd 7th Floor ...

Reviews: