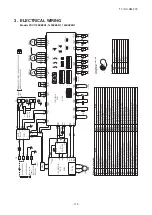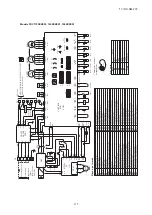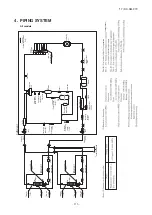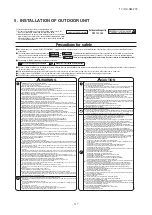
–
124
–
●
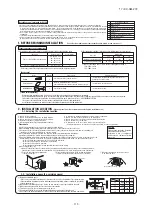
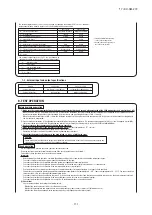
A signal cable system is operated at DC5V, so never connect it to the power source 220/240V or 380/415V.
If the power source is applied, a protective fuse
provided on the board will be actuated. If the protective fuse is actuated, follow the procedure set out below.
(1) Turn off power and make sure that 220/240V or 380/415V is not applied to signaling wires.
(2) In the case of an indoor unit, switch from CNK1 to CNK2 and cut the jumper line JSL1.
(3) In the case of an outdoor unit, switch from CNX1 to CNX2 and cut the jumper line J10.
(4) Check signal cable terminal block resistance before you turn on power. If the resistance value is 100 ohms or less, there is possibility that a power cable is connected to a
signal cable terminal block.
A typical resistance value is [46000 / (No. of connected FD
○
A
△△
KXE4 and KXE5 series units x 5) + (No. of connected FD
○△△
KXE6 and KXZ series units x 9)].
If the resistance value is 100 ohms or less, tentatively detach signal cables and thus, divide the network into more than one block (to reduce the number
of indoor units connected in a network) to check for cabling errors in each such block.
Signal line
(mm
2
)
20A, 30mA
less than 0.1 sec
2
3.5
5.5
5.5
30A, 30mA
less than 0.1 sec
40A, 30mA
less than 0.1 sec
8
112KXZEN1
140KXZEN1
155KXZEN1
112KXZES1
140KXZES1
155KXZES1
Single-phase
220/240V 50Hz
220V 60Hz
Three-phase
380/415V 50Hz
380V 60Hz
32
40
50
2
M5
20A, 30mA
less than 0.1 sec
3.5
46
20
30
2
M4
Round crimp
contact terminal
Crimp
contact terminal
Diameter of a cable:thin
Diameter of a cable:thick
Wire
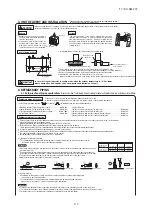
(1) Method of leading out cables
●
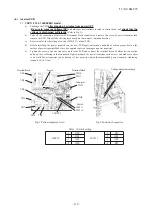
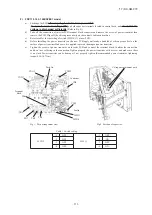
As shown on the drawing in Section 4-2, cables can be laid through the front, right, left or bottom casing.
●
In wiring on the installation site, cut off a half-blank covering a penetration of the casing with nippers.
●
In the case of an installation using a collective drain system, use a port other than the bottom one to take out cables and pipes.
If the bottom port is used, seal it thoroughly so that drain water may not spill out.
(2) Notabilia in connecting power cables
●
Connect the ground wire before you connect the power cable. When you connect a grounding wire to a terminal
block, use a grounding wire longer than the power cable so that it may not be subject to tension.
●
Do not turn on power until installation work is completed. Turn off power to the unit before you service the unit.
●
Always connect power cables to the power terminal block.
●
To connect a cable to the power terminal block, use a round crimp contact terminal.
If two cables are to be connected to one terminal, arrange cables in such a manner that you put their crimp
contact terminals together back to back. Further, put the thinner cable above the thicker one in arranging cables
for such connection.
●
Use specified wires in wiring, and fasten them securely in such a manner that the terminal blocks are not
subject to external force.
●
In fastening a screw of a terminal block, use a correct-size driver.
Fastening a screw of a terminal block with excessive force can break the screw.
●
When electrical installation work is completed, make sure that all electrical components within the electrical
component box are free of loose connector coupling or terminal connection.
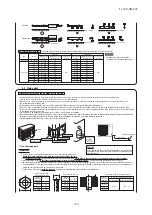
Method of connecting power cables
Model
Power source
Cable size for
power source (mm
2
)
Wire length
(m)
Rated current
Switch capacity
Size (mm
2
)
Screw type
Moulded-case circuit breaker (A)
Earth wire
Earth leakage breaker
21
20
30
2 cores
×
0.75
※
33
24
30
Rated current Switch capacity
Moulded-case circuit breaker (A)
Earth leakage breaker
outdoor-indoor
indoor-indoor
Combined total capacity
of indoor units
Cable size for
power source(mm
2
)
Wire length(m)
Please note
a) The method of laying cables has been determined pursuant to the Japanese indoor wiring regulations (JEAC8001). (Please adapt it to the regulations in
effect in each country)
b) Wire length in the table above is the value for when the indoor unit is connect to the power cable in series also the wire size and minimum length when the
power drop is less than 2% are shown. If the current exceeds the value in the table above, change
the wire size according to the indoor wiring regulations.
(Please adapt it to the regulations in effect in each country.)
c) For details, please refer to the installation manual supplied with the indoor unit.
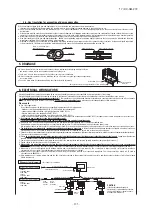
The communication protocol can be choosen from following two types. One of them is the conventional Superlink (hereinafter previous SL) and the other is the new
Superlink
Ⅱ
(hereinafter new SL) . These two communication protocols have the following advantages and restrictions, so please choose a desirable one meeting your
installation conditions such as connected indoor units and central control. When signal cables are connected into a network involving outdoor units, indoor units or central
control equipment that do not support new SL, please select communications in the previous SL mode, even if the refrigerant system is separated from theirs.
How to connect signal cables
Outdoor unit setting (SW5-5)
No. of connectable indoor units in a network
No. of connectable outdoor units in a network
Signal cable (total length)
Signal cable (furthest length)
Connectable units to a network
ON
Max. 48
Max. 48
Up to 1000m
Up to 1000m
Units not supporting new SL (FD
○A△△KXE4
series)
Units supporting new SL (FD
○△△KXE6
series)
Can be used together. (*1)
OFF (factory setting)
Max. 128
Max. 32
Up to 1500m (When 0.75mm
2
shielded cable used)
Up to 1000m (When 1.25mm
2
shielded cable used)
Up to 1000m
Power source specifications
Terminal block
less than 7A
less than 11A
less than 12A
less than 16A
Units supporting new SL (FD
○△△KXE6 KXZ
series)
※
Please use a shielded cable.
Conventional communication protocol (previous SL)
Communication protocol
New communication protocol (new SL)
※
1 New SL supporting units and non-supporting units cannot be used together in a same refrigerant system.
(1) Outdoor unit power source (Indoor unit is another power source.)
(2) Indoor unit power source (Outdoor unit is another power source.) & signal line
'17 • KX-SM-272
Summary of Contents for 140KXZEN1
Page 153: ... 17 KX SM 272 151 ...
Page 154: ... 17 KX SM 272 152 ...
Page 155: ... 17 KX SM 272 153 ...
Page 156: ... 17 KX SM 272 154 ...
Page 165: ... 163 MEMO 17 KX SM 272 ...

