−5−
−4−
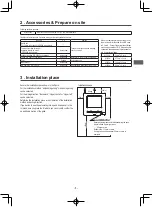
2 . Accessories & Prepare on site
Following parts are arranged at site. Prepare them according to the respective installation procedures.
Item name
Q’ty
Remark
Switch box
For 1 piece or 2 pieces (JIS C8340 or equivalent)
1
These are not required when installing
directly on a wall.
Thin wall steel pipe for electric
appliance directly on a wall.
(JIS C8305 or equivalent)
As required
Lock nut, bushing (JIS C8330 or equivalent)
As required
Lacing (JIS C8425 or equivalent)
As required
Necessary to run R/C cable on the wall.
Putty
Suitably
For sealing gaps
Molly anchor
As required
R/C cable (0.3 mm
2
x 2 pcs)
As required
See right table when longer than 100 m
Following parts are provided.
Accessories
R/C main unit, wood screw (ø3.5 x 16) 2 pcs, Quick reference
When the cable length is longer than 100 m,
the max size for wires used in the R/C case
is 0.5 mm2 . Connect them to wires of larger
size near the outside of R/C. When wires are
connected, take measures to prevent water,
etc. from entering inside.
≦
200 m
0.5 mm
2
x 2-core
≦
300m
0.75 mm
2
x 2-core
≦
400m
1.25 mm
2
x 2-core
≦
600m
2.0 mm
2
x 2-core
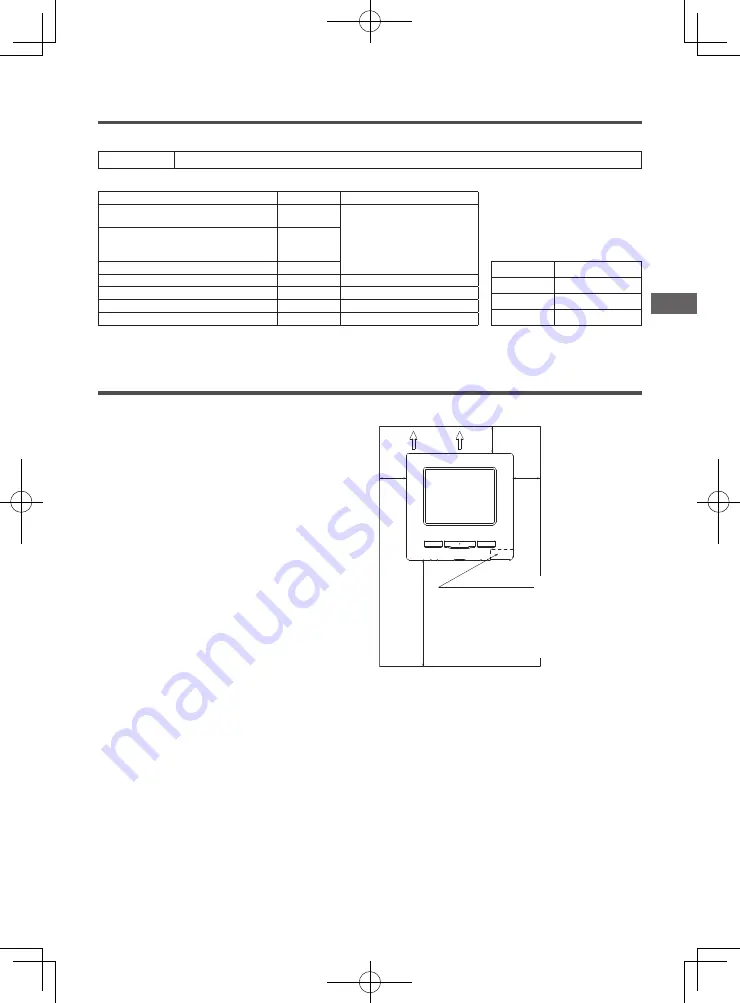
Secure the installation space shown in the figure.
For the installation method, “embedding wiring” or “exposing wiring”
can be selected.
For the wiring direction, “Backward”, “Upper center” or “Upper left”
can be selected.
Determine the installation place in consideration of the installation
method and wiring direction.
If you decide to use the automatic grille up and down panel in the
IU, make sure you place the IU where you can visually confirm the
up and down motion of the grille.
Installation space
30mm
30mm
30mm
120mm
配線
30mm
30mm
30mm
120mm
Wiring
R/C temperature sensor
Secure minimum spaces for disassembling the case.
Upper left and Upper right sides
……30mm or more
Bottom side…120mm or more
If using L-shaped screwdriver, 50mm or more is
available.
3 . Installation place


